|
Steve67
|
 |
« Reply #30 on: July 19, 2015, 18:47:32 pm » |
|
thanks  bin to a Birthday Party of a good friend which turned out to be a nice small VW meeting with about 25 cars. Did any of you European guys try the new Ahnendorp Customsport Exhaust system? I am thinking about buying it... 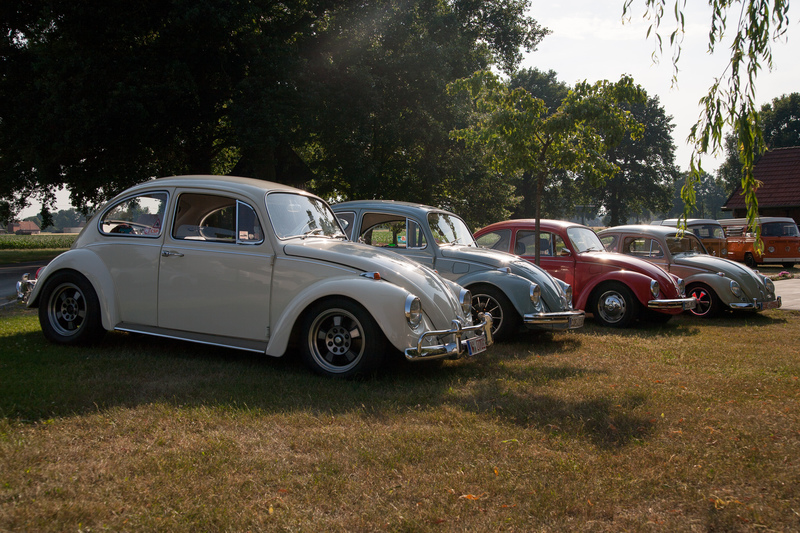 |
|
|
|
« Last Edit: July 19, 2015, 19:00:40 pm by Steve67 »
|
 Logged
|
|
|
|
|
Steve67
|
|
« Reply #31 on: April 25, 2020, 06:26:50 am » |
|
After a few years of driving I did some changes this winter. I got rid of the old stone chip protection stuff that was cracked all over. Sandblasted and painted the rear fenders from the inside which where never treated before. I still need to apply the new transparent stone chip protection form Timemax. I Converted the 67 to 12V and have installed a freshly rebuild gearbox. Now I need to finish the new 1835 single port engine, install it and dial in the jetting  And finally I got new wheels, first series Ronal wheels with 165/65 and 185/70 instead of 145/80 and 185/80. That should increase the corner speed a bit on our small, windy country roads. [ Attachment: You are not allowed to view attachments ] [ Attachment: You are not allowed to view attachments ] [ Attachment: You are not allowed to view attachments ] |
|
|
|
« Last Edit: September 19, 2025, 09:56:29 am by Steve67 »
|
Logged
|
|
|
|
|
brewsy
|
|
« Reply #32 on: April 26, 2020, 21:08:10 pm » |
|
And finally I got new wheels, first series Ronal wheels with 165/65 and 185/70 instead of 145/80 and 185/80.
That should increase the corner speed a bit on our small, windy country roads.
Nice Looking wheels! Is that a stock oil cooler youre using in an external position? Do you still have the og unit IN the shroud? Cheers |
|
|
|
|
Logged
|
|
|
|
|
Steve67
|
|
« Reply #33 on: April 27, 2020, 05:07:51 am » |
|
yes, its' a type 4 VW cooler with an adapter from Gembler. I still use the origial oil cooler in the dog house fan shroud as well.
|
|
|
|
|
Logged
|
|
|
|
|
Frenchy Dehoux
|
|
« Reply #34 on: April 28, 2020, 07:25:02 am » |
|
Steve nice looking 1967 you have . The type 4 oil cooler you have do you have it with a shield to protect it from rocks or road debris. Also what is your oil temperature with this cooler on .
Take care
Frenchy
|
|
|
|
|
Logged
|
Doctor Detail ( Retired )
|
|
|
|
Steve67
|
|
« Reply #35 on: April 28, 2020, 14:02:17 pm » |
|
thanks Frenchy,
I haven't tested the oil cooler setup yet, with the old engine I had a different setup.
I am planing to protect the cooler with a perforated stainless steel plate.
|
|
|
|
|
Logged
|
|
|
|
|
Steve67
|
|
« Reply #36 on: May 25, 2020, 10:12:23 am » |
|
engine is in and pulling nicely. Now I need to put some kilometers on it...
[ Attachment: You are not allowed to view attachments ]
|
|
|
|
« Last Edit: September 19, 2025, 08:59:48 am by Steve67 »
|
Logged
|
|
|
|
FredH17
Newbie

Posts: 26
|
|
« Reply #37 on: May 26, 2020, 10:37:33 am » |
|
Very nice ride ! Lotus White is an outstanding color..
Nice project to follow, keep us posted !!
|
|
|
|
|
Logged
|
|
|
|
|
Wout
|
|
« Reply #38 on: June 01, 2020, 20:31:15 pm » |
|
Very nice and clean car!
Hope to have my 67 Ghia in Lotus White some day...
Wout
|
|
|
|
|
Logged
|
|
|
|
|
Steve67
|
|
« Reply #39 on: September 28, 2020, 17:36:46 pm » |
|
two shots in the evening in front of my garage. Still on the old wheels as I have clearance issues between the Ronal wheels and the dropped spindels. I will try to sort that this week (set front wheels to 1° negative camber plus 4 mm wheel spacers plus some grinding on the lower trailing arm, I hope that works).
Anybody having the similar issues with dropped spindels and 15 inch wheels?
[ Attachment: You are not allowed to view attachments ]
[ Attachment: You are not allowed to view attachments ]
|
|
|
|
« Last Edit: September 19, 2025, 09:01:00 am by Steve67 »
|
Logged
|
|
|
|
|
baz
|
|
« Reply #40 on: September 28, 2020, 19:53:36 pm » |
|
Nice car. The bottom trailing arm can be reamed deeper to allow the ball joint sit further into the arm, just another option to gain some clearance.
|
|
|
|
|
Logged
|
I will prevail.
|
|
|
|
Steve67
|
|
« Reply #41 on: September 29, 2020, 05:45:22 am » |
|
That's a good idea, thanks
|
|
|
|
|
Logged
|
|
|
|
|
Cornpanzer
|
|
« Reply #42 on: October 03, 2020, 02:01:38 am » |
|
Nice car!
|
|
|
|
|
Logged
|
'67 Turbo Sedan
Ultra VW Contributor
|
|
|
|
Eddie DVK
|
|
« Reply #43 on: October 03, 2020, 07:20:45 am » |
|
That combination of the white car with the riviera s... is top.
|
|
|
|
|
Logged
|
Regards Edgar
" Type 4, it is a completely different engine. You have to drive one to understand! "
|
|
|
|
jamiep_jamiep
|
|
« Reply #44 on: October 09, 2020, 11:50:34 am » |
|
Looks great.
|
|
|
|
|
Logged
|
|
|
|
|
Steve67
|
|
« Reply #45 on: July 07, 2021, 14:58:49 pm » |
|
finally I managed to modify the dropped spindels to make my Ronal wheels fit without rubbing on the trailing arms.
I really like the look of them!
[ Attachment: You are not allowed to view attachments ] [ Attachment: You are not allowed to view attachments ] [ Attachment: You are not allowed to view attachments ]
|
|
|
|
|
Logged
|
|
|
|
|
brewsy
|
|
« Reply #46 on: July 07, 2021, 15:46:56 pm » |
|
finally I managed to modify the dropped spindels to make my Ronal wheels fit without rubbing on the trailing arms.
I really like the look of them!
Nice!!! |
|
|
|
|
Logged
|
|
|
|
|
jmarkha1
|
|
« Reply #47 on: July 08, 2021, 12:21:55 pm » |
|
Ronals look really good - nice job
|
|
|
|
|
Logged
|
|
|
|
|
VWGlassee
|
|
« Reply #48 on: July 08, 2021, 14:38:29 pm » |
|
Perfect! Great stance  Yannick |
|
|
|
|
Logged
|
Get In, Sit Down, Shut Up, & Hold On
|
|
|
|
Good-Old-Ragtop60
|
|
« Reply #49 on: July 13, 2021, 06:16:42 am » |
|
Nice wheels! That looks to be 1. series Ronals?
|
|
|
|
|
Logged
|
|
|
|
|
Steve67
|
|
« Reply #50 on: July 13, 2021, 08:57:01 am » |
|
thanks everybody Yes, they are 1st series Ronals |
|
|
|
|
Logged
|
|
|
|
|
Steve67
|
|
« Reply #51 on: September 18, 2025, 17:36:24 pm » |
|
no update for a long time :-)
I still enjoy the 67 a lot when I have the time to drive it, currently it's back on the Rivieras.
Earlier this year I scored Italian 40 IDFs for a bargain and so I have a little project for the winter. The single port engine has to go and a nice 1835 will take its place.
I already have a pair of new 35,5/32 cylinderheads and UDO Becker manifolds that where ported and got a valve job by a friend. Now I need to decide which camshaft to use...
[ Attachment: You are not allowed to view attachments ] [ Attachment: You are not allowed to view attachments ]
|
|
|
|
|
Logged
|
|
|
|
tpb_karl
Jr. Member
Posts: 98
|
|
« Reply #52 on: September 25, 2025, 20:22:28 pm » |
|
Nice seeing you at the Airmighty show! Looking forward to seeing more of that engine build!
|
|
|
|
|
Logged
|
|
|
|
|
 The Cal-look Lounge


 Author