|
karl h
|
 |
« Reply #150 on: July 22, 2015, 07:16:10 am » |
|
top profile of the panel is different?
|
|
|
|
|
 Logged
|
|
|
|
|
vwhelmot
|
|
« Reply #151 on: July 22, 2015, 07:56:50 am » |
|
Correct  |
|
|
|
« Last Edit: October 10, 2017, 15:58:59 pm by vwhelmot »
|
Logged
|
|
|
|
|
vwhelmot
|
|
« Reply #152 on: July 22, 2015, 09:29:40 am » |
|
|
|
|
|
« Last Edit: July 22, 2015, 10:32:38 am by vwhelmot »
|
Logged
|
|
|
|
|
vwhelmot
|
|
« Reply #153 on: July 23, 2015, 11:36:39 am » |
|
|
|
|
|
|
Logged
|
|
|
|
|
vwhelmot
|
|
« Reply #154 on: July 23, 2015, 12:09:02 pm » |
|
|
|
|
|
|
Logged
|
|
|
|
|
vwhelmot
|
|
« Reply #155 on: July 24, 2015, 09:41:28 am » |
|
|
|
|
|
|
Logged
|
|
|
|
|
vwhelmot
|
|
« Reply #156 on: July 24, 2015, 13:13:30 pm » |
|
|
|
|
|
« Last Edit: July 24, 2015, 13:24:12 pm by vwhelmot »
|
Logged
|
|
|
|
|
vwhelmot
|
|
« Reply #157 on: July 24, 2015, 13:23:15 pm » |
|
Well folks, this is it for now. Like I said I just wanted to show the amount of work that's gone into my bug so far. I`ve been doing many many more hours work on all the other details which I will keep to myself for now. I`ve done more bodywork and there is still lots to do but you get the picture?! Its got to be ready for paint by spring next year and then its off for its new coat of sea blue by someone who knows what it takes to paint a show winner.  Cheers for the compliments Parting shot. Bye for now... 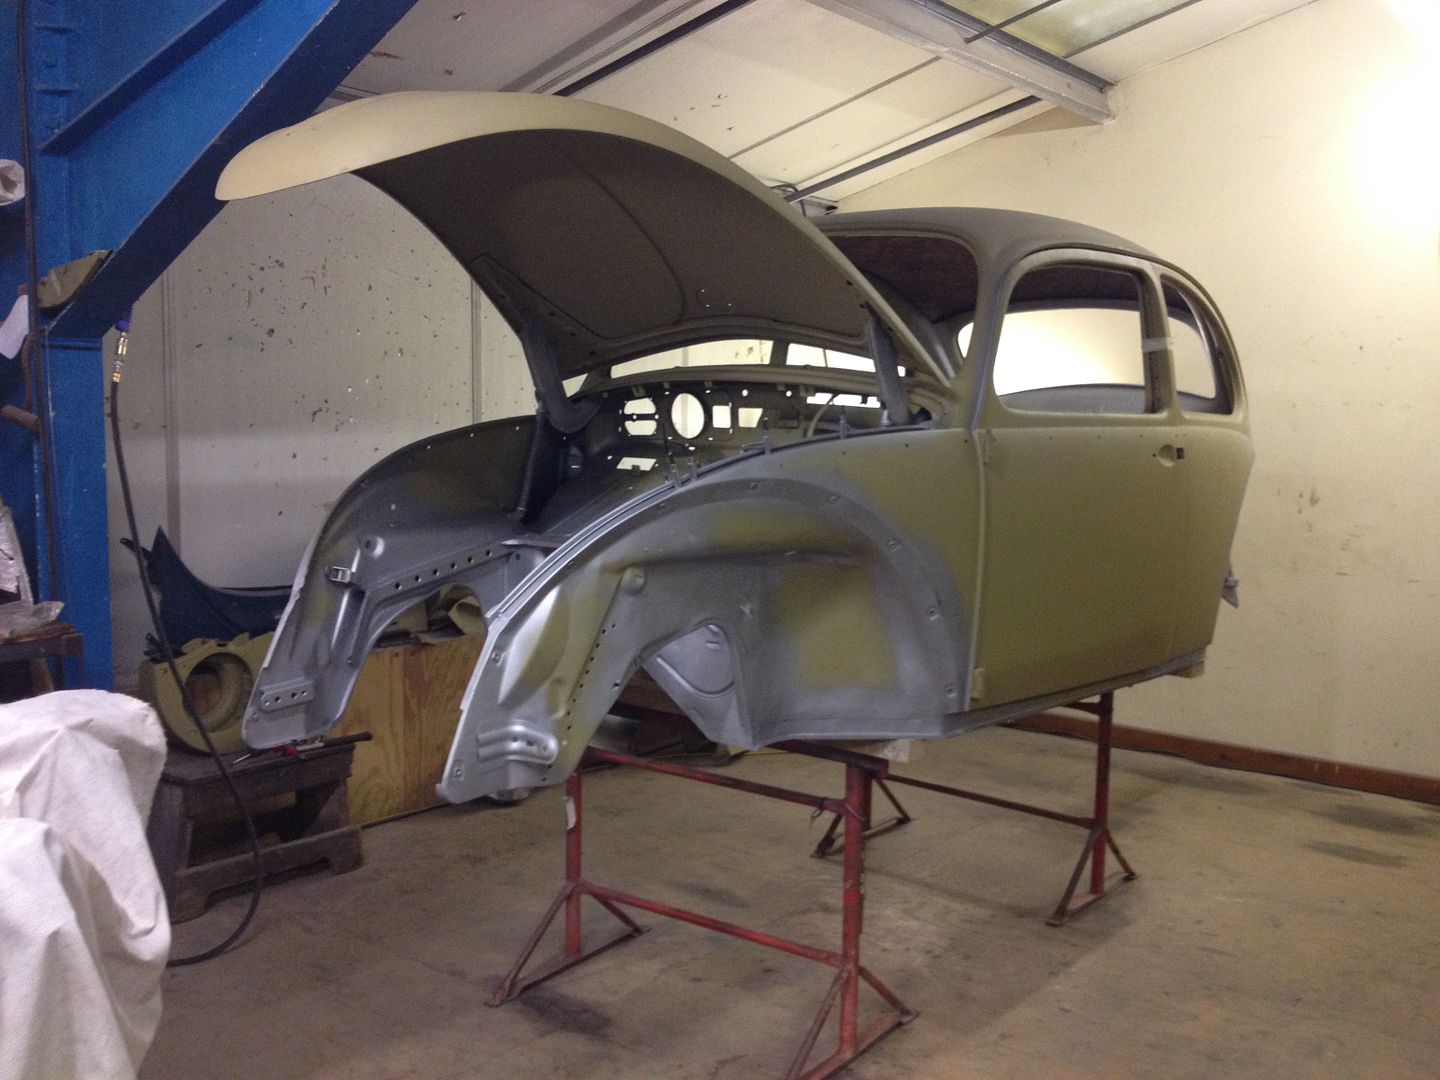 |
|
|
|
|
Logged
|
|
|
|
|
leec
|
|
« Reply #158 on: July 24, 2015, 13:49:13 pm » |
|
Well done. Amazing work. I loved it the first time round so can not imagine how good it will be this time.
Lee
|
|
|
|
|
Logged
|
|
|
|
|
Gaz1
|
|
« Reply #159 on: July 27, 2015, 12:32:21 pm » |
|
Stunning work mate , it's coming along nicely |
|
|
|
|
Logged
|
|
|
|
|
danny gabbard
|
|
« Reply #160 on: August 01, 2015, 18:10:41 pm » |
|
Dam nice work ! Great detail !!
|
|
|
|
|
Logged
|
A poor craftsman, Blame's it on poor tools. GAB-FAB shop # 775 246-3069
|
|
|
Erlend / bug66
Global Moderator
Hero Member

Posts: 955
SCC Event

|
|
« Reply #161 on: September 09, 2015, 21:01:23 pm » |
|
I need to get my fix..
What's up? Any update?
|
|
|
|
|
Logged
|
The '67:
10.626 @ 132mph, SCC 2016
10.407 @ 134mph, SCC 2017
10.221 @ 135mph, SCC 2018
The '59:
Not yet..
|
|
|
|
vwhelmot
|
|
« Reply #162 on: September 10, 2015, 08:30:17 am » |
|
I`ve been doing lots to it, the body is back on the pan for mock up, fitted the spare wheel tray and fitted the gearbox and motor. There has been a tonne of work with the engine mock up side of things, I`ve had to fab up a new traction bar as the old one didn't fit because of the exhaust, cut and remount the whole trapeze bar, build a stainless 304 muffler , create a three piece removable rear valence and then I had an issue with the deck lid gaps which I am now nearly finished in fixing that. I`ve been doing lots of custom bits like steering column mods, mag switch location etc. Final bodywork will start prob around November which will give me plenty of time to get it ready for paint next spring. 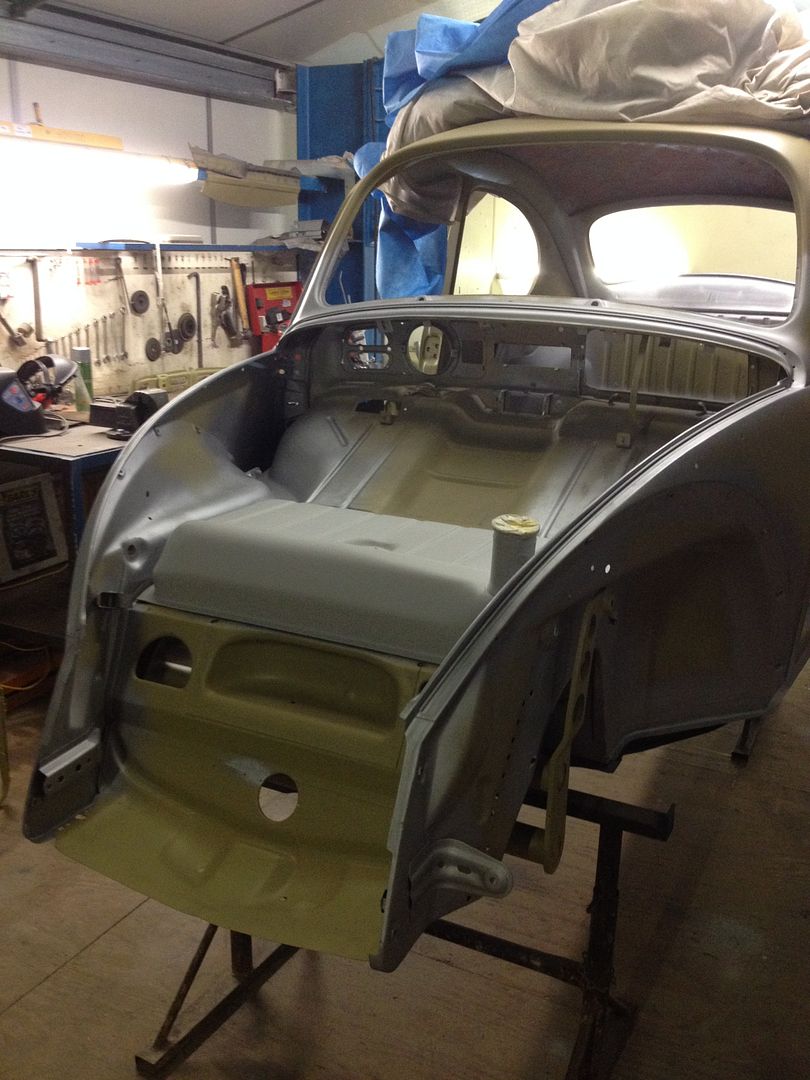 I modified the lip on the nos spare wheel tray so it flowed nicely, no gaps. 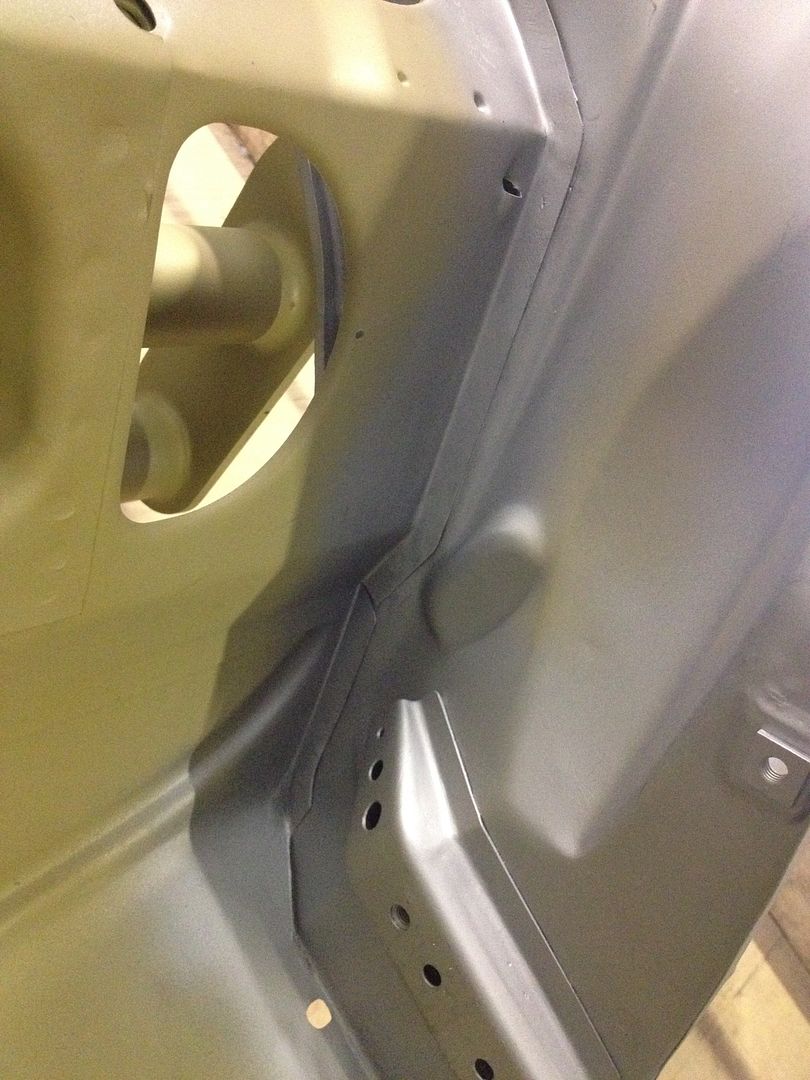 Also doing lots of detail bits like this, so many small areas that need attention, its unreal 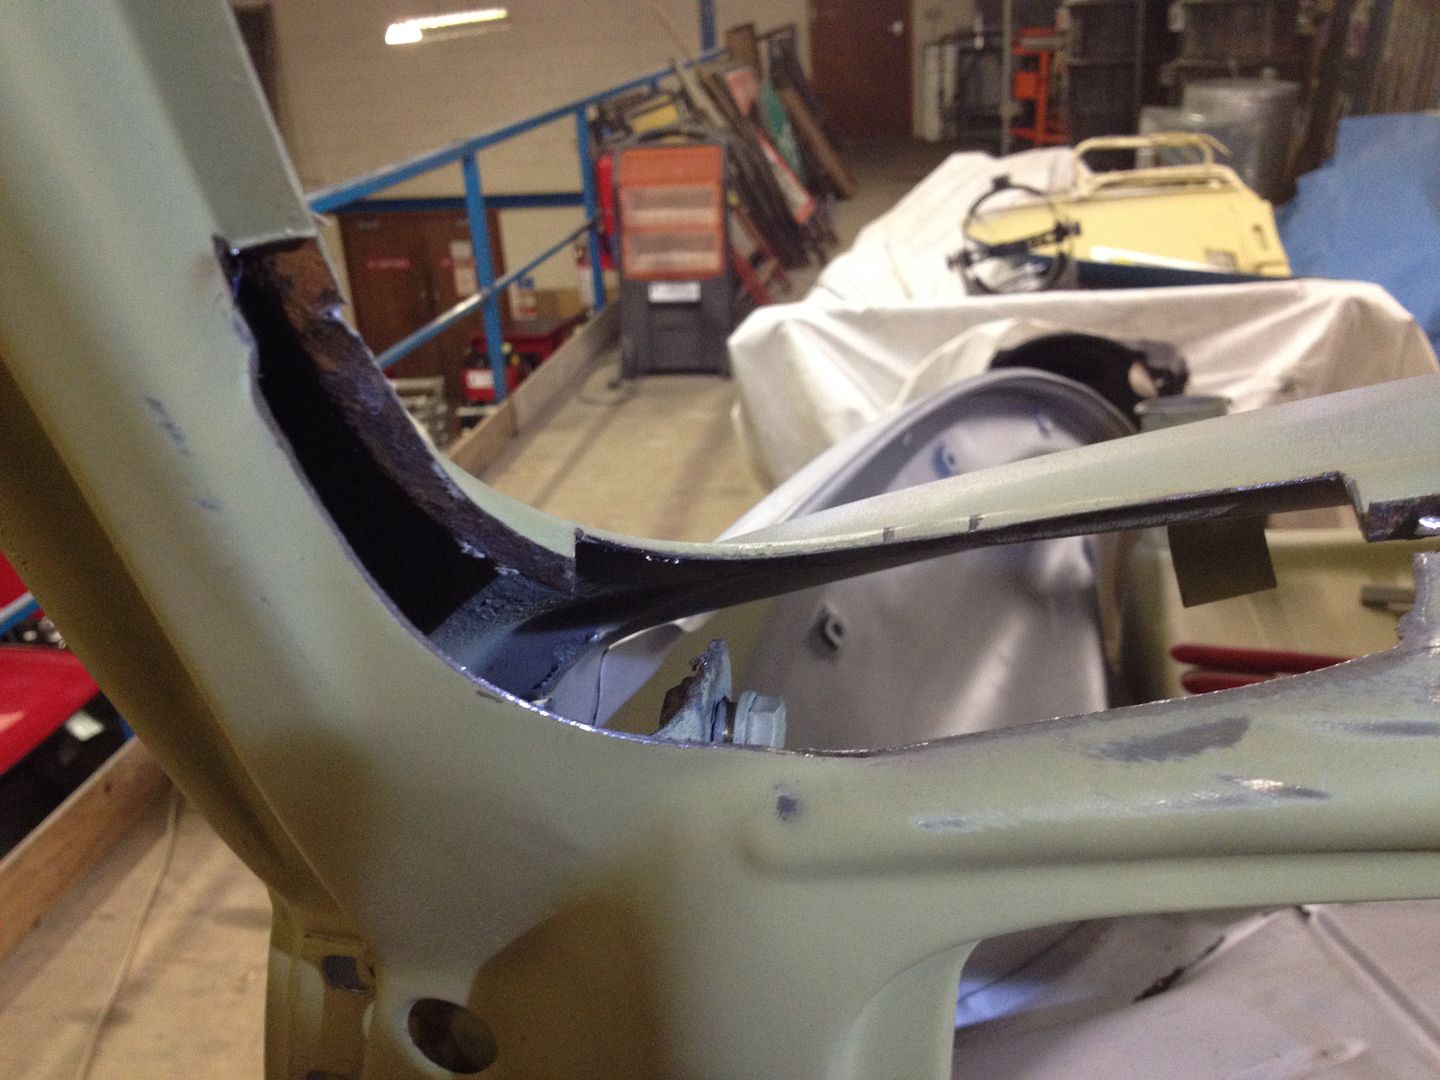 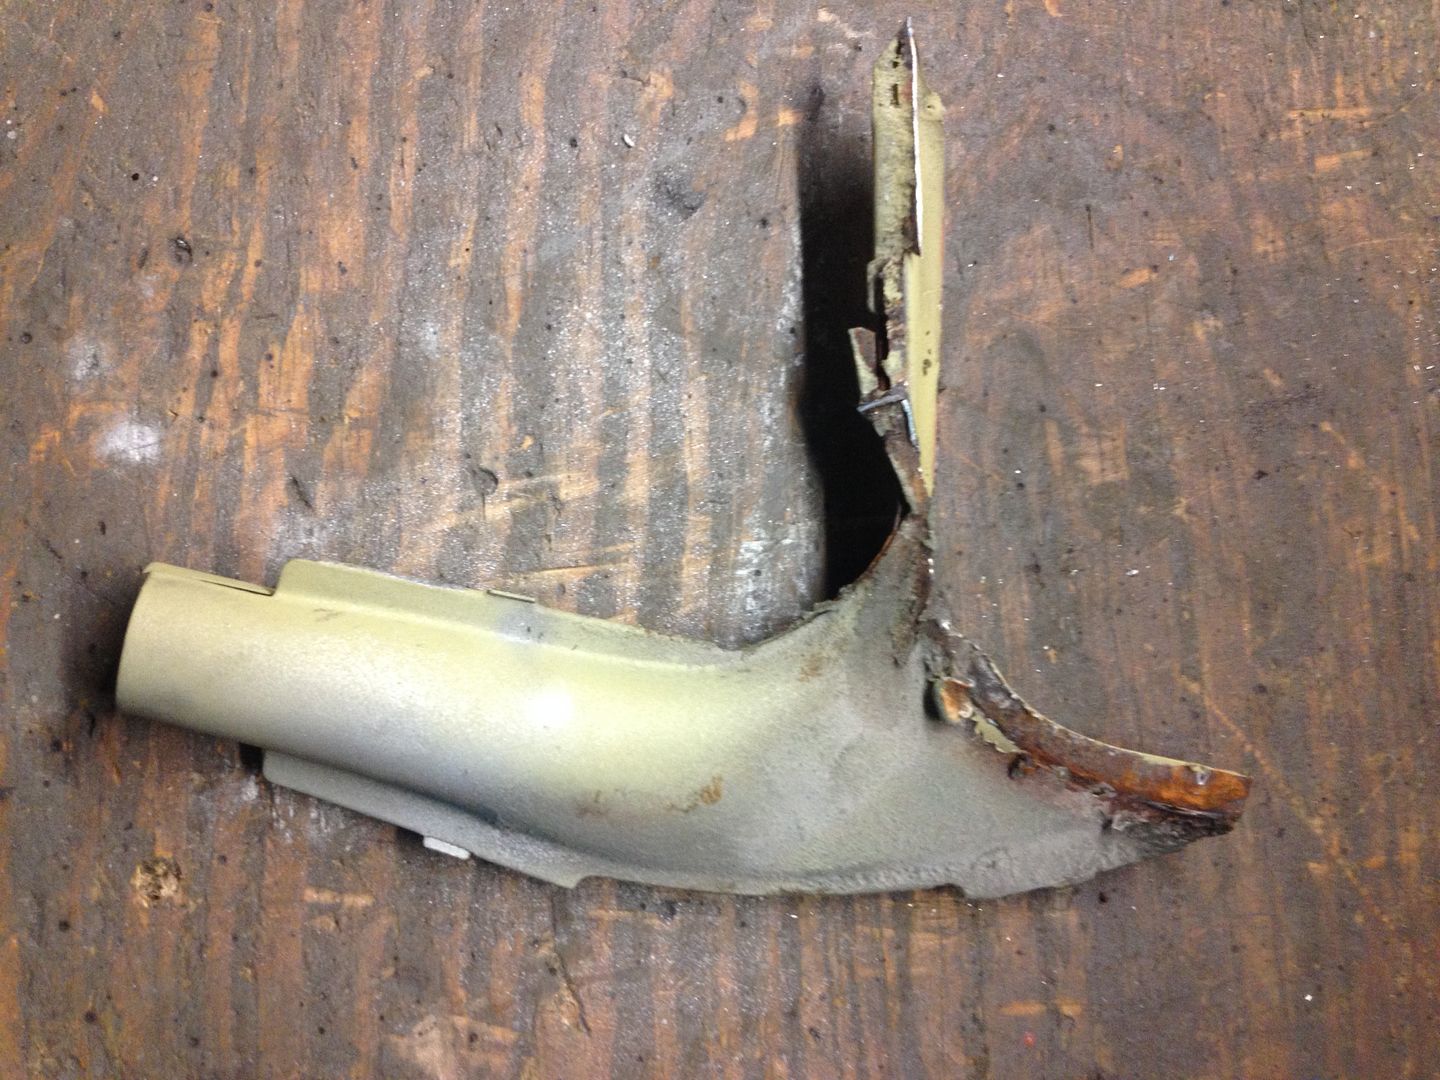 Defrost delete, ugly dash part beautified 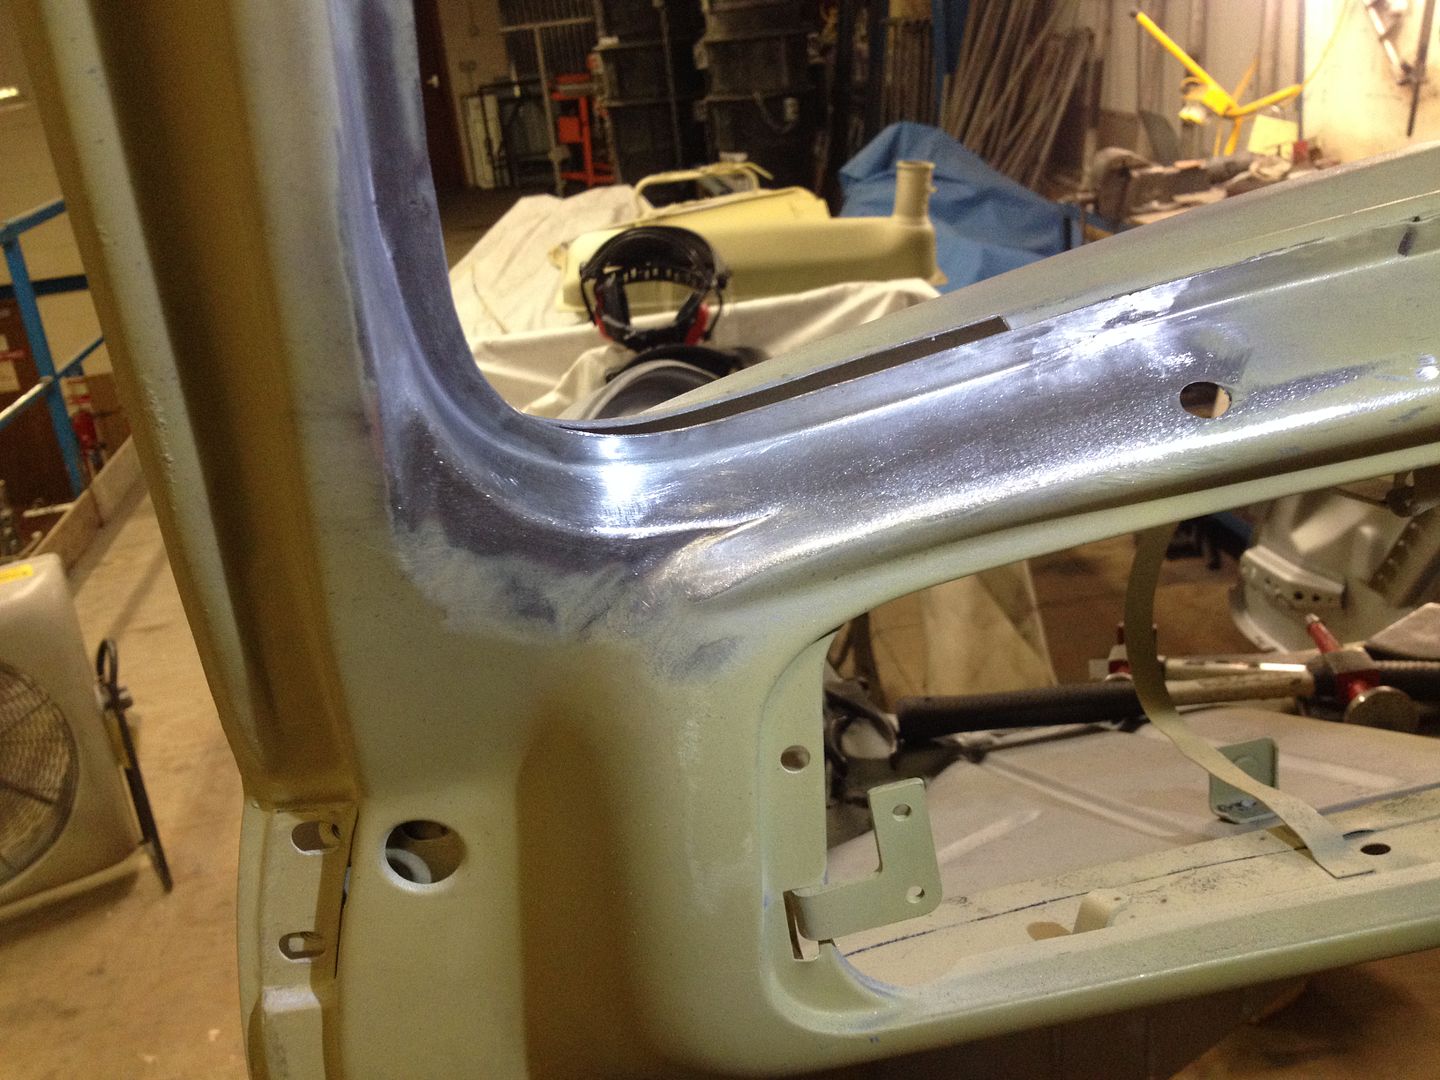 Thank you so much for the kind comments, its appreciated. Cheers
|
|
|
|
« Last Edit: January 10, 2017, 12:27:27 pm by vwhelmot »
|
Logged
|
|
|
|
|
BeetleBug
|
|
« Reply #163 on: October 14, 2015, 07:20:50 am » |
|
Any more updates? I`m eager to see and to learn more from your fantastic work.
-BB-
|
|
|
|
|
Logged
|
10.41 - 100ci - 1641ccm - 400hp
|
|
|
|
vwhelmot
|
|
« Reply #164 on: October 14, 2015, 09:51:02 am » |
|
Thanks For the past two or three months its been all about the engine mock up. I must have installed and removed the block about twenty bloody times. You know how it goes, to fit this, the carb has to be mounted, to clear that ,the fan housing has to be mounted ........ I`ve realised that I`ve wasted a lot of time polishing lots of parts that were previously fitted only to realise that I will not use them again. The tall manifolds have gone, I must have spent three days smoothing and polishing those only to find that that age old problem of the stack to foul the lid. Also I`ve been having a few issues with the deck lid fit. The car was involved in a minor accident way before I bought it the first time in the nineties, the previous owner had reversed into a waterboard truck and pushed the offside corner of the deck lid inwards hitting the dynamo in the process. the damage caused was cosmetic but I had not reckoned with the fact that the offside engine bay side was pushed downwards in the event. The gap between the lid and body on the nearside was perfect but the offside there was much larger. Perfect 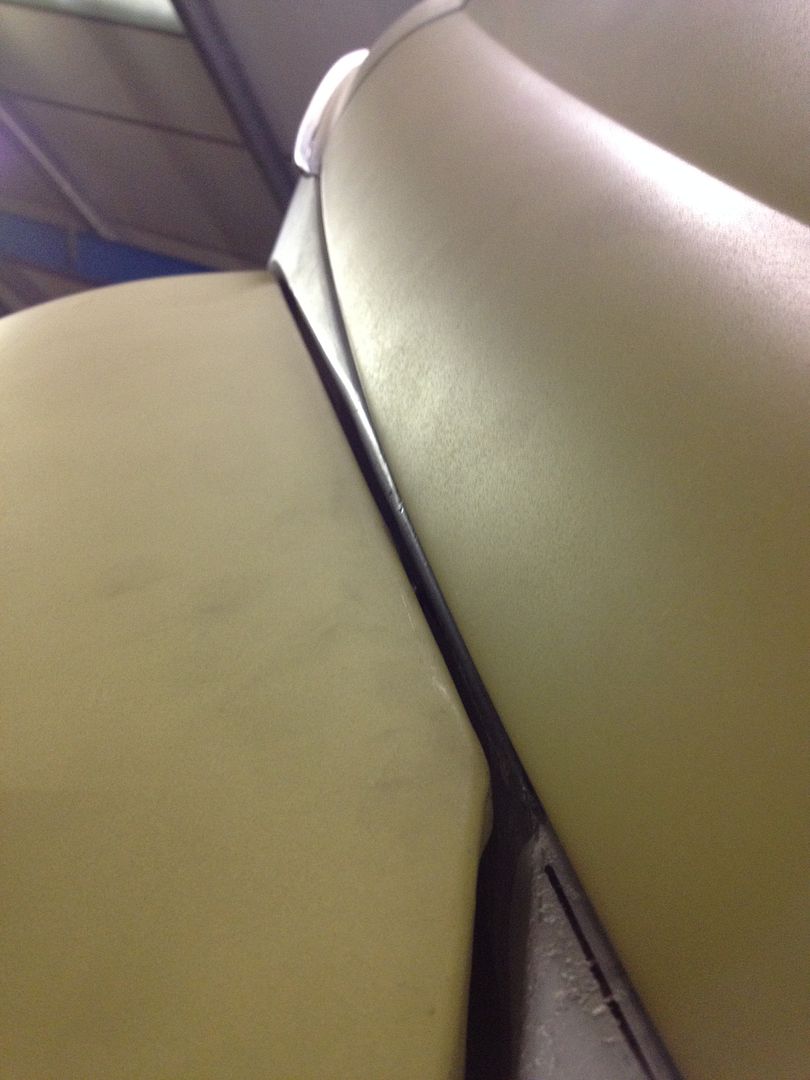 Really bad 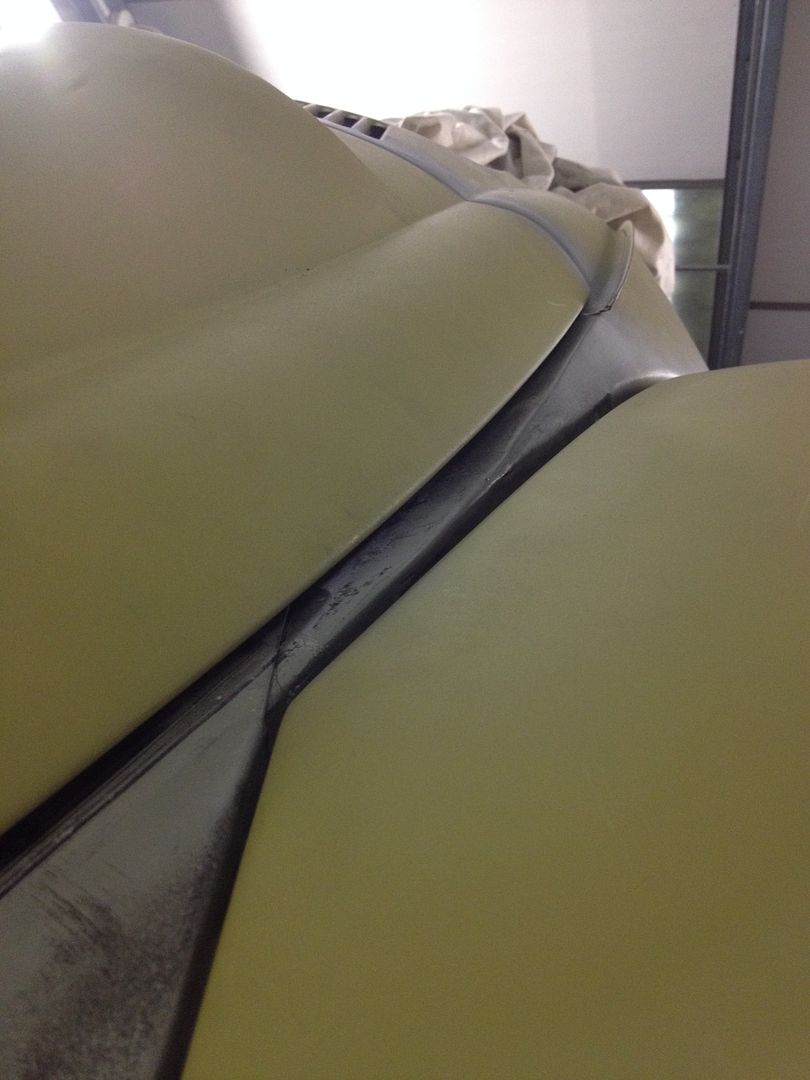 Now , I tried to fix this by panel beating the body upwards which worked to a degree but I wasn't happy with the fact that some filler would have had to have been used so I cut it out and replaced the corner with a new section from a later donor car. Gap at the top was great 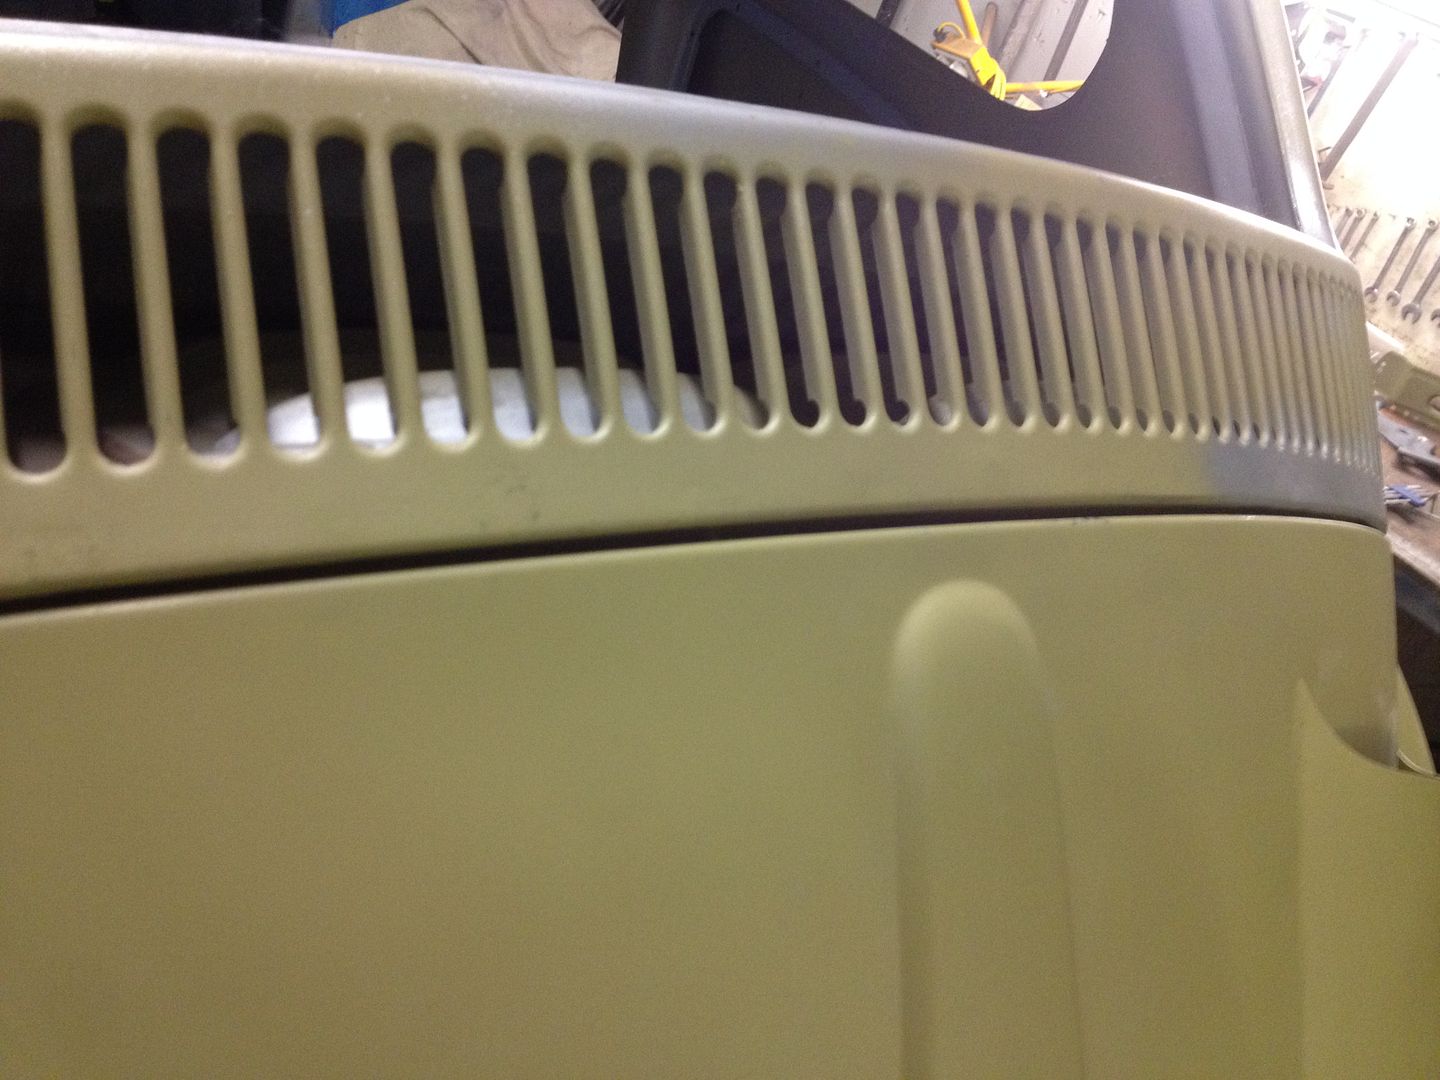 I tried using my dent puller  No luck so I cut it out 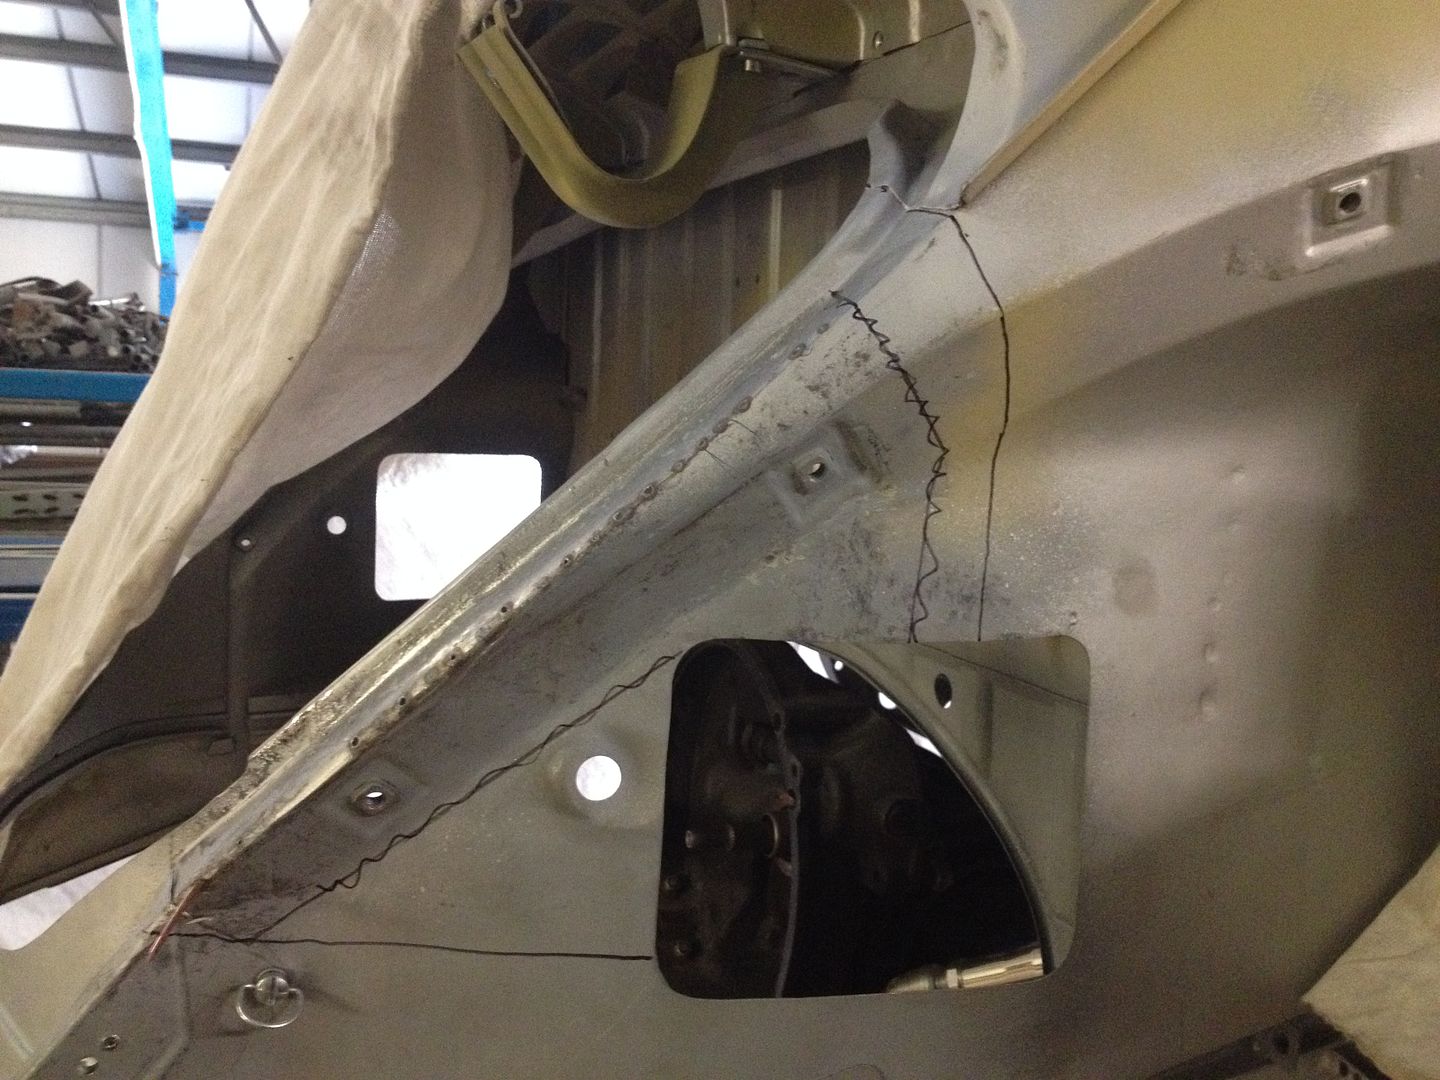  It would have took a lot of filler to fix this 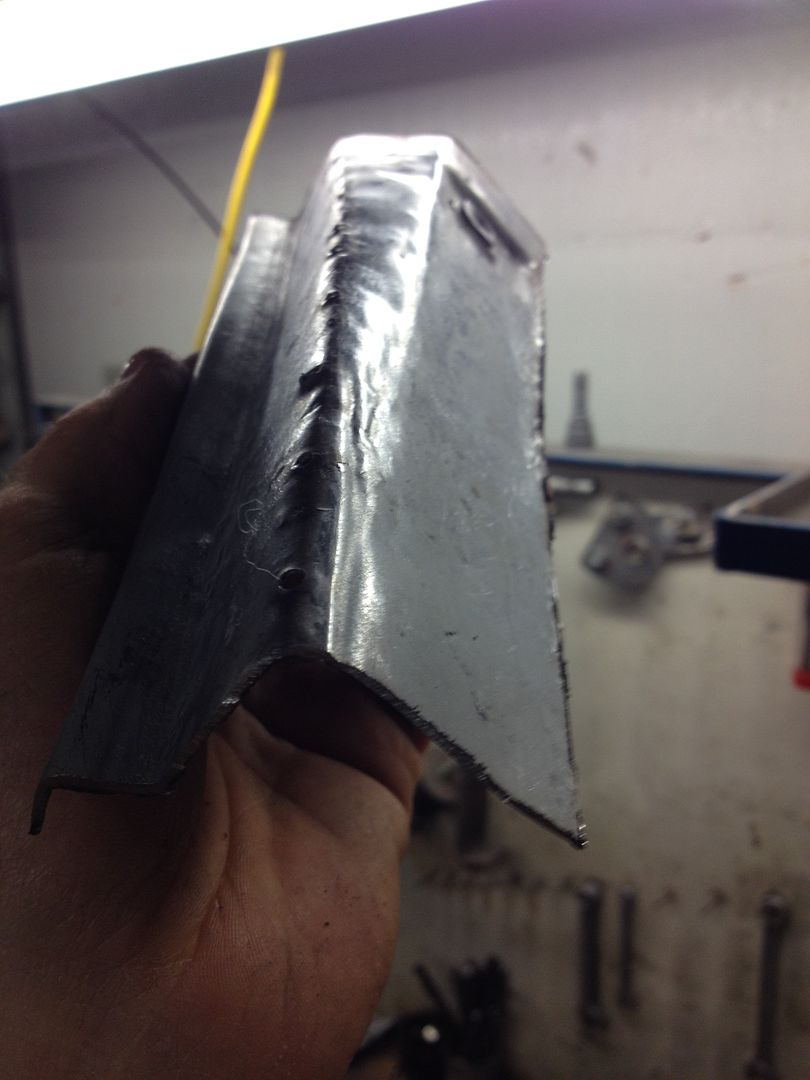 Donor section from a late bug  Quickly fitted, one hell of a difference 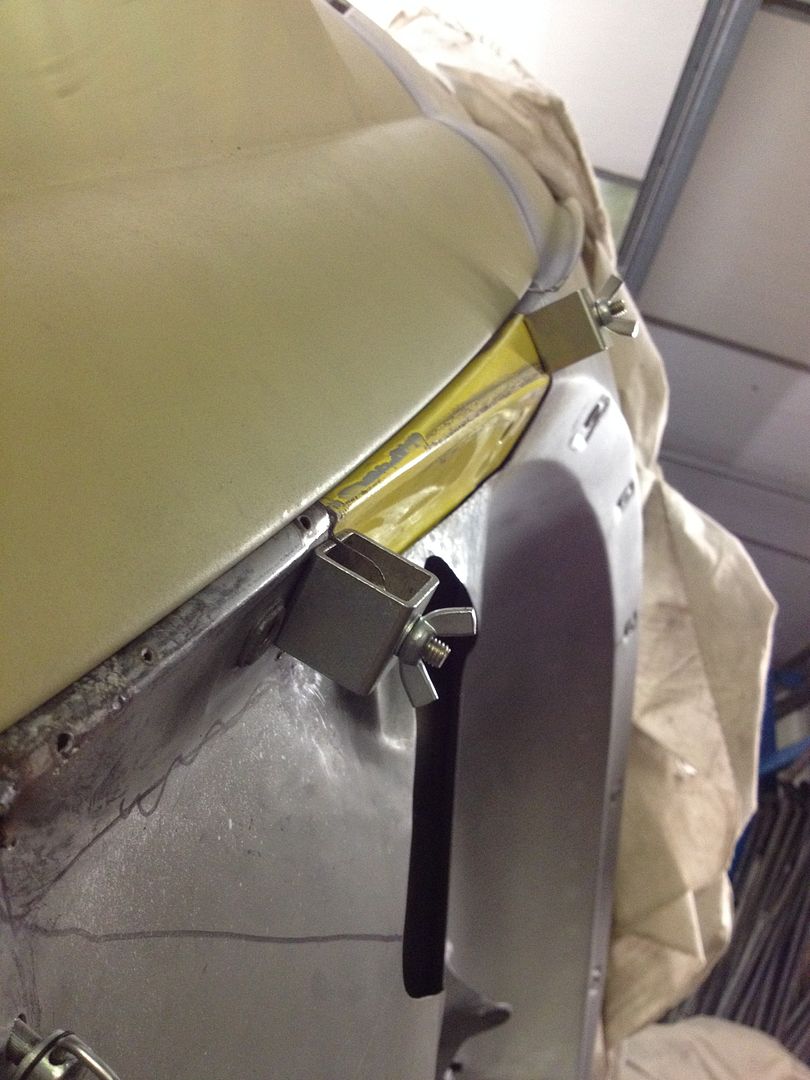 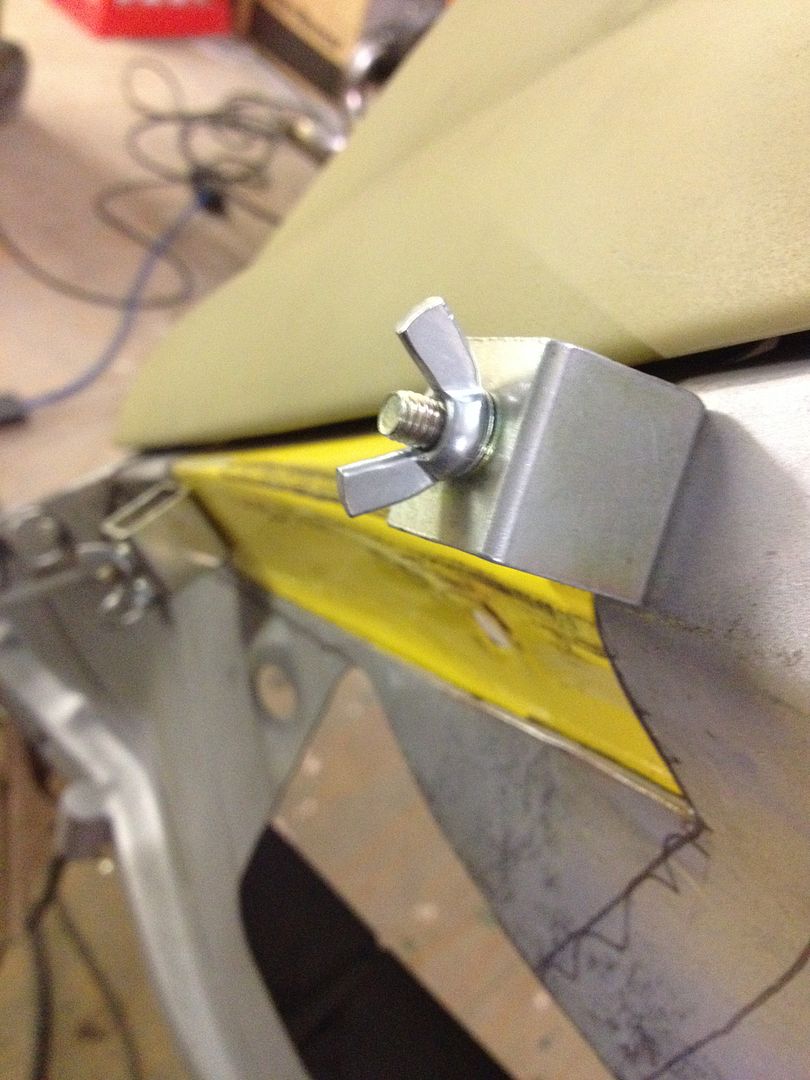 Surprise surprise the wing captive nut was wrong so out came the trusty super press tool 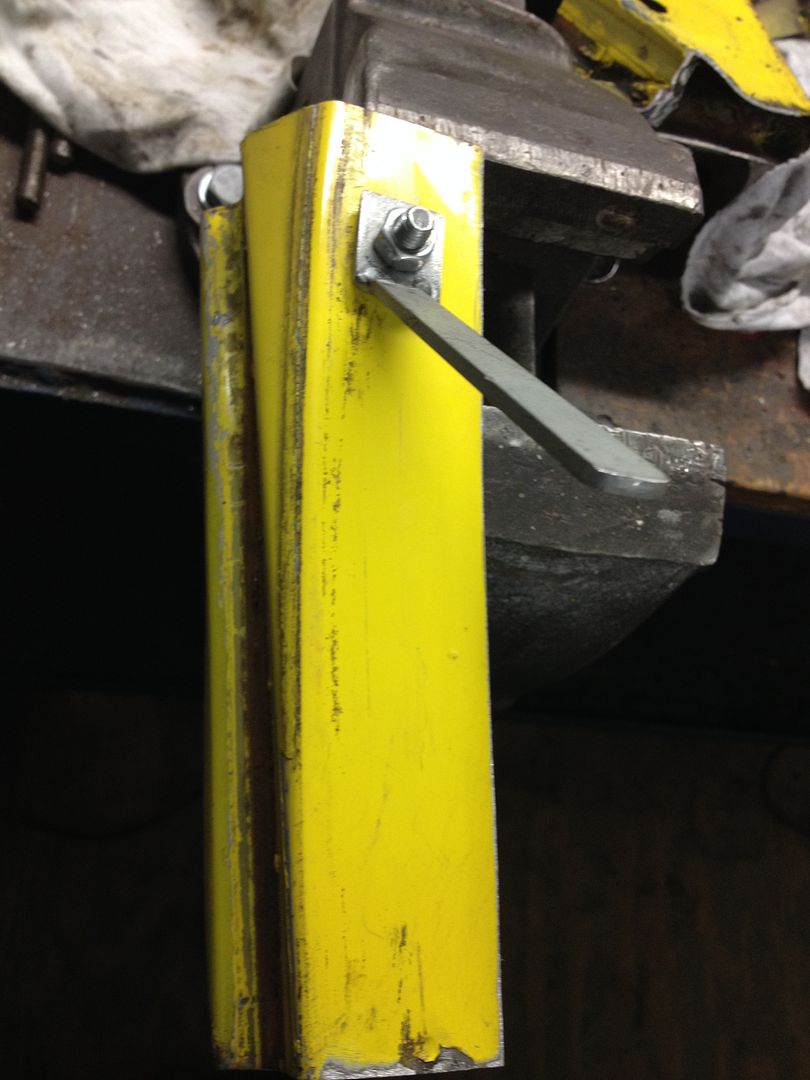 Genuine nut 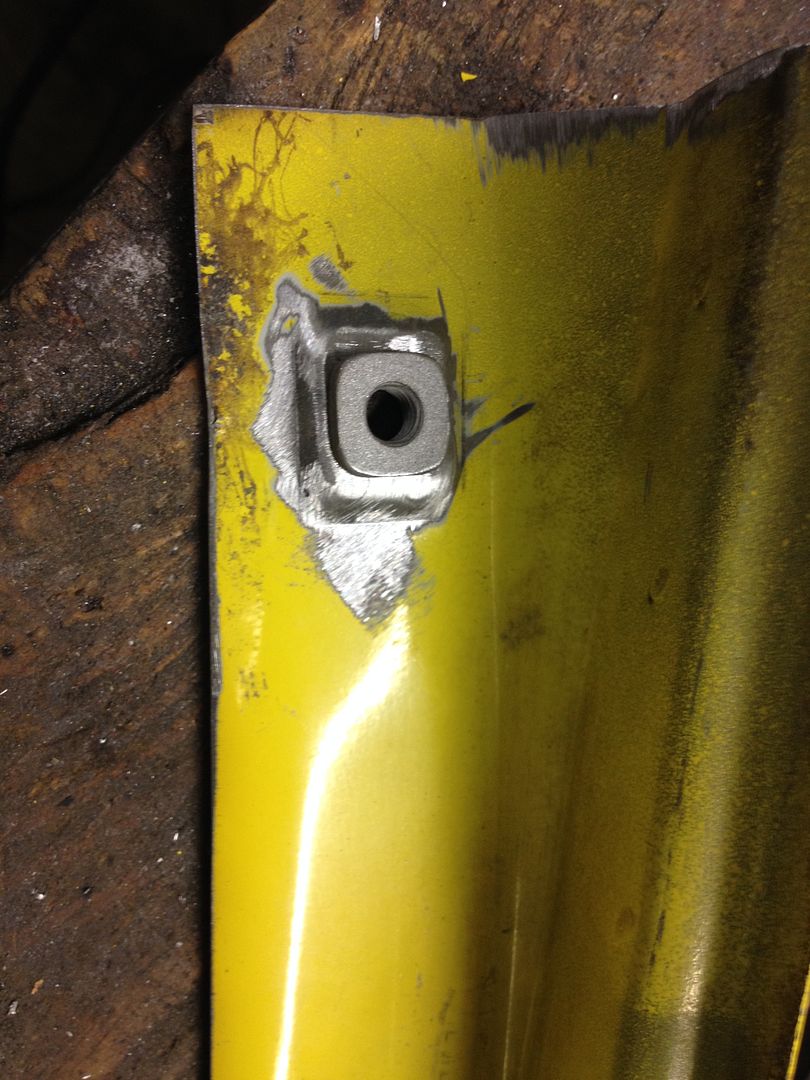 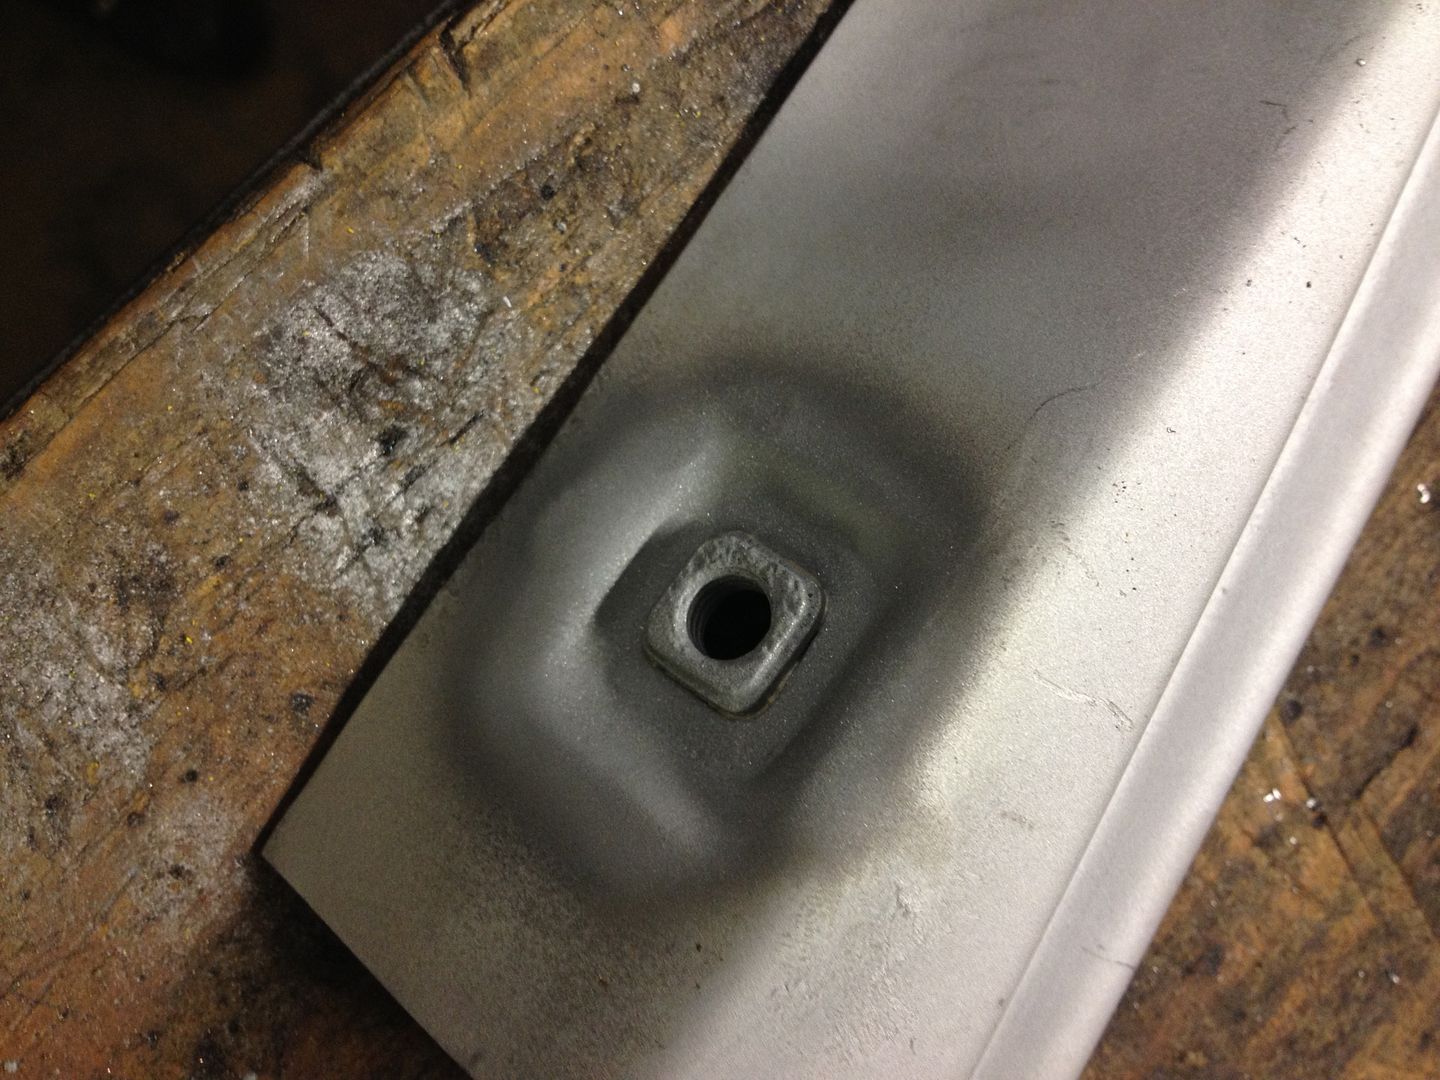 See the difference in the shape  Part way in 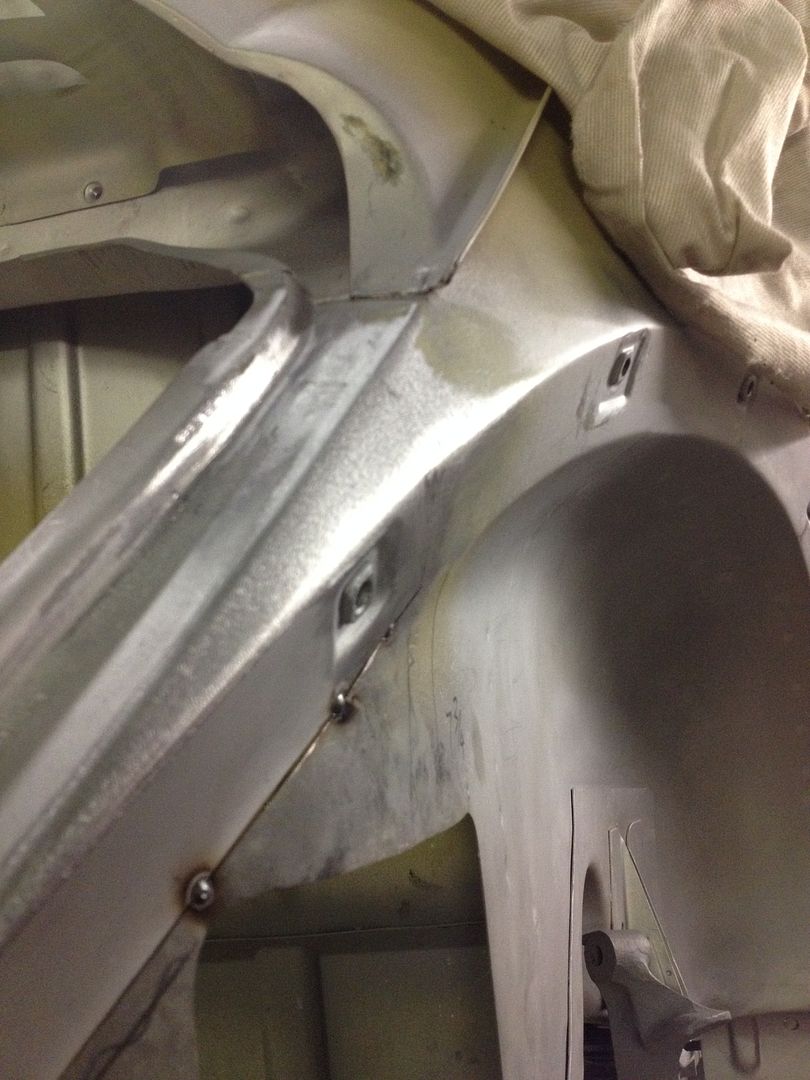 Mucho bettterrer 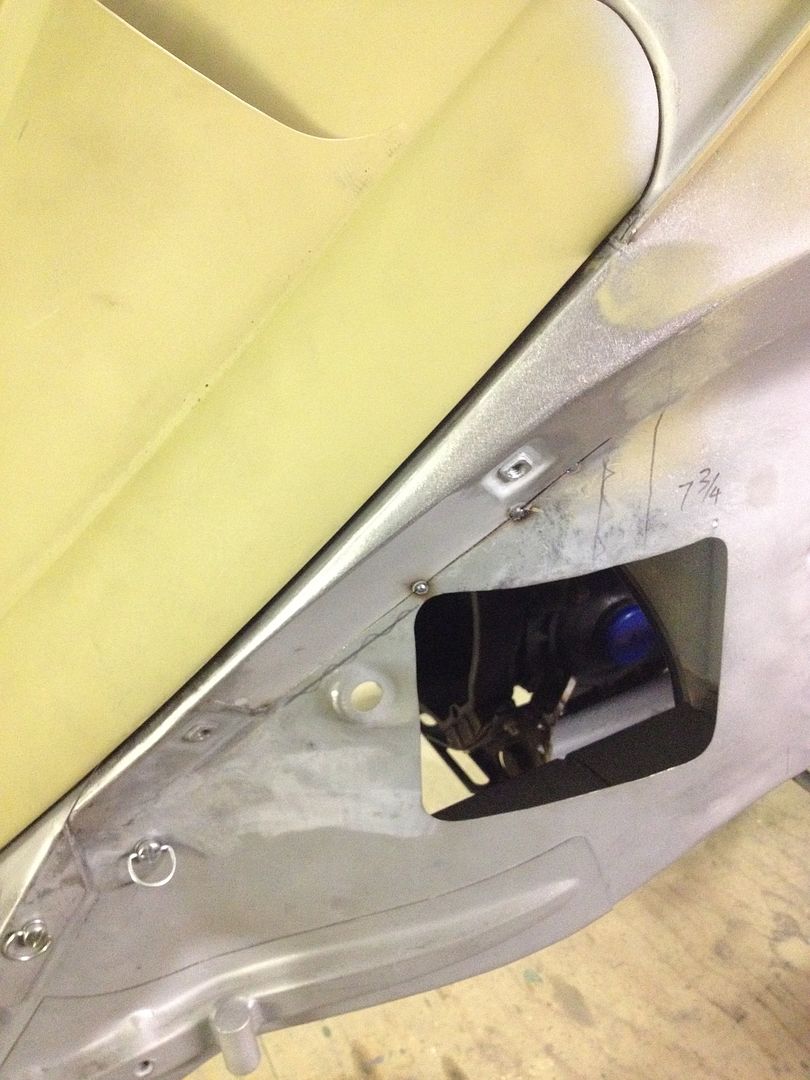 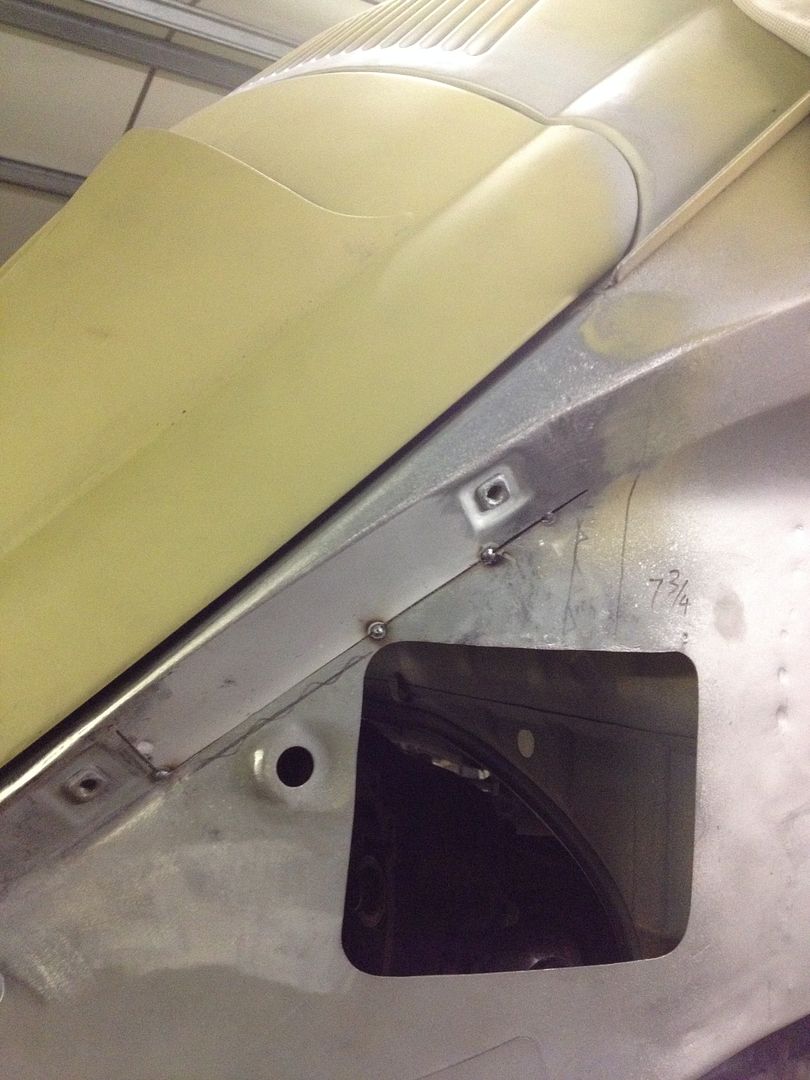 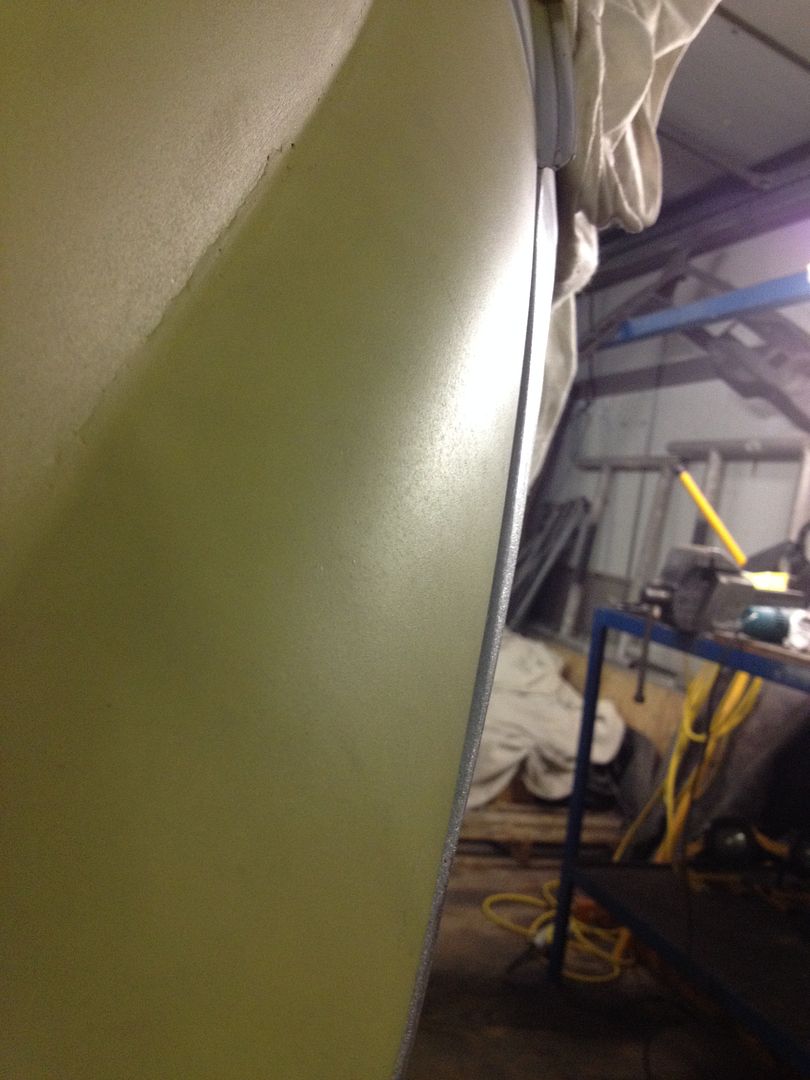 No filler 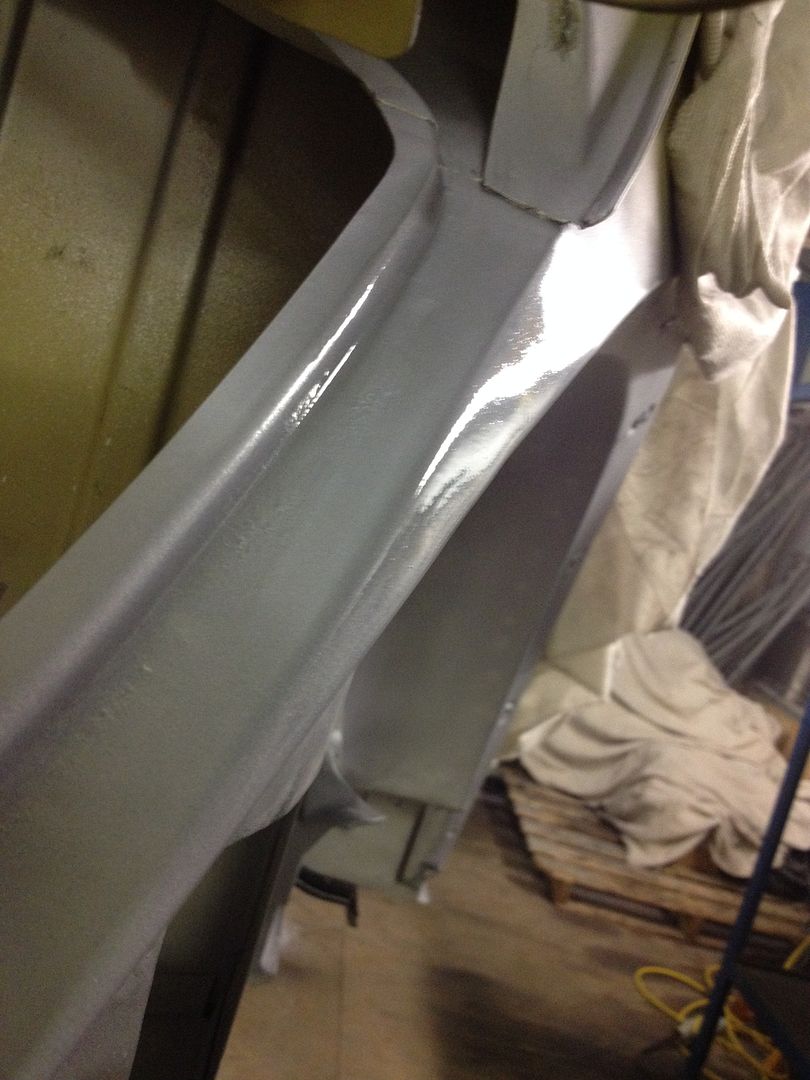 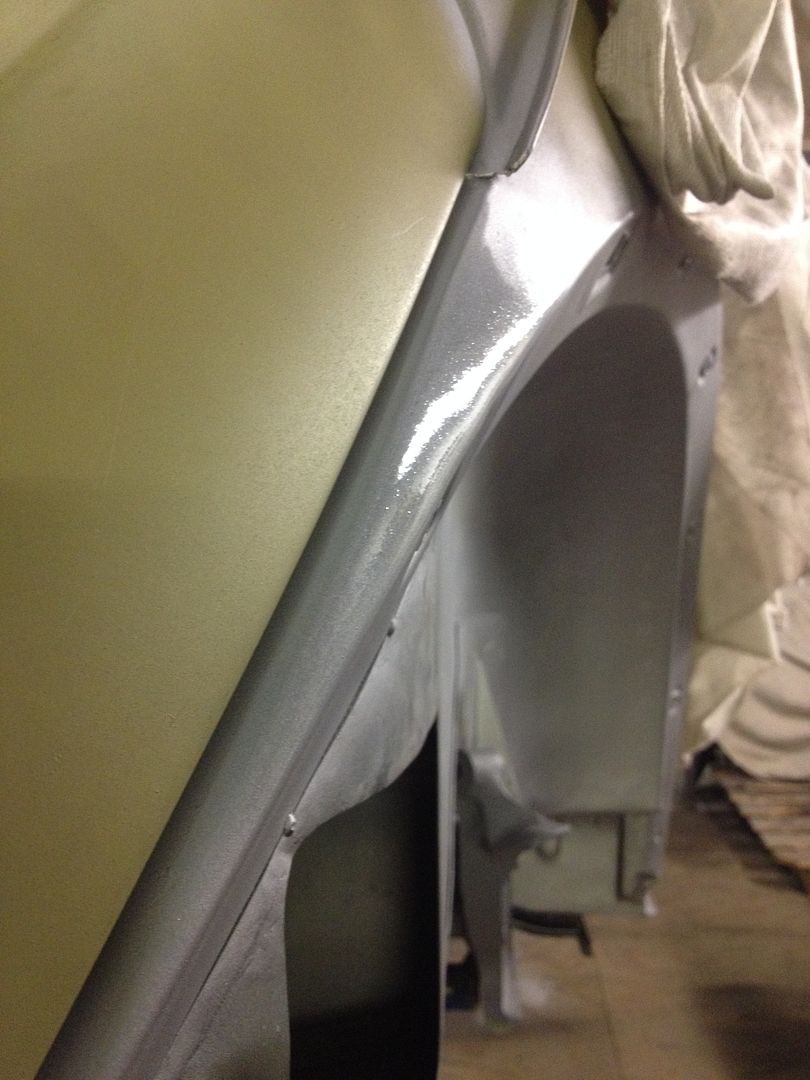 |
|
|
|
|
Logged
|
|
|
|
|
vwhelmot
|
|
« Reply #165 on: October 14, 2015, 10:03:59 am » |
|
|
|
|
|
|
Logged
|
|
|
|
MickO
Newbie

Posts: 1
|
|
« Reply #166 on: November 01, 2015, 13:22:35 pm » |
|
Very inspiring work!
Stupid question from a beginner: What type is the yellow primer that you use after blasting?
|
|
|
|
|
Logged
|
|
|
|
|
Lids
|
|
« Reply #167 on: November 01, 2015, 17:31:35 pm » |
|
Very inspiring work!
Stupid question from a beginner: What type is the yellow primer that you use after blasting?
He answered that earlier in the thread |
|
|
|
|
Logged
|
|
|
|
|
vwhelmot
|
|
« Reply #168 on: November 01, 2015, 17:58:45 pm » |
|
The yellow is an ordinary etch primer, 1:1 mixed with activator
Cheers.
|
|
|
|
|
Logged
|
|
|
|
Clatter
Newbie
Posts: 27
|
|
« Reply #169 on: November 02, 2015, 06:11:38 am » |
|
Upol weld 2
I linish the weld with a 1" belt sander and then use a random orb sander. All of my tools are Makita. I know them inside and out.
Oh, my, this is lovely to behold... I'm floored. So much detail! Care to share a bit more of your methods? Am i to believe that you do all of your rough dressing of welds with the little electric Makita belt fella in the pic here? 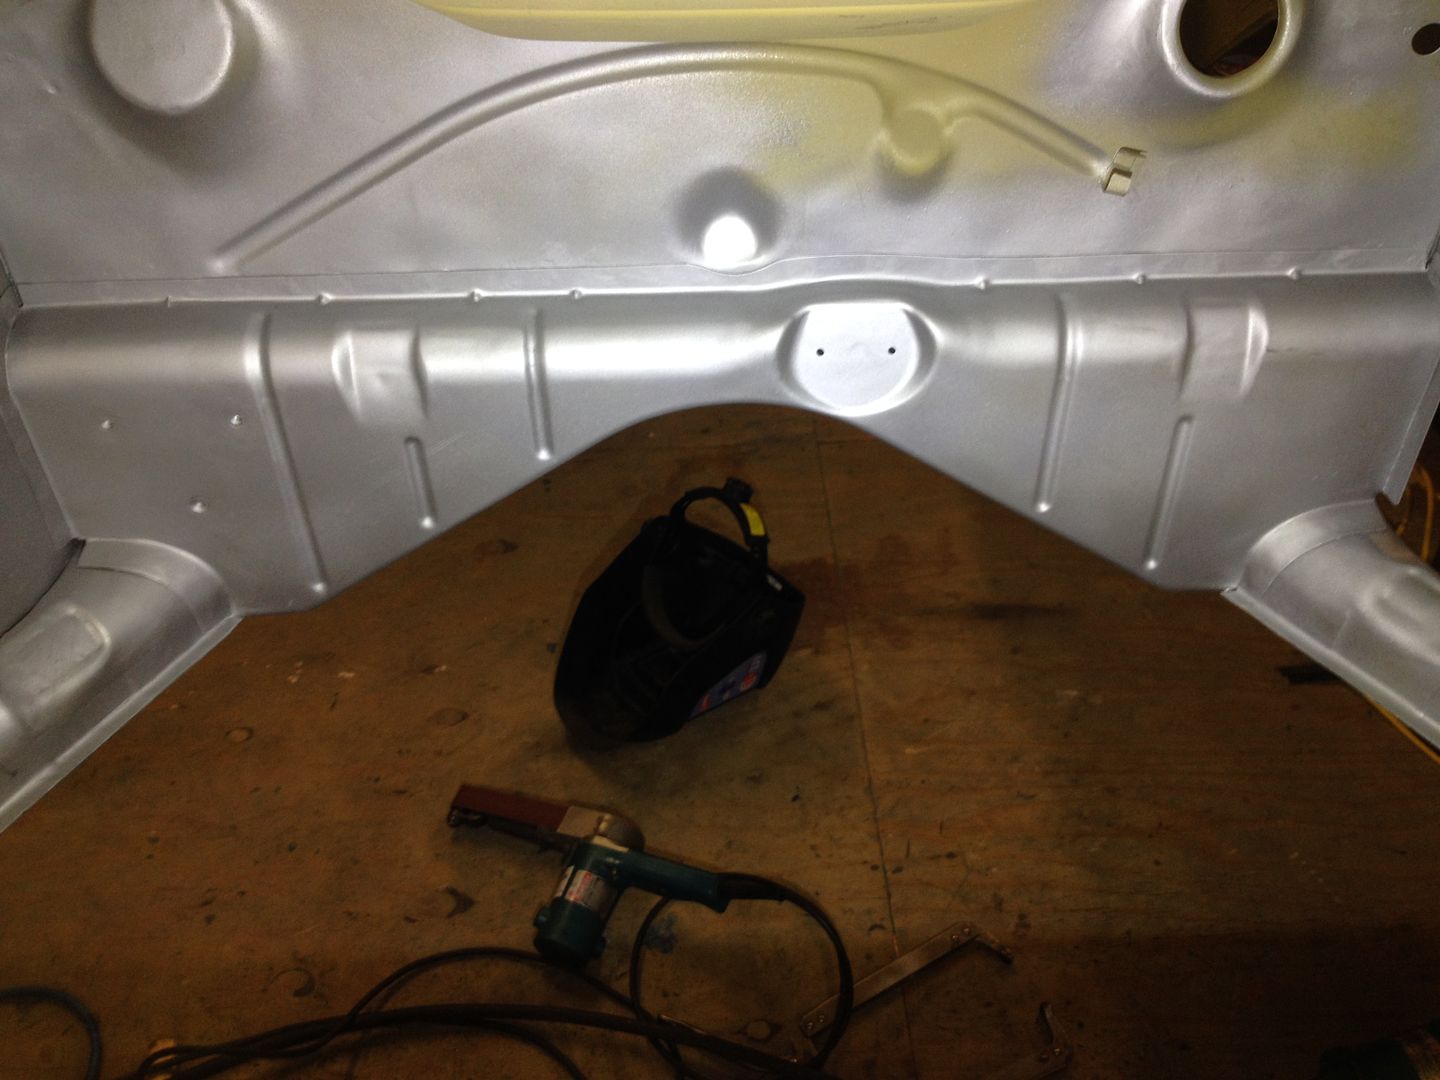 No stone grinding wheels at all  I am baffled how you dress welds down inside right angles and tight crevices and such..!  Do you have a picture of your DA sander? It's also electric? What grits do you prefer for these? -Also- You are spot-blasting up high there, or forking the thing down every time? I could see blasting up there making the mother of all messes.. Learning SO much here.. Pretty much spent most of today studying this. Thanks for taking the time to document so thouroughly. |
|
|
|
|
Logged
|
|
|
|
|
vwhelmot
|
|
« Reply #170 on: November 02, 2015, 08:58:58 am » |
|
Upol weld 2
I linish the weld with a 1" belt sander and then use a random orb sander. All of my tools are Makita. I know them inside and out.
Oh, my, this is lovely to behold... I'm floored. So much detail! Care to share a bit more of your methods? Am i to believe that you do all of your rough dressing of welds with the little electric Makita belt fella in the pic here? ................. Yes I do 99% of the rough dressing with the belt sander 40g then 60g belts No stone grinding wheels at all I am baffled how you dress welds down inside right angles and tight crevices and such..! .................The only time I will use a grinder is when I need to make a cut or some serious rough dressing. You can easily slip and do some damage with a grinding cutting wheel, yes I said cutting wheel too. I never use a thick grinding wheel as the is very little control with those, a thinner cutting wheel used on its edge is better but don't grind on its underside as cutting wheels used for grinding can explode, the strength is at the tip. Tight corners etc are accessed using a die grinder with a burr first. Do you have a picture of your DA sander? It's also electric? ............Its just a 5" Makita elec da sander, I use 60g or 80g What grits do you prefer for these? -Also- You are spot-blasting up high there, or forking the thing down every time? I could see blasting up there making the mother of all messes.. ...........Yes I spot blast and have to clean up after, its easier than lifting the shell up and down on the mez floor! Learning SO much here.. Pretty much spent most of today studying this. ...........Thanks for taking the time to document so thouroughly. Thanks and no worries, just make sure you enjoy what you do! |
|
|
|
|
Logged
|
|
|
|
|
vwhelmot
|
|
« Reply #171 on: November 02, 2015, 09:02:04 am » |
|
|
|
|
|
|
Logged
|
|
|
|
|
vwhelmot
|
|
« Reply #172 on: November 09, 2015, 12:26:31 pm » |
|
|
|
|
|
|
Logged
|
|
|
|
|
vwhelmot
|
|
« Reply #173 on: November 09, 2015, 12:30:18 pm » |
|
|
|
|
|
|
Logged
|
|
|
|
|
vwhelmot
|
|
« Reply #174 on: November 21, 2015, 10:01:35 am » |
|
|
|
|
|
|
Logged
|
|
|
|
|
vwhelmot
|
|
« Reply #175 on: November 21, 2015, 10:06:04 am » |
|
|
|
|
|
|
Logged
|
|
|
|
|
broen messiaen
|
|
« Reply #176 on: November 21, 2015, 12:26:19 pm » |
|
very impressive!
could you show how you did the mounting of the rear apron? i see some kind of fastener system to mount it.
thanks
|
|
|
|
|
Logged
|
|
|
|
|
karl h
|
|
« Reply #177 on: November 23, 2015, 09:27:06 am » |
|
as always - watching in awe! i have no fucking idea of how you get it that clean, i tried but i never even come close to your work....
|
|
|
|
|
Logged
|
|
|
|
|
vwhelmot
|
|
« Reply #178 on: November 23, 2015, 13:23:03 pm » |
|
Thanks, just takes time and lots of it. As for the rear valence, I will show how I`ve done it a bit later. Took a bit of head scratching to get it right. |
|
|
|
|
Logged
|
|
|
|
|
Deanodynosaurs
|
|
« Reply #179 on: November 24, 2015, 17:59:48 pm » |
|
F*ckin Hell!! Your attention to detail is awesome, and you metal working skills are amazing!! Proper respect to you.  Dude  |
|
|
|
|
Logged
|
|
|
|
|
 The Cal-look Lounge


 Author