|
vwhelmot
|
 |
« Reply #180 on: December 05, 2015, 20:17:04 pm » |
|
Cheers Neil , if it turns out anywhere near as good as your looker then I will be happy. While the bodywork has taken up all my time and it's still ongoing, all the other parts are being worked on in the background. The odd couple of hours here and there, lunch times etc are being used for all the other stuff that needs doing. A full engine strip and rebuild was reqd even though it ran with no problems or issues, I just wanted it freshening up and a hike in capacity and power will go down well. Cosmetically it needs a tonne of work, linkage and manifolds and a whole host of other parts are being changed too. The manifolds needed changing because the tall skat ones made the stacks foul the decklid and that just won't do. I bought a set of unbranded short ones and set about match porting them to my Jeff Denham heads. Shame really as I spent an age polishing the tall ones  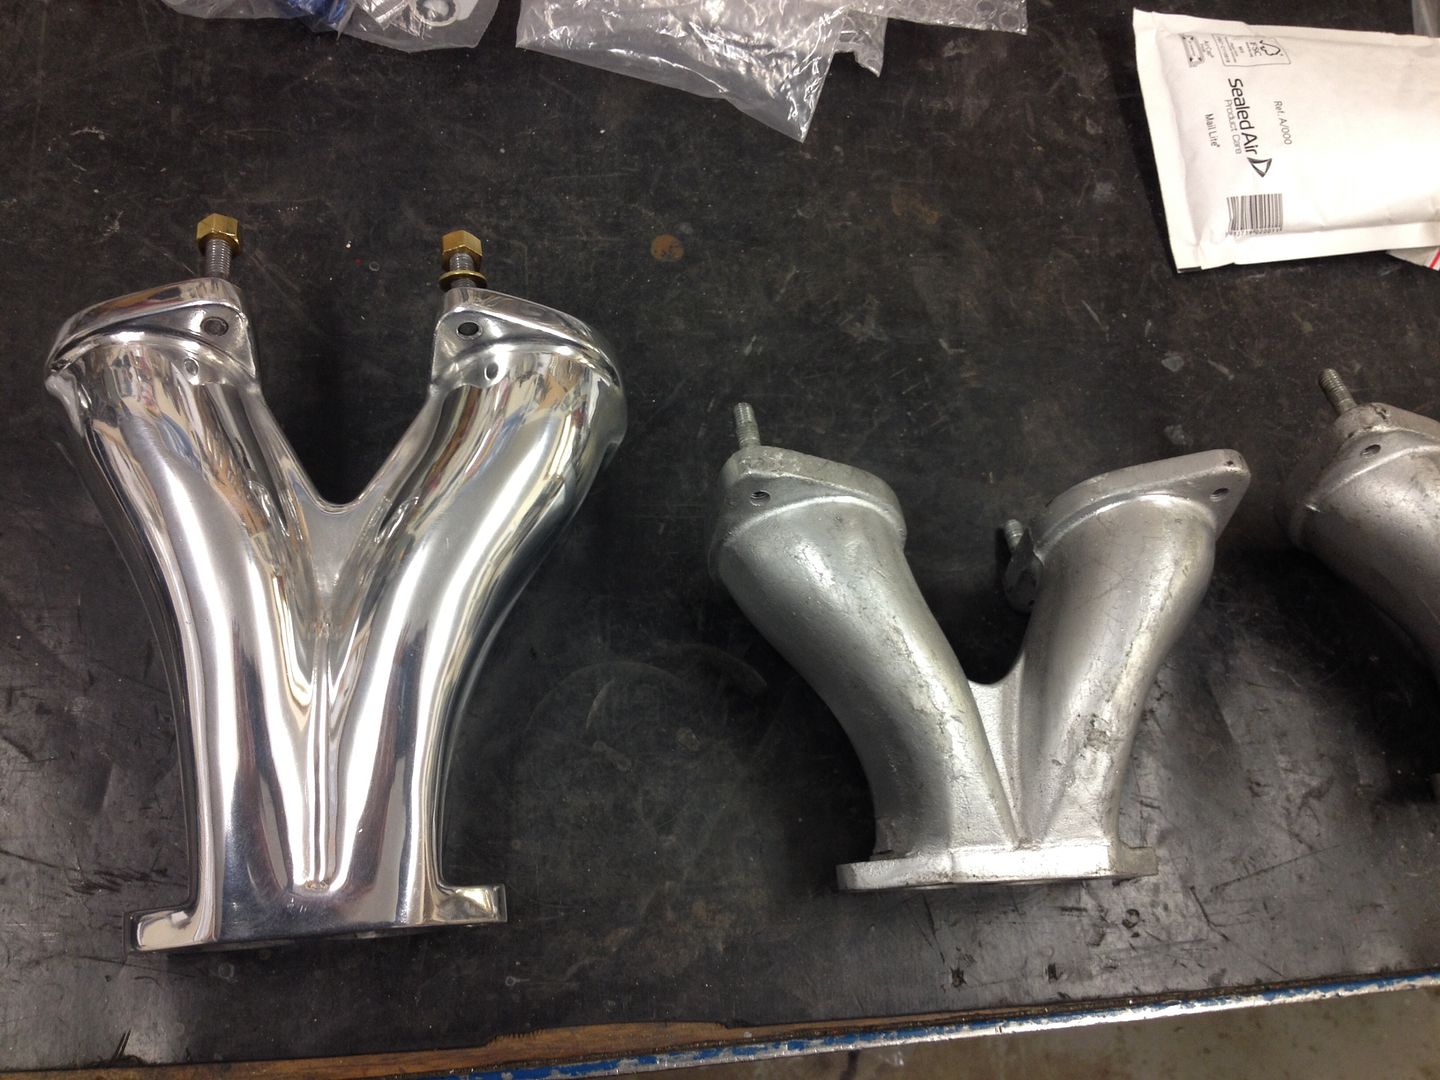 Copying the port shape 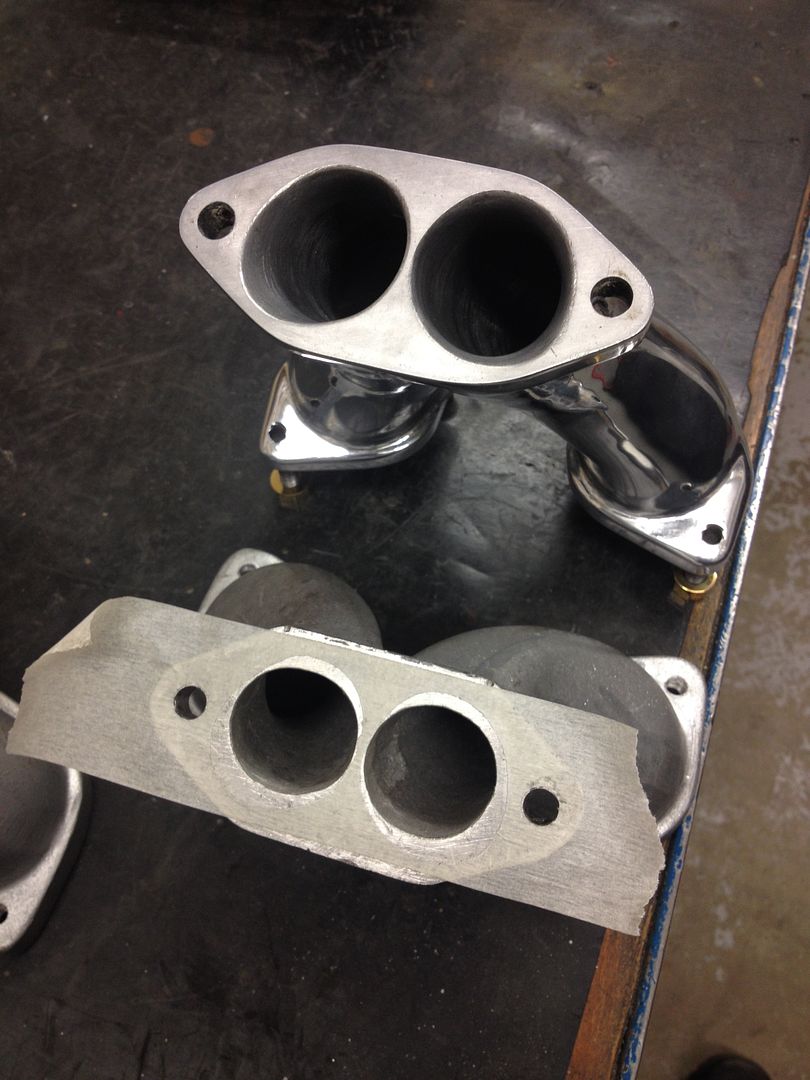 Bought the necessary tools 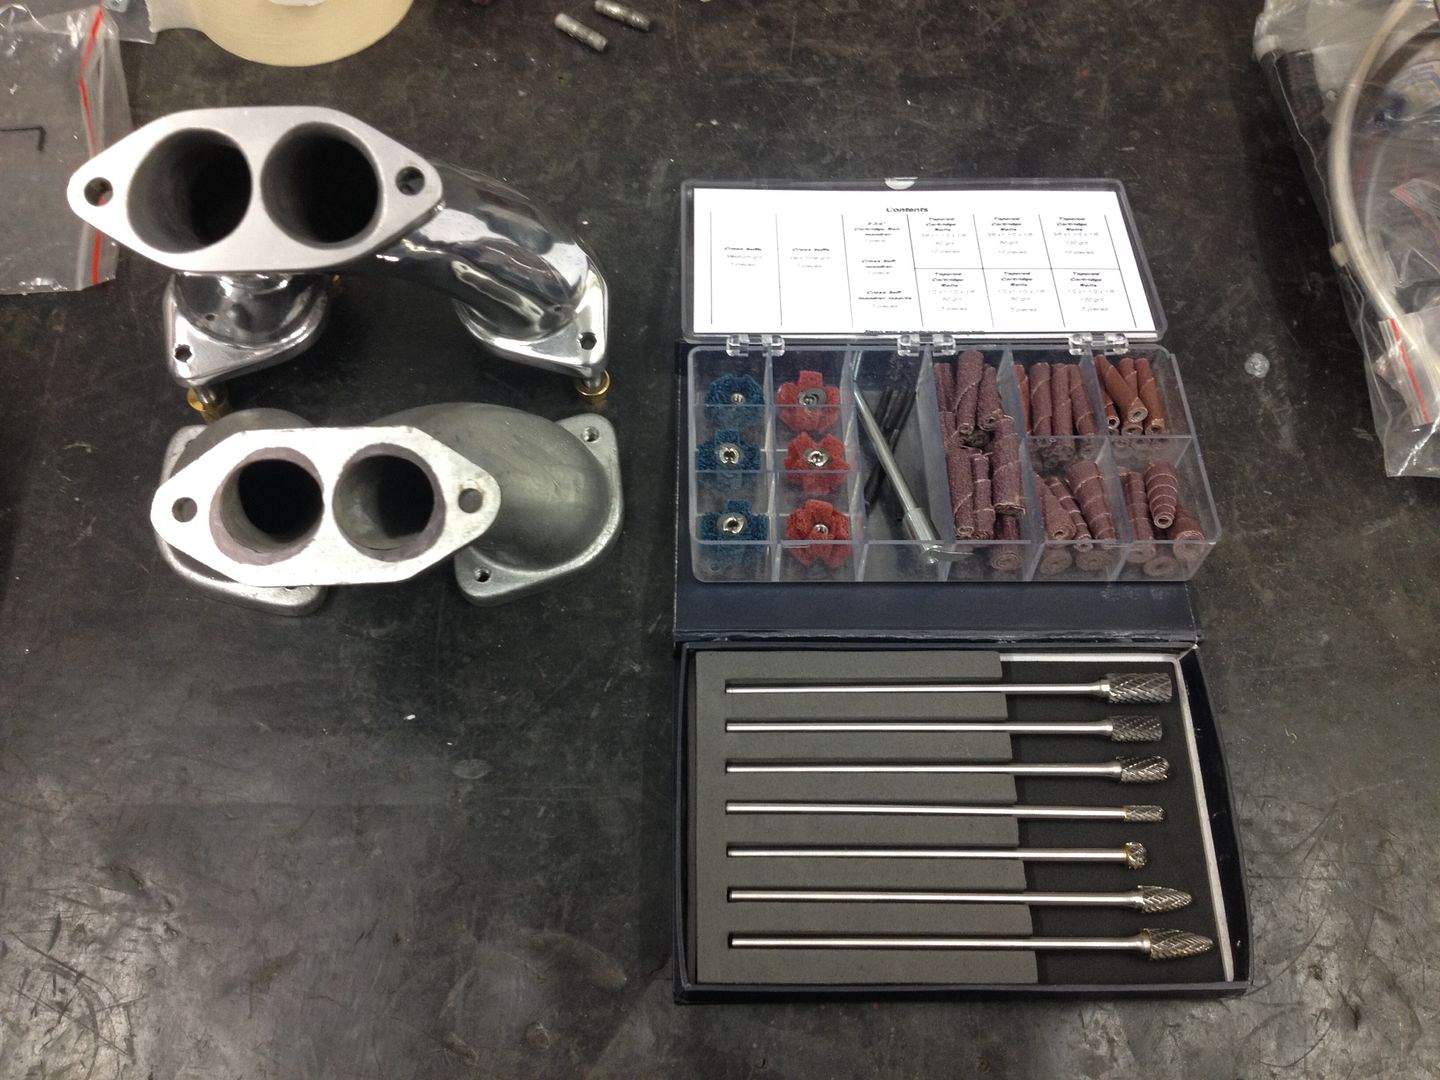 And got on with it 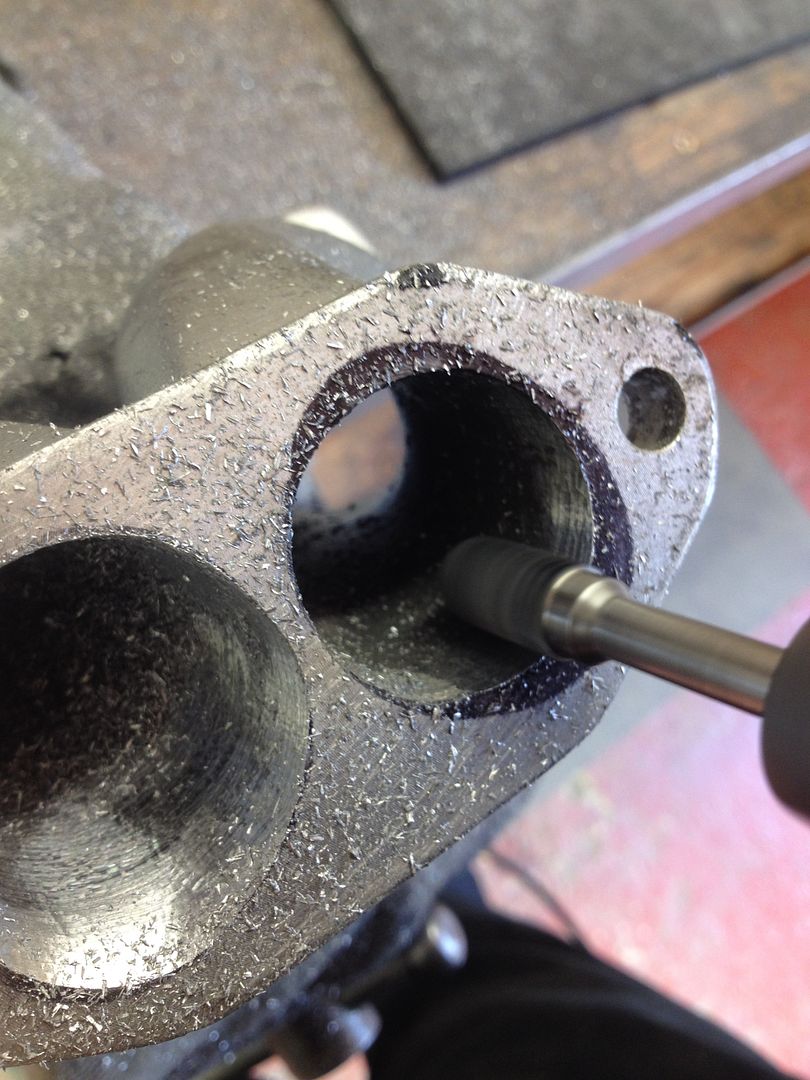 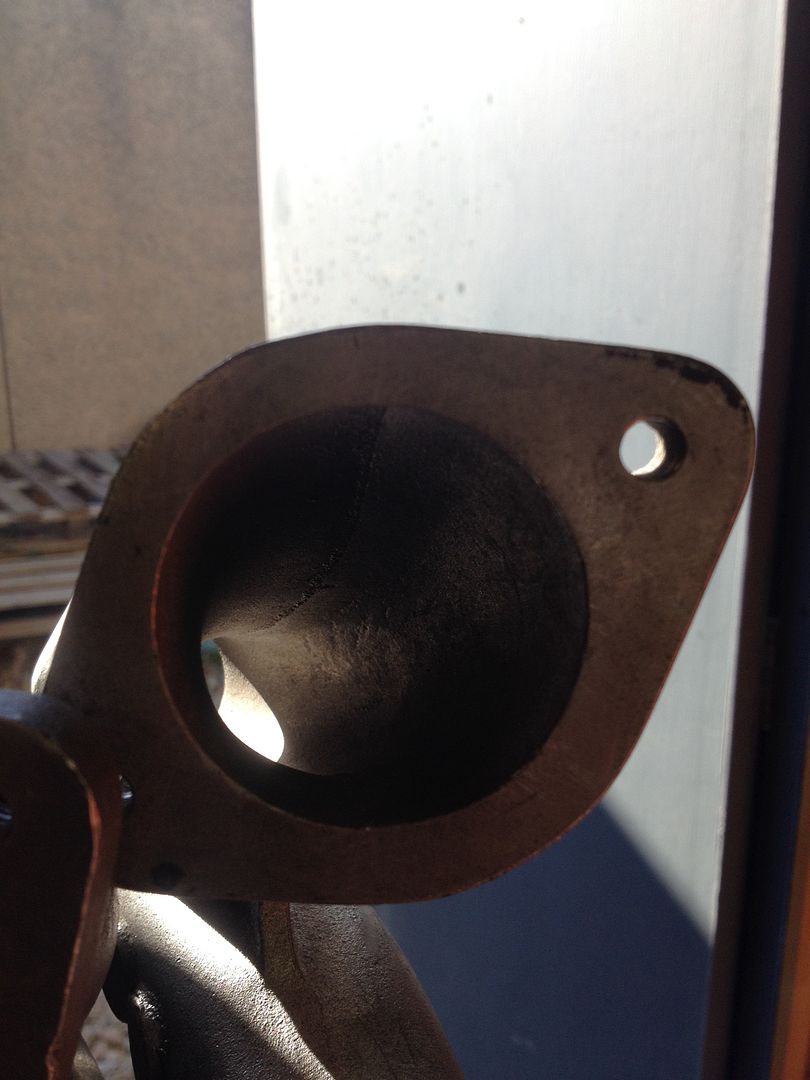 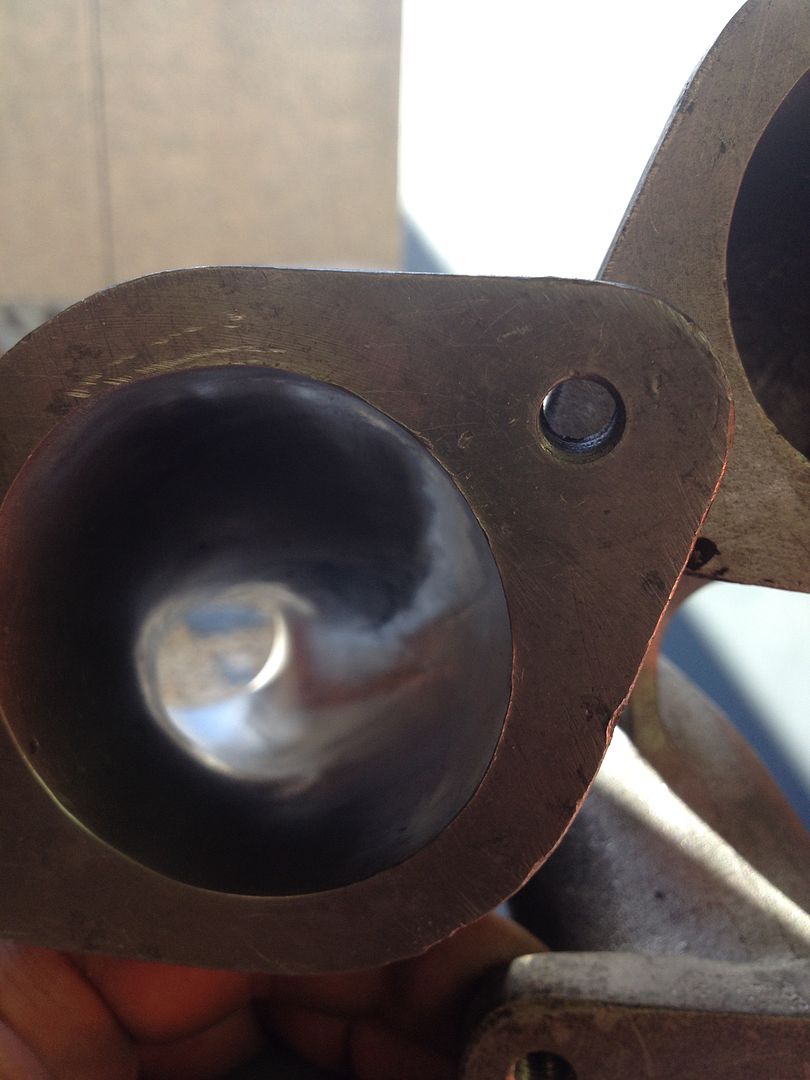 They were rough castings 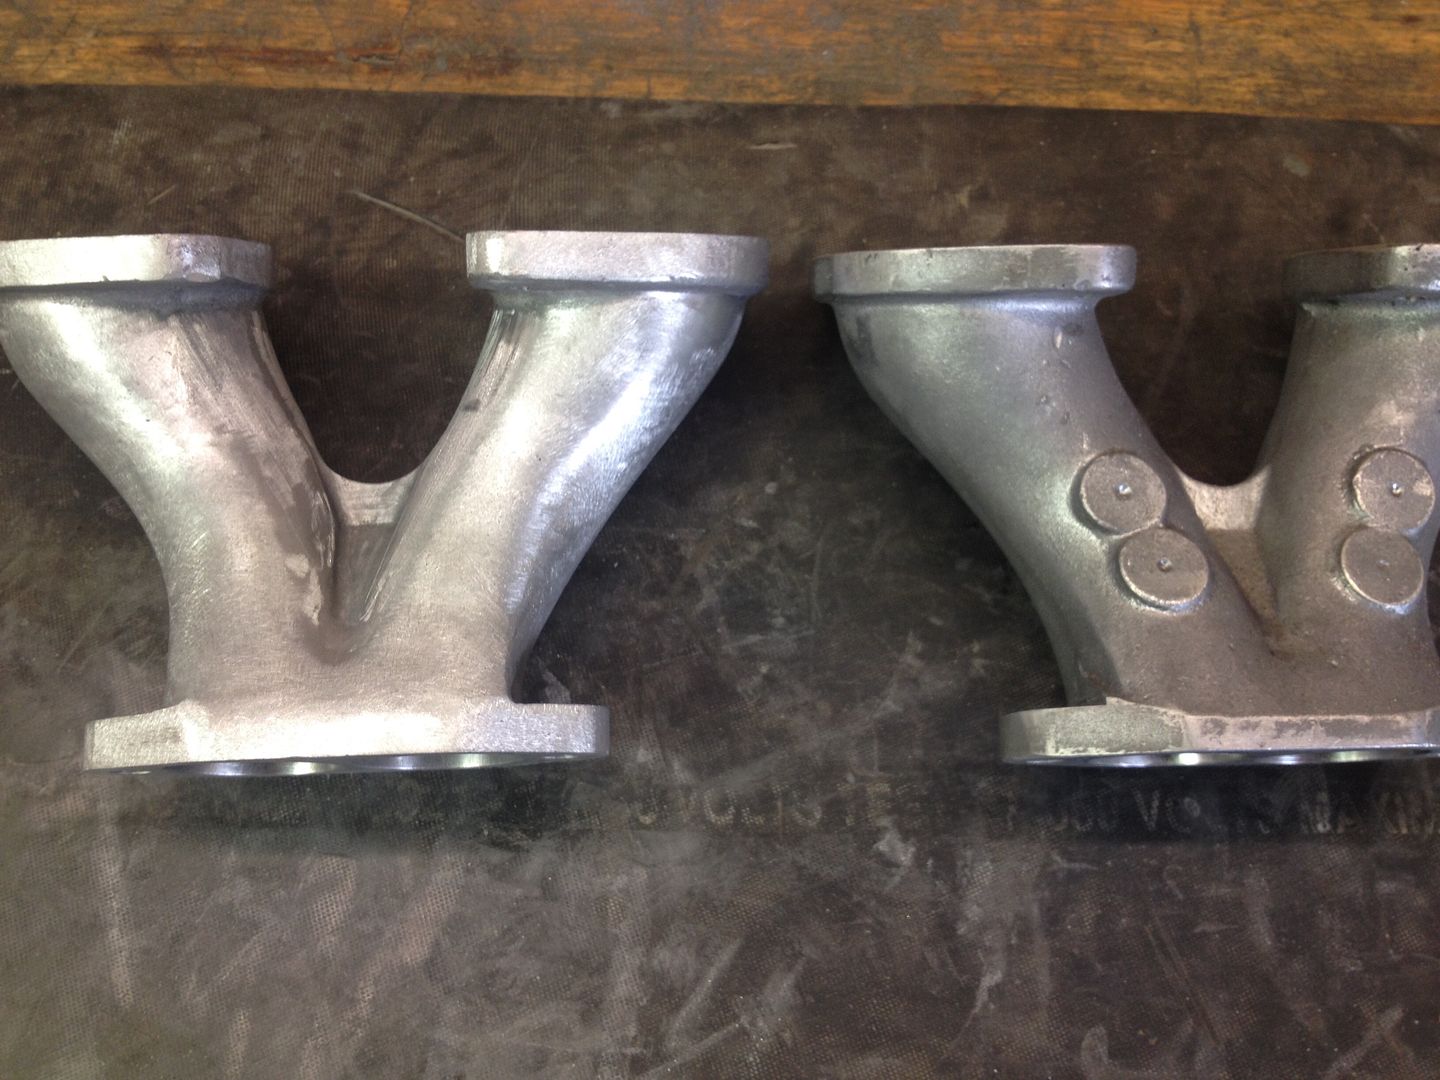 Very rough! 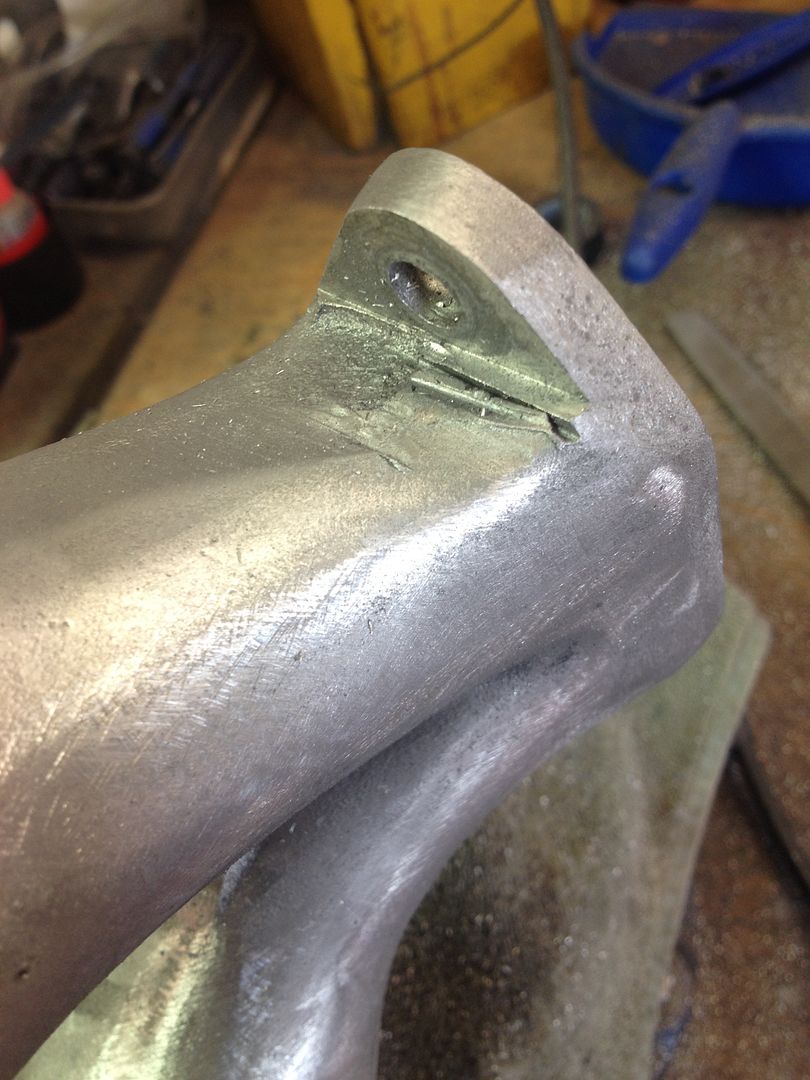 Got there in the end 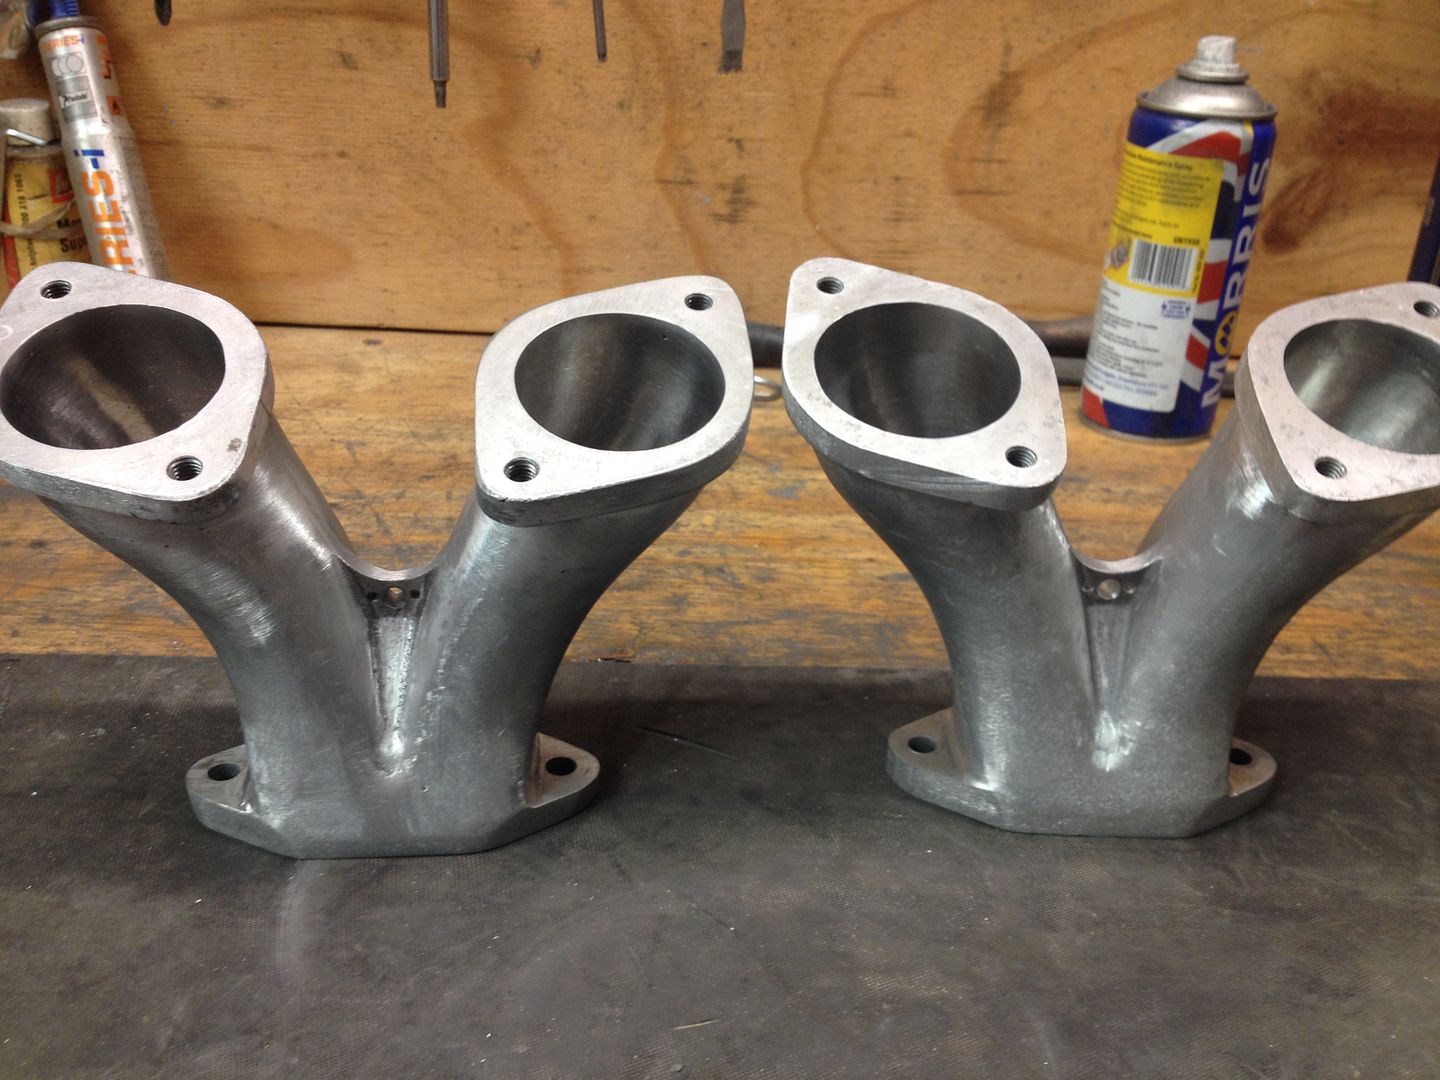 |
|
|
|
|
 Logged
|
|
|
|
|
vwhelmot
|
|
« Reply #181 on: December 05, 2015, 20:31:16 pm » |
|
|
|
|
|
|
Logged
|
|
|
|
|
leec
|
|
« Reply #182 on: December 05, 2015, 20:47:06 pm » |
|
Nice work. What tool and tool bits are you using to do the manifolds?
Lee
|
|
|
|
|
Logged
|
|
|
|
|
vwhelmot
|
|
« Reply #183 on: December 05, 2015, 21:04:35 pm » |
|
Cheers. I used a bergen long burr set but to be honest a short set did the job. HPS supplied the sanding roll set. Not cheap stuff but very handy! Got a blue point die grinder to use with the long burrs so I could regulate the speed. Mainly used a Mikita electric die grinder for most of the job.
|
|
|
|
|
Logged
|
|
|
|
|
leec
|
|
« Reply #184 on: December 05, 2015, 21:30:21 pm » |
|
Great, have been looking for an electric die grinder for a while. What model is yours?
Lee
|
|
|
|
|
Logged
|
|
|
|
|
vwhelmot
|
|
« Reply #185 on: December 05, 2015, 21:36:35 pm » |
|
It's a really old one mate. 110v which I run off a transformer.
|
|
|
|
|
Logged
|
|
|
|
|
leec
|
|
« Reply #186 on: December 05, 2015, 23:05:21 pm » |
|
Ok, that's cool. I've google'd a few  £30 for the Scat Traks? Lee |
|
|
|
|
Logged
|
|
|
|
|
vwhelmot
|
|
« Reply #187 on: December 05, 2015, 23:19:02 pm » |
|
They are on my mantelpiece.  |
|
|
|
|
Logged
|
|
|
|
|
BeetleBug
|
|
« Reply #188 on: December 06, 2015, 10:12:00 am » |
|
vwhelmot; what is the area at the tightest point in your new manifolds compared to the cylinder head intake channel and valve size? You should try to avoid thight areas throughout the intake channel since you do not want a second venturi.
Best rgs
BB
|
|
|
|
|
Logged
|
10.41 - 100ci - 1641ccm - 400hp
|
|
|
|
vwhelmot
|
|
« Reply #189 on: December 06, 2015, 11:04:09 am » |
|
I've done about as much porting on these manifolds as I can without having to weld them. The tightest area I suppose is the curve on the inside.
|
|
|
|
|
Logged
|
|
|
|
|
Deanodynosaurs
|
|
« Reply #190 on: December 07, 2015, 01:12:30 am » |
|
Cheers Neil , if it turns out anywhere near as good as your looker then I will be happy.
Dude, its already better. Honestly, the standard of metal work and attention to detail on this car is another level. If I ever do another car this will be the standard I aim for. Dude  |
|
|
|
|
Logged
|
|
|
|
|
Rocket Ron
|
|
« Reply #191 on: December 07, 2015, 08:25:59 am » |
|
Ok, that's cool. I've google'd a few £30 for the Scat Traks? Lee Lee I've got a nice 110v one if you need to borrow it Ta Ron |
|
|
|
« Last Edit: December 09, 2015, 09:13:49 am by Ron Elliot »
|
Logged
|
13.12 @ 101.84
Grooving out on life
You can't polish a turd but you can roll it in glitter
|
|
|
|
leec
|
|
« Reply #192 on: December 07, 2015, 08:32:26 am » |
|
Thanks Ron |
|
|
|
|
Logged
|
|
|
|
|
|
|
vwhelmot
|
|
« Reply #194 on: December 13, 2015, 12:29:11 pm » |
|
When it came to the channels , I knew that the closing plates were all wrong. Wrong shape and wrong pressing. I knew it would be a bit of a pain to drill out all the spot welds but it had to be done. 95 in each closing plate, my blair cutter did the trick. Check out the horrible pressing, it wasn't even a one piece panel 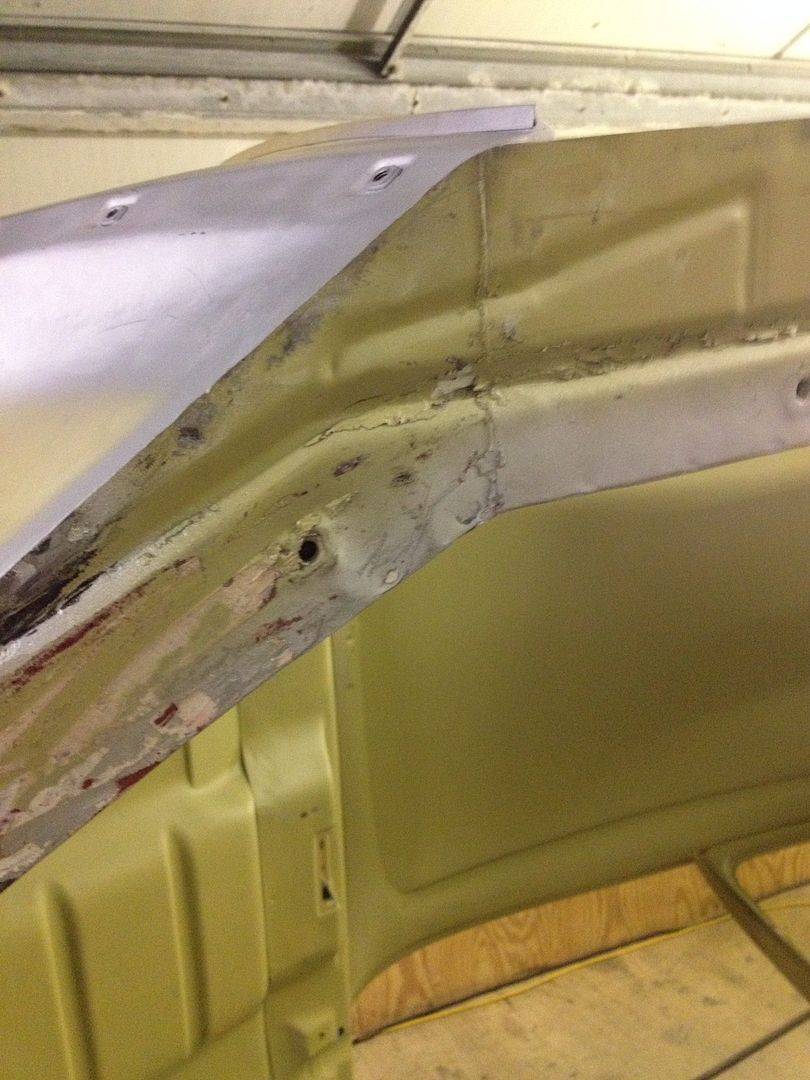 The way the crossmember lip on the outside is wrong too 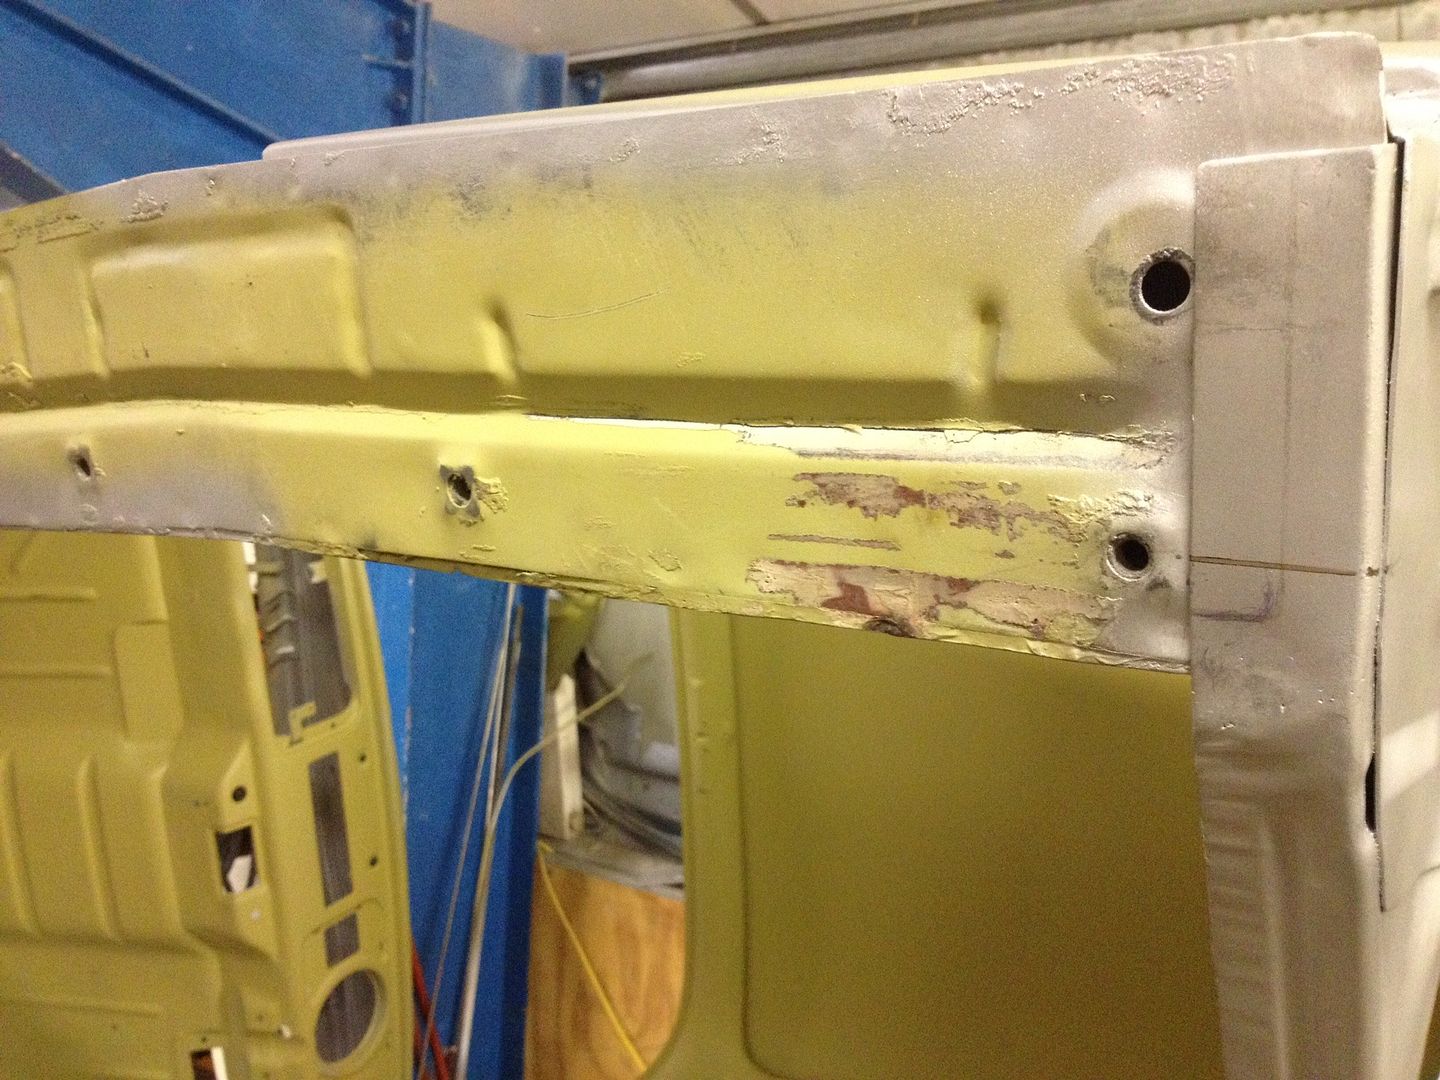 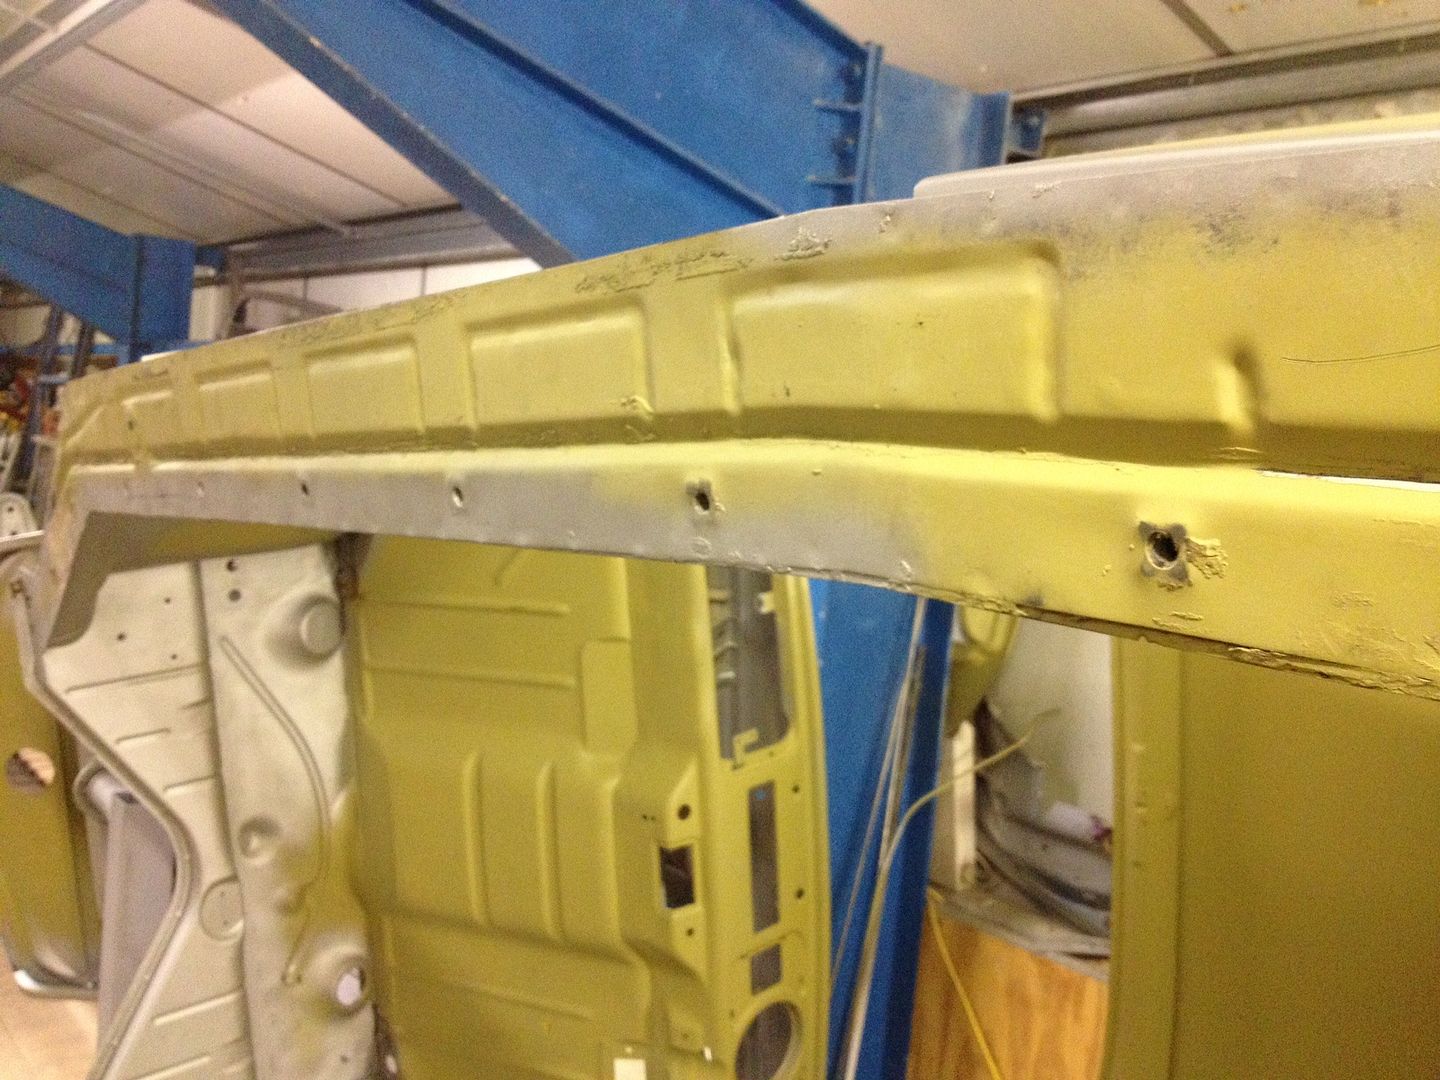 Steve Hook made me a pair of panels that are slightly different. The way the panel angles forward is different on the later channels , the early pressings had more of a curve so Steve made mine a bit wider at his point but I knew I would have to add more metal to this area to accommodate. See here 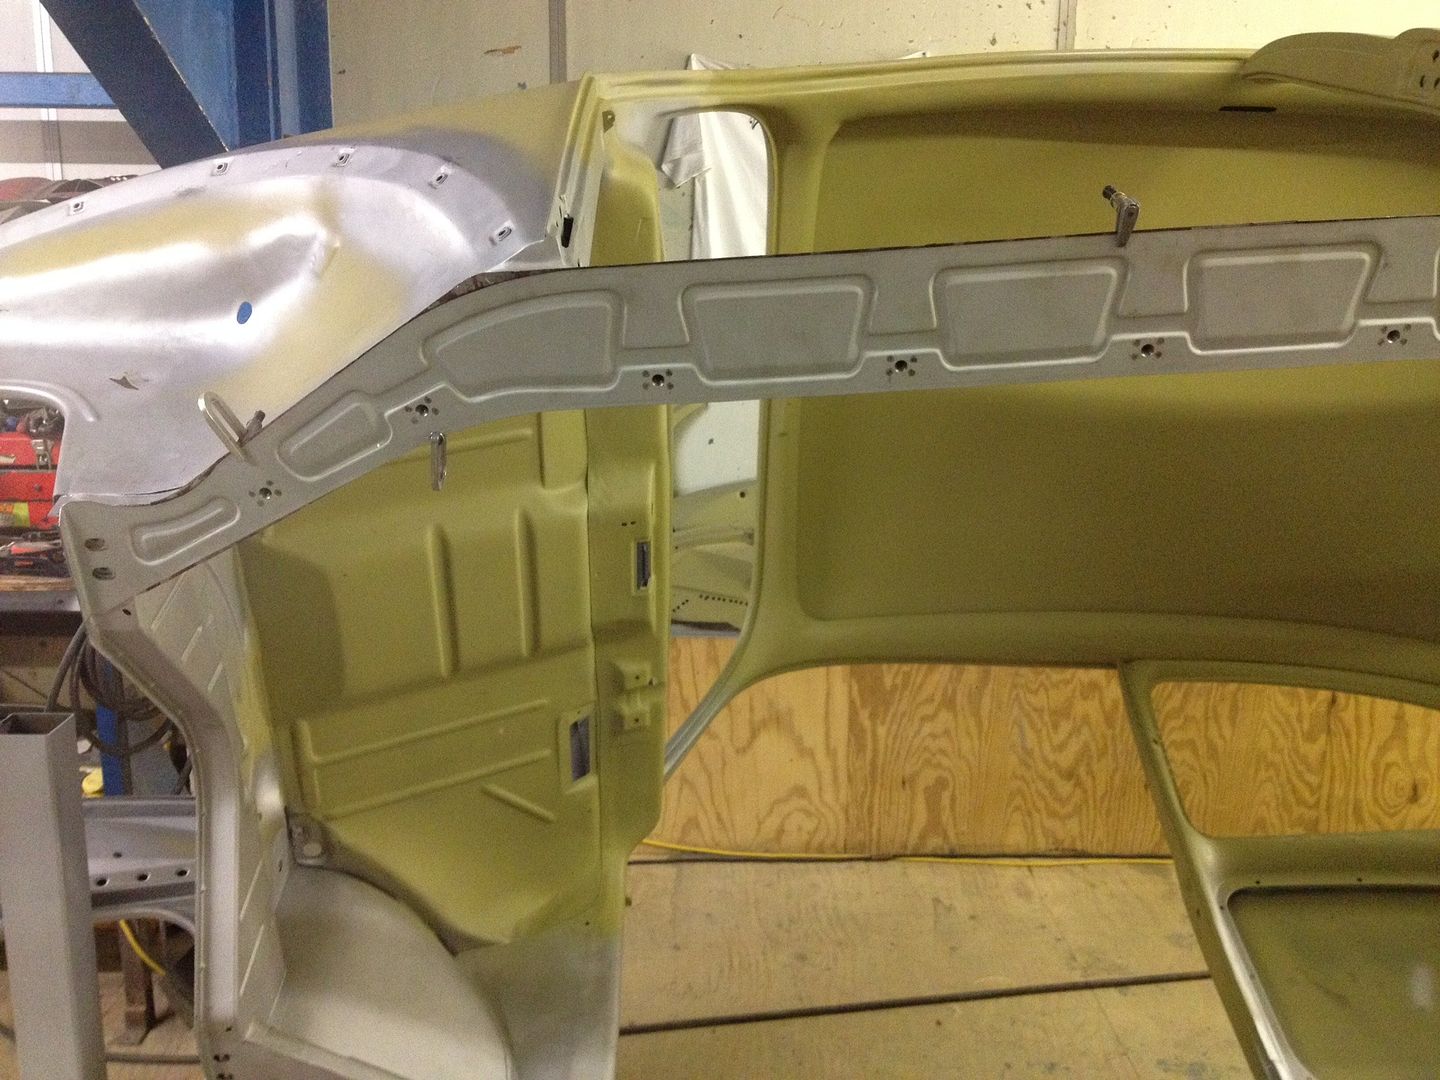 Blasted on the outside, rust on the inside 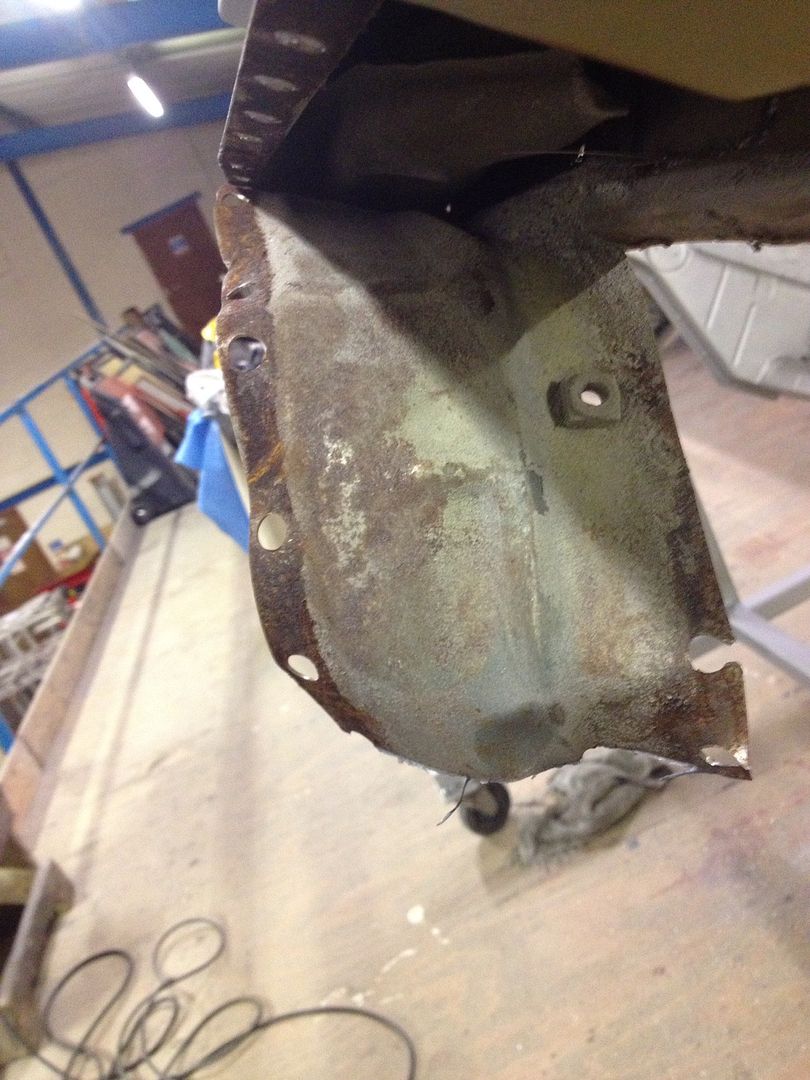  |
|
|
|
« Last Edit: December 13, 2015, 12:31:05 pm by vwhelmot »
|
Logged
|
|
|
|
|
vwhelmot
|
|
« Reply #195 on: December 13, 2015, 12:41:36 pm » |
|
|
|
|
|
|
Logged
|
|
|
|
|
vwhelmot
|
|
« Reply #196 on: December 13, 2015, 12:46:27 pm » |
|
|
|
|
|
|
Logged
|
|
|
|
|
richie
|
|
« Reply #197 on: December 13, 2015, 17:53:36 pm » |
|
Fourteen months ago  It's been a blur! 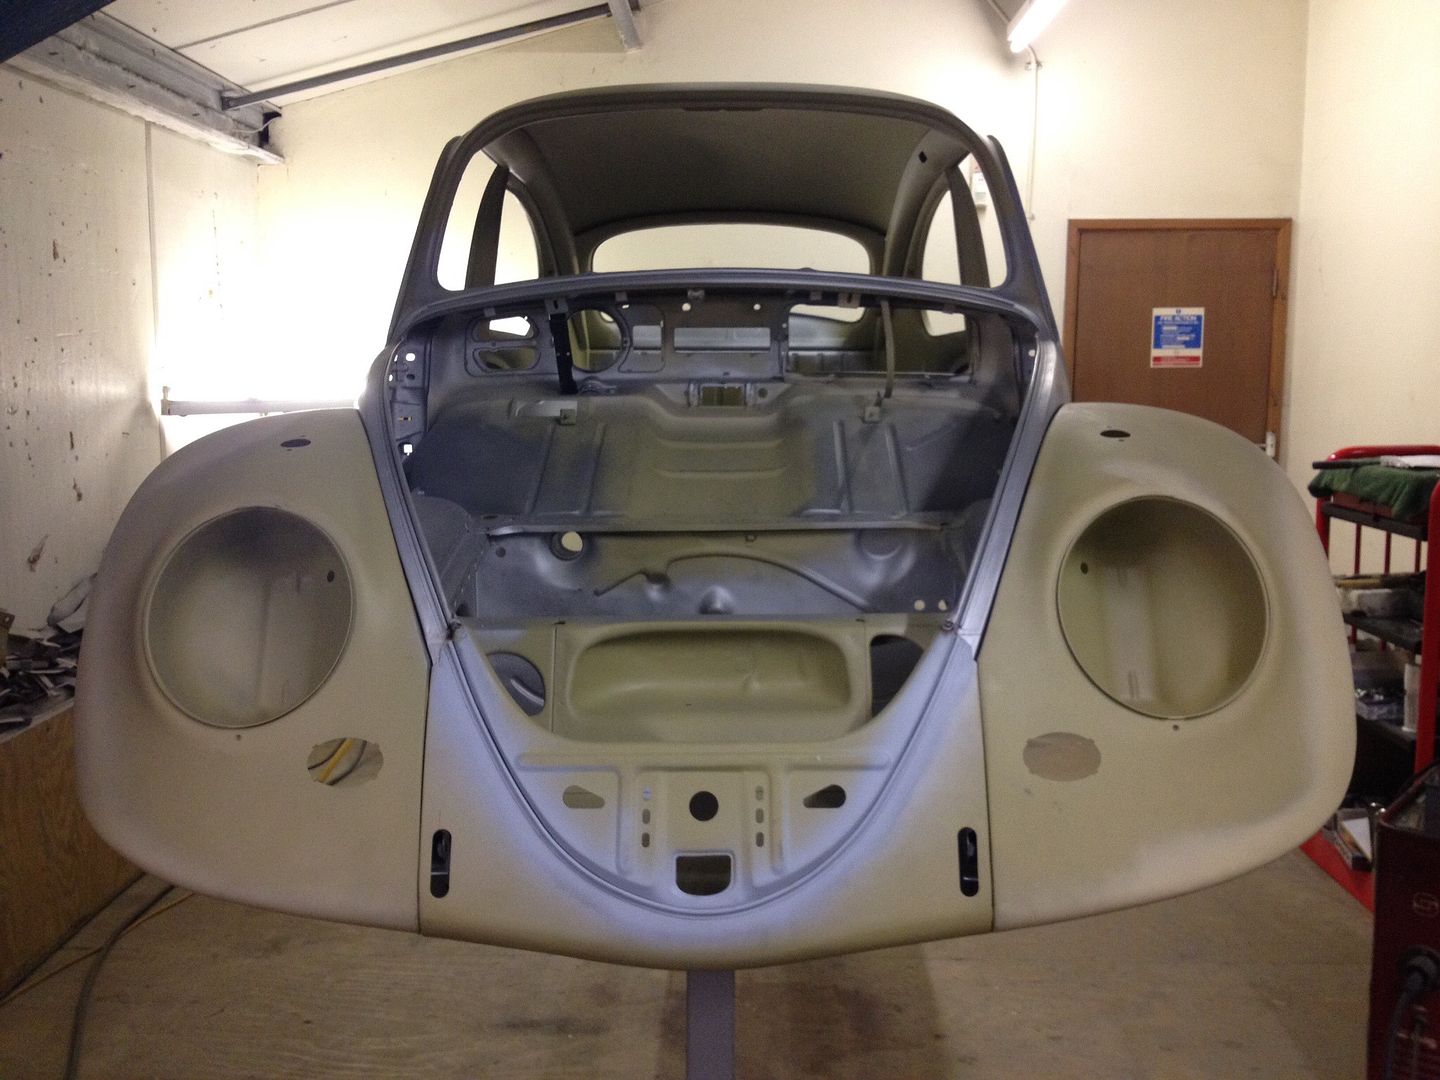 I think I prefer the 1st picture   Seriously stupid amount of work you have done, well done cheers Richie |
|
|
|
|
Logged
|
Cars are supposed to be driven, not just talked about!!! Good parts might be expensive but good advice is priceless  |
|
|
|
vwhelmot
|
|
« Reply #198 on: December 13, 2015, 18:21:35 pm » |
|
So do I haha Onto the other side it was much the same story, it also gave me the chance to remove the heater tubes too and the amount of glass dust that was trapped inside was an eye opener Just from one side 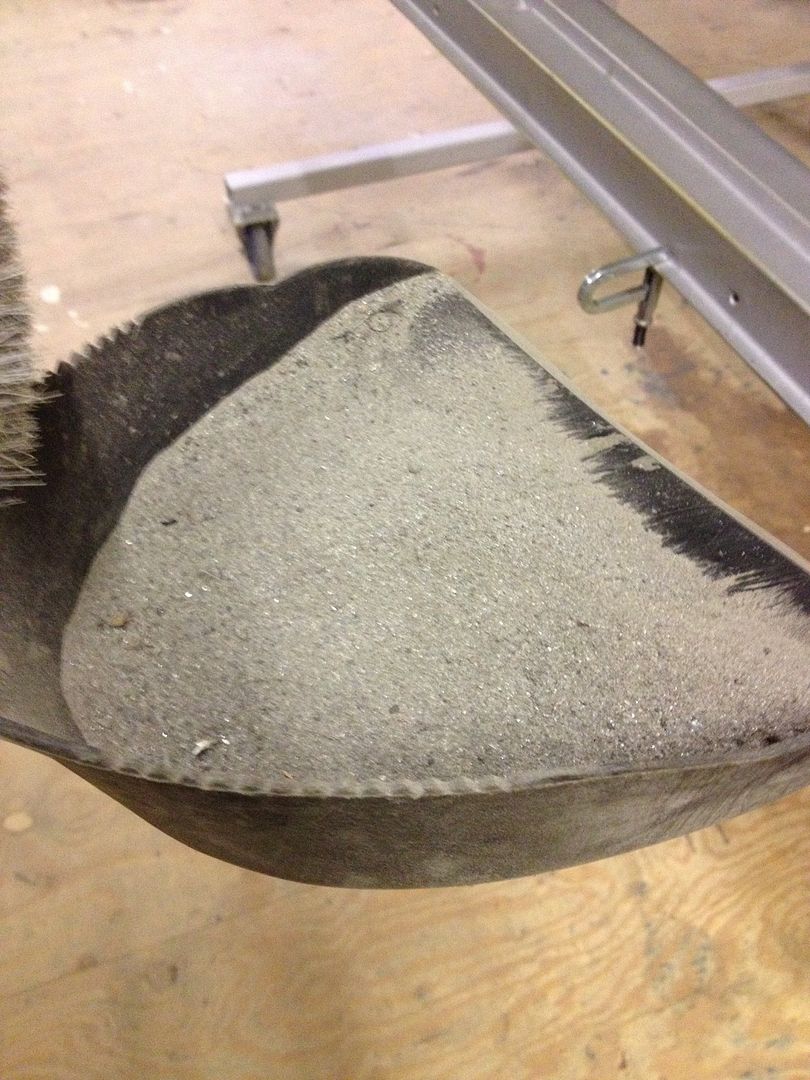 More spot weld drilling 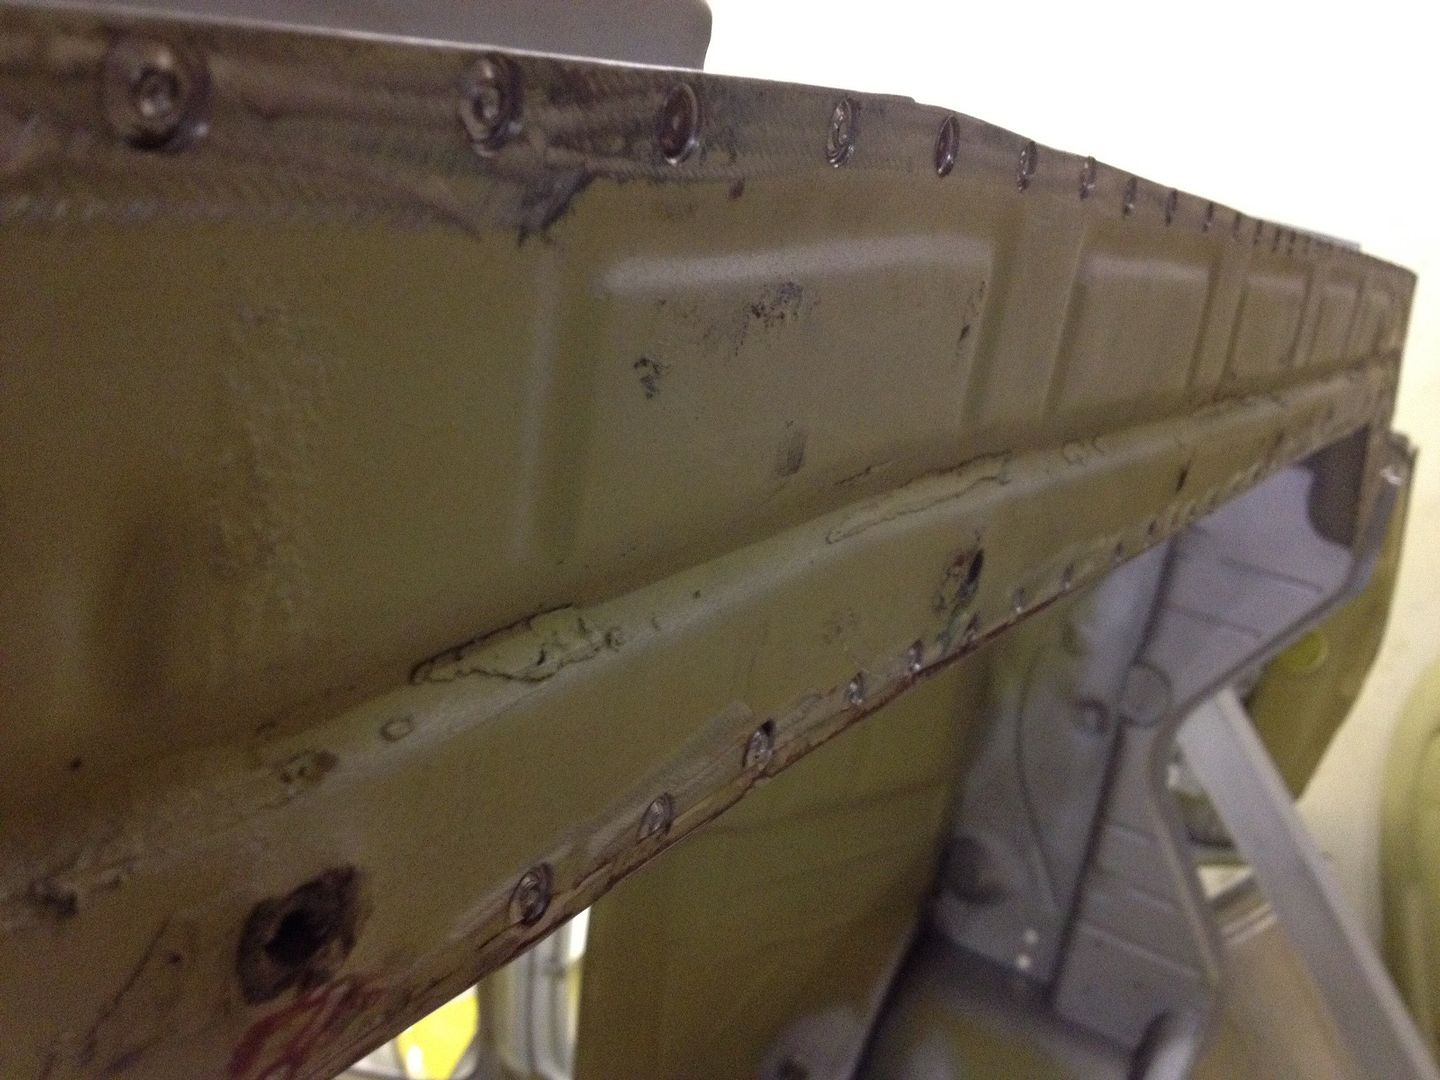 Had one of those rare moments when I had drilled out all the spots in the right place. Stuck the chisel in and it just fell apart. Happy days 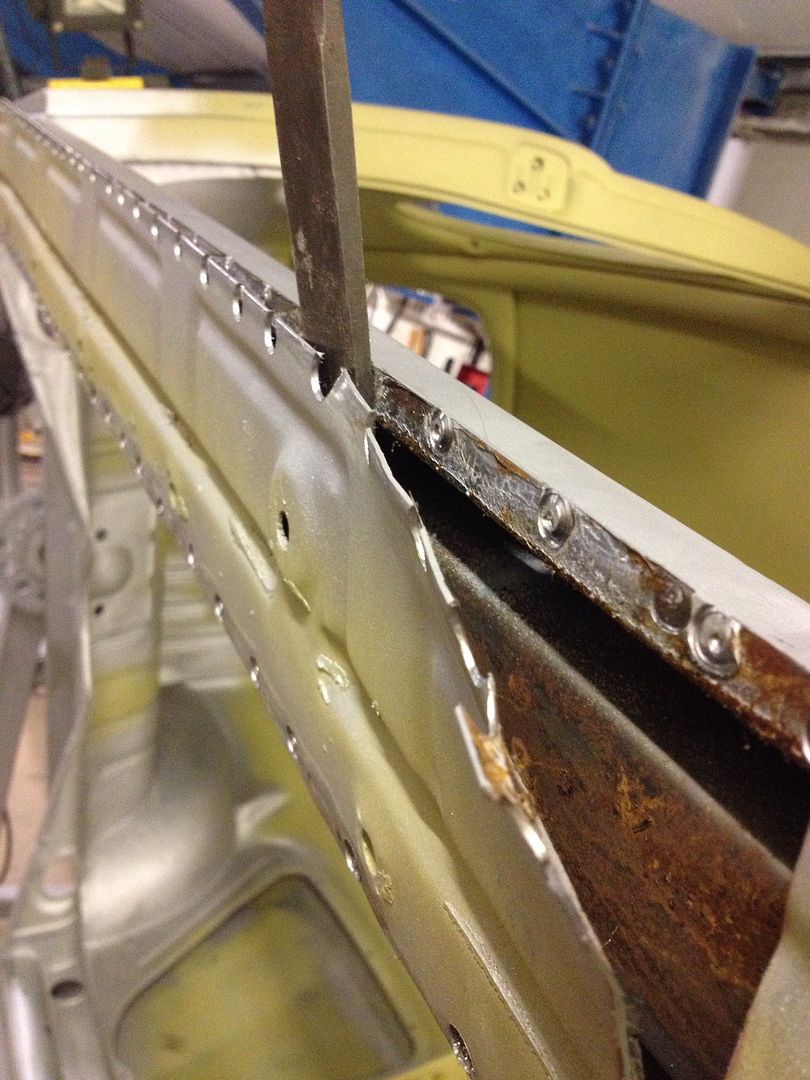 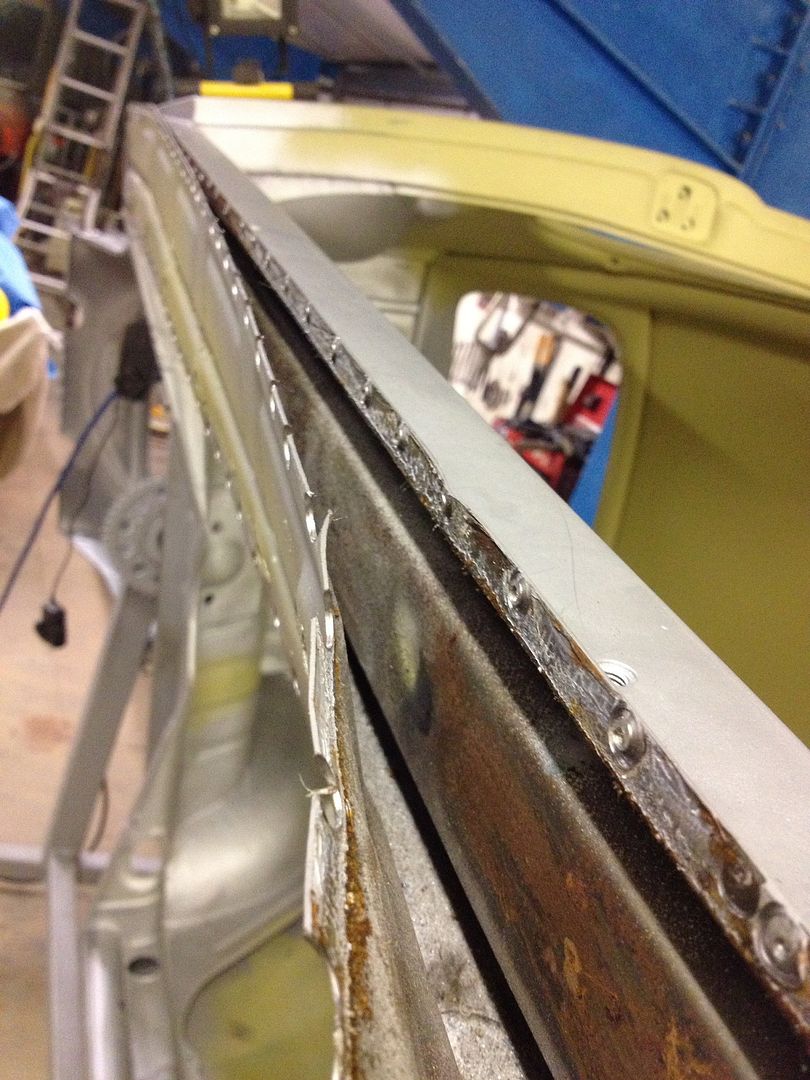 Goes to show where rust lurks 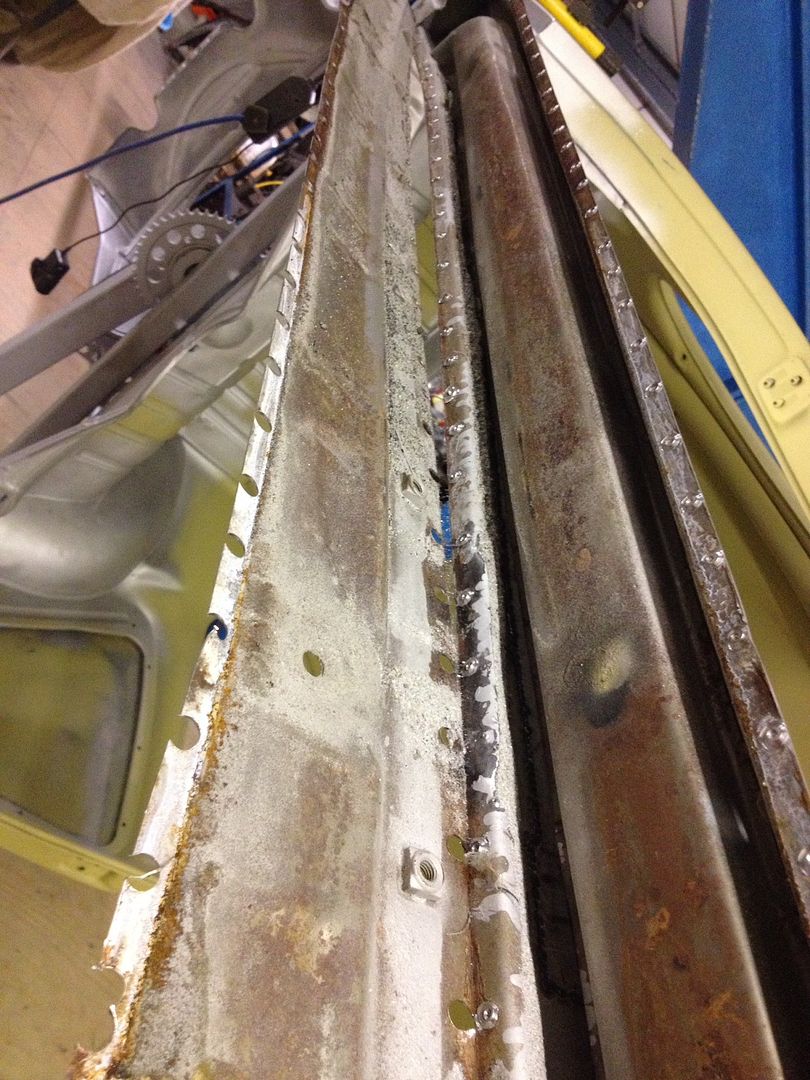 So, after filling up the whole are with crushed glass, it was onto cleaning up all the lips and getting the new panel ready for fitting. Welded the crossmember to the channel like this. 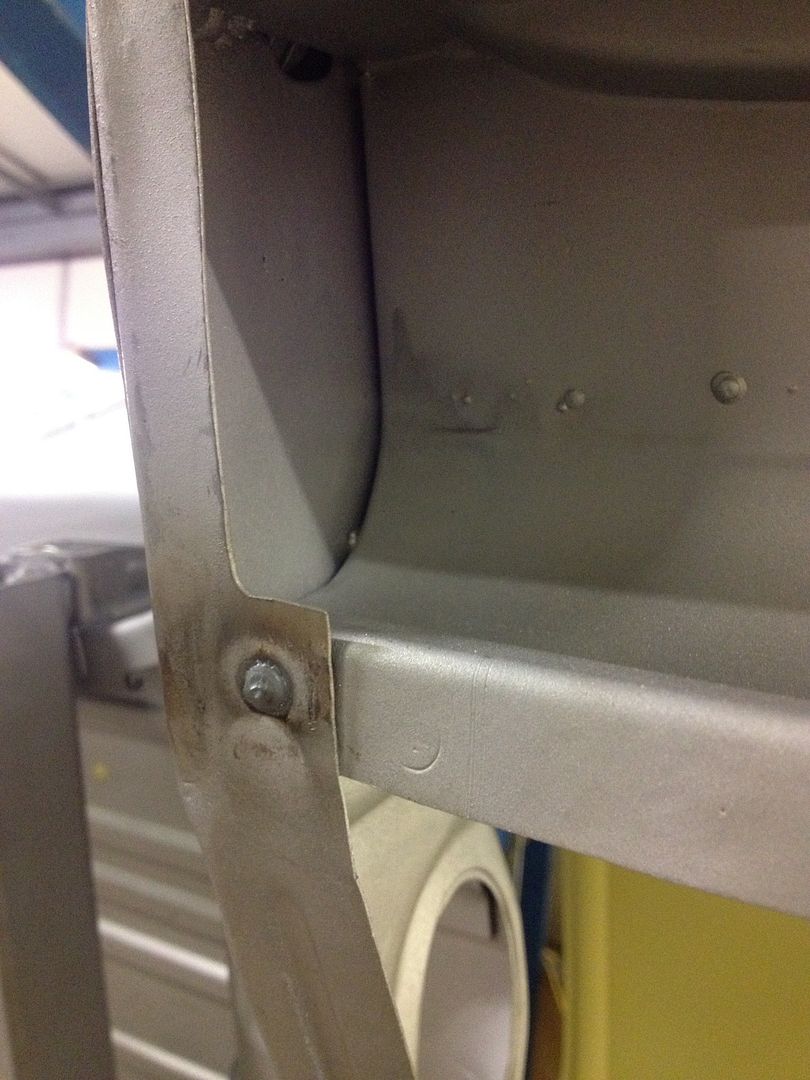  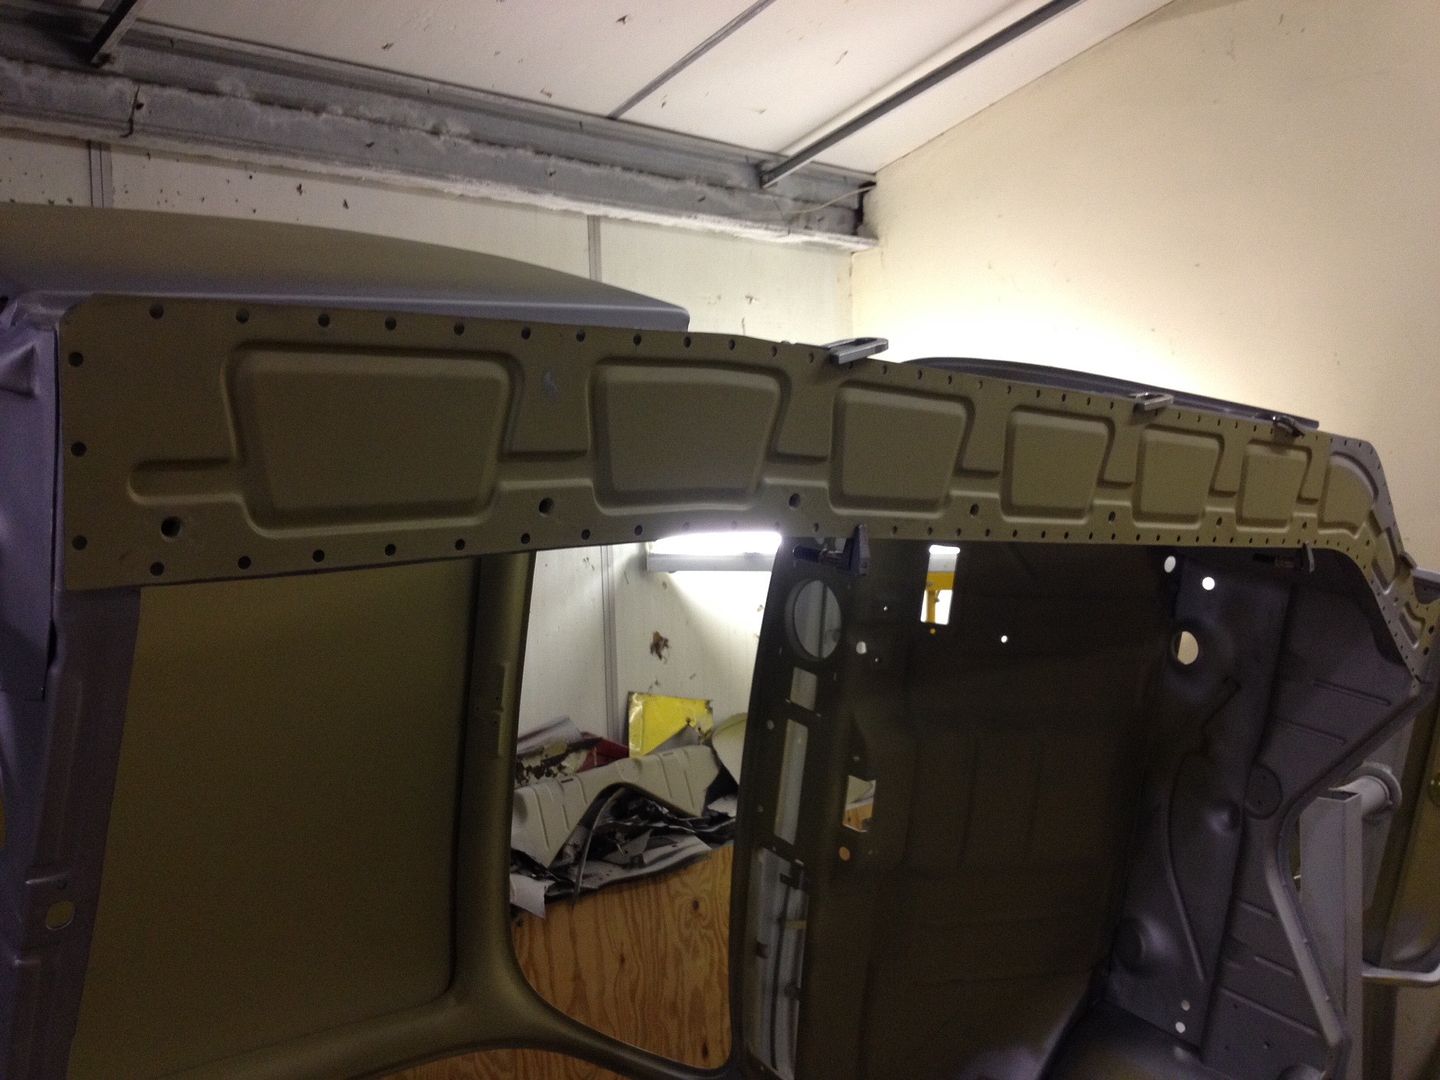 Clamping up the rear. It's such a strong structure when finished. Great design 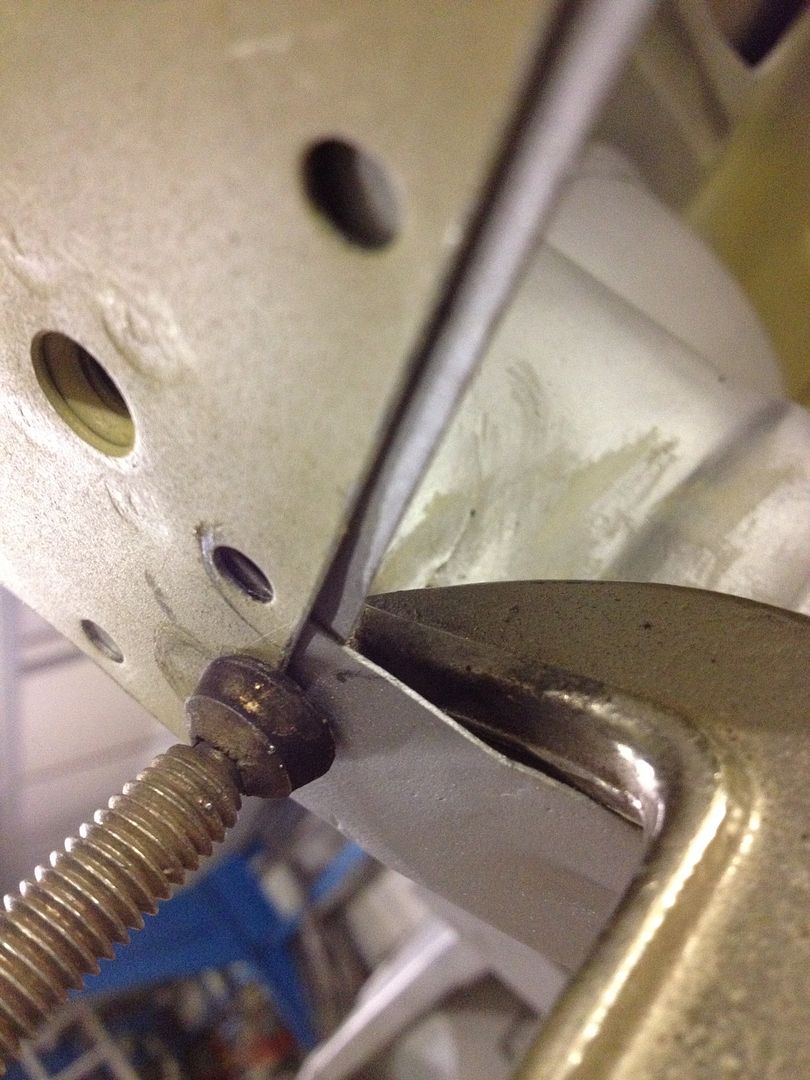 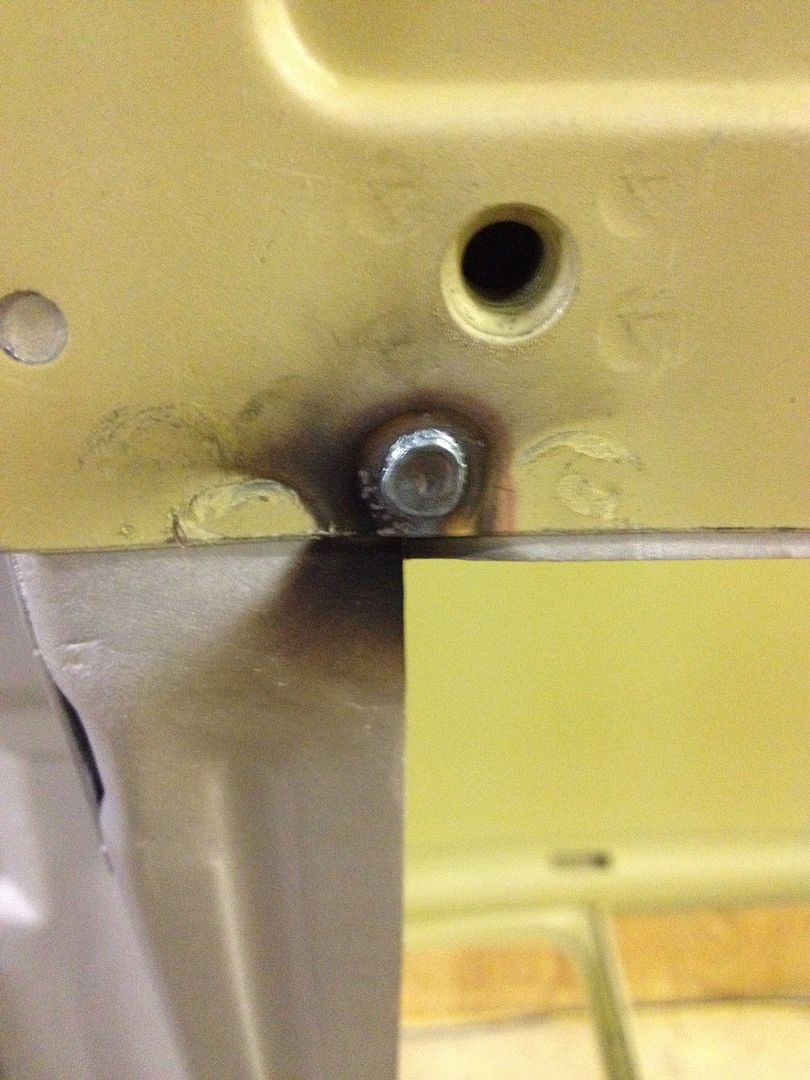 Took a long time to make sure everything was straight. The body had been placed on the pan a few times to align up the bolt holes 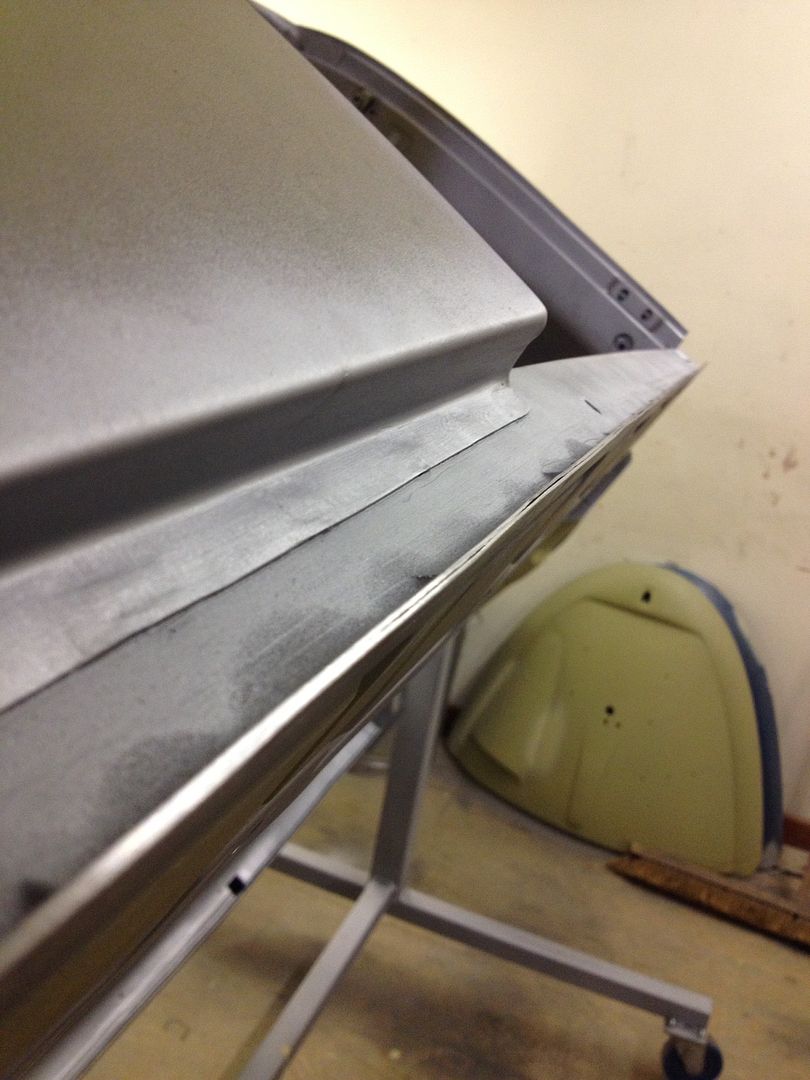 Finished 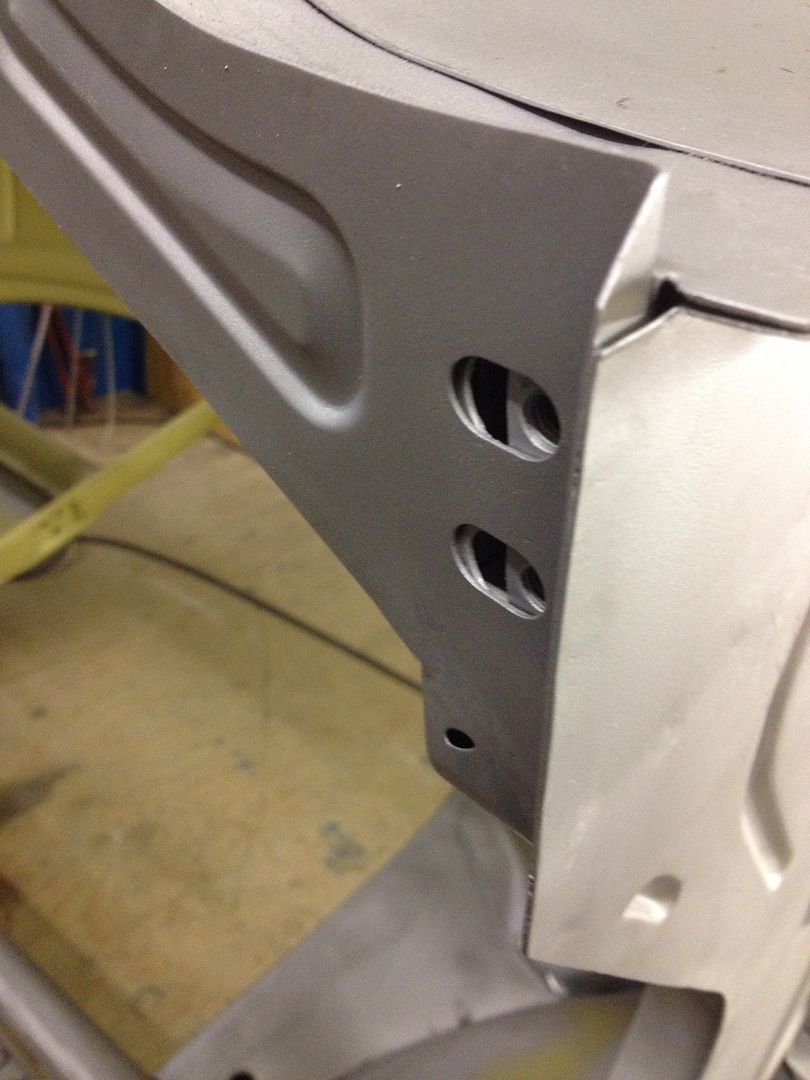 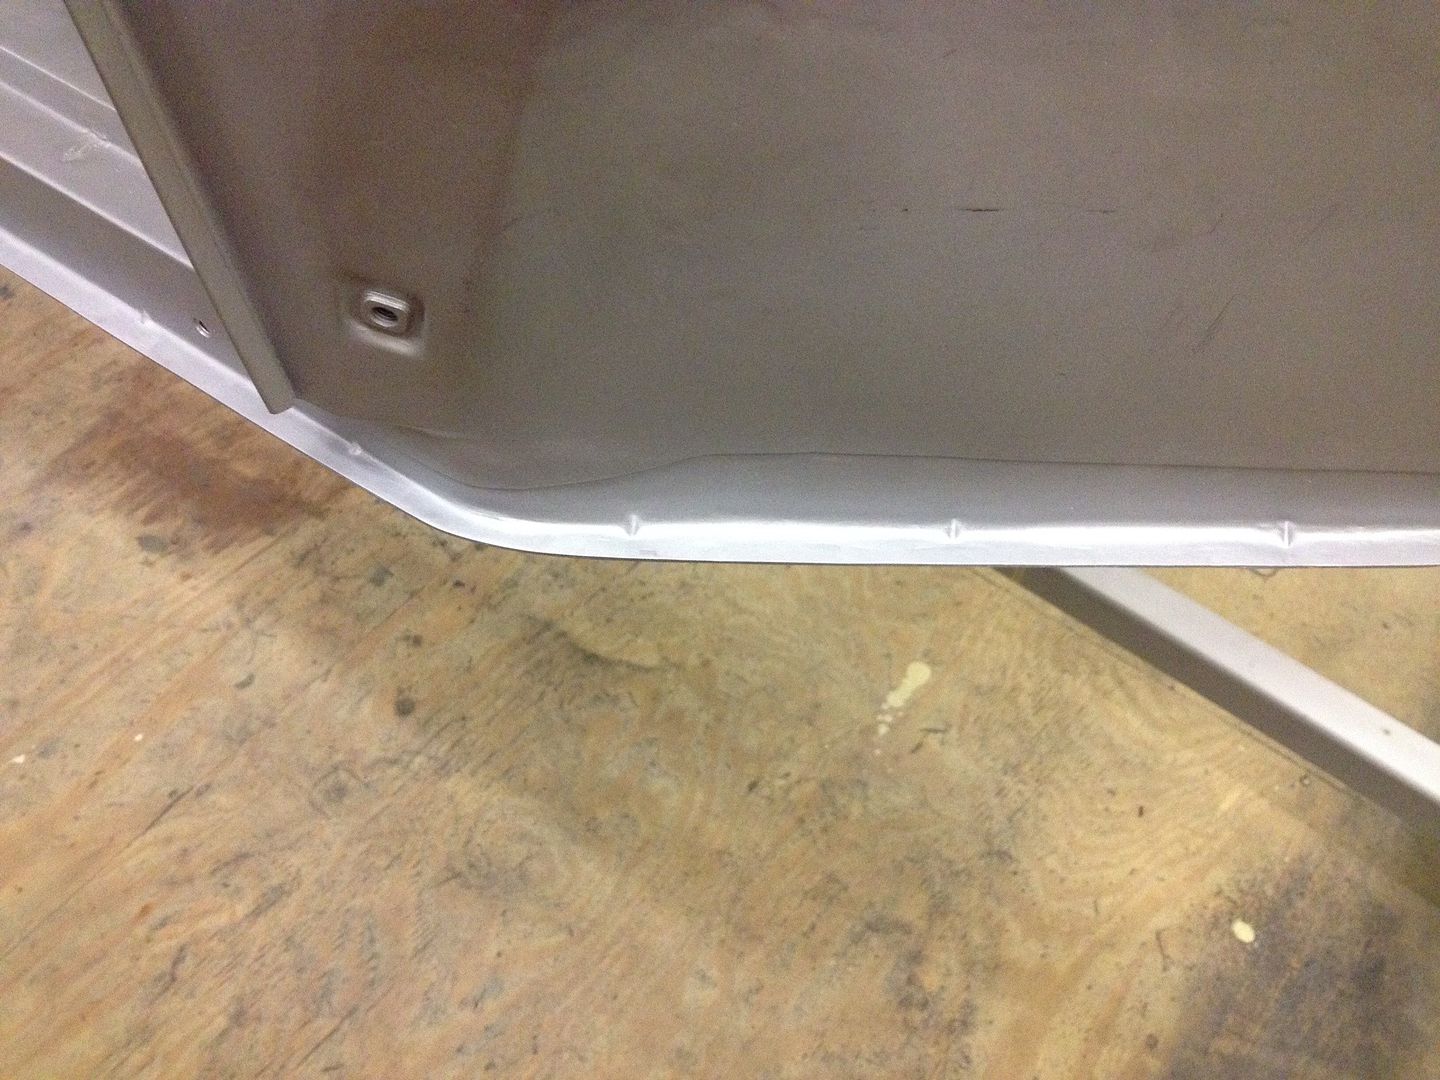 |
|
|
|
|
Logged
|
|
|
|
|
Zach Gomulka
|
|
« Reply #199 on: December 14, 2015, 00:32:20 am » |
|
You have the patience of a saint. Well done.
|
|
|
|
|
Logged
|
Born in the '80s, stuck in the '70s.
|
|
|
|
vwhelmot
|
|
« Reply #200 on: December 14, 2015, 08:37:51 am » |
|
I`m single |
|
|
|
|
Logged
|
|
|
|
|
karl h
|
|
« Reply #201 on: December 14, 2015, 08:52:00 am » |
|
running out of superlatives here....
|
|
|
|
|
Logged
|
|
|
|
|
vwhelmot
|
|
« Reply #202 on: December 15, 2015, 15:29:45 pm » |
|
Cheers Getting the front valence on was pretty straight forward, welding the seal clamping strip is a bit of a pain, its very hard to attach it neatly and to bend it right. I found the best way was to run a steel rod up through the strip and after that it was a lot easier to bend without kinking it. I welded it from behind too. The valence itself is an Autocraft engineering item. Its a nice pressing, fitted well but I did clean and straighten some of the edges a bit. It would be nice if they offered one with the seal strip already attached but I guess they know that's its a pain to do. 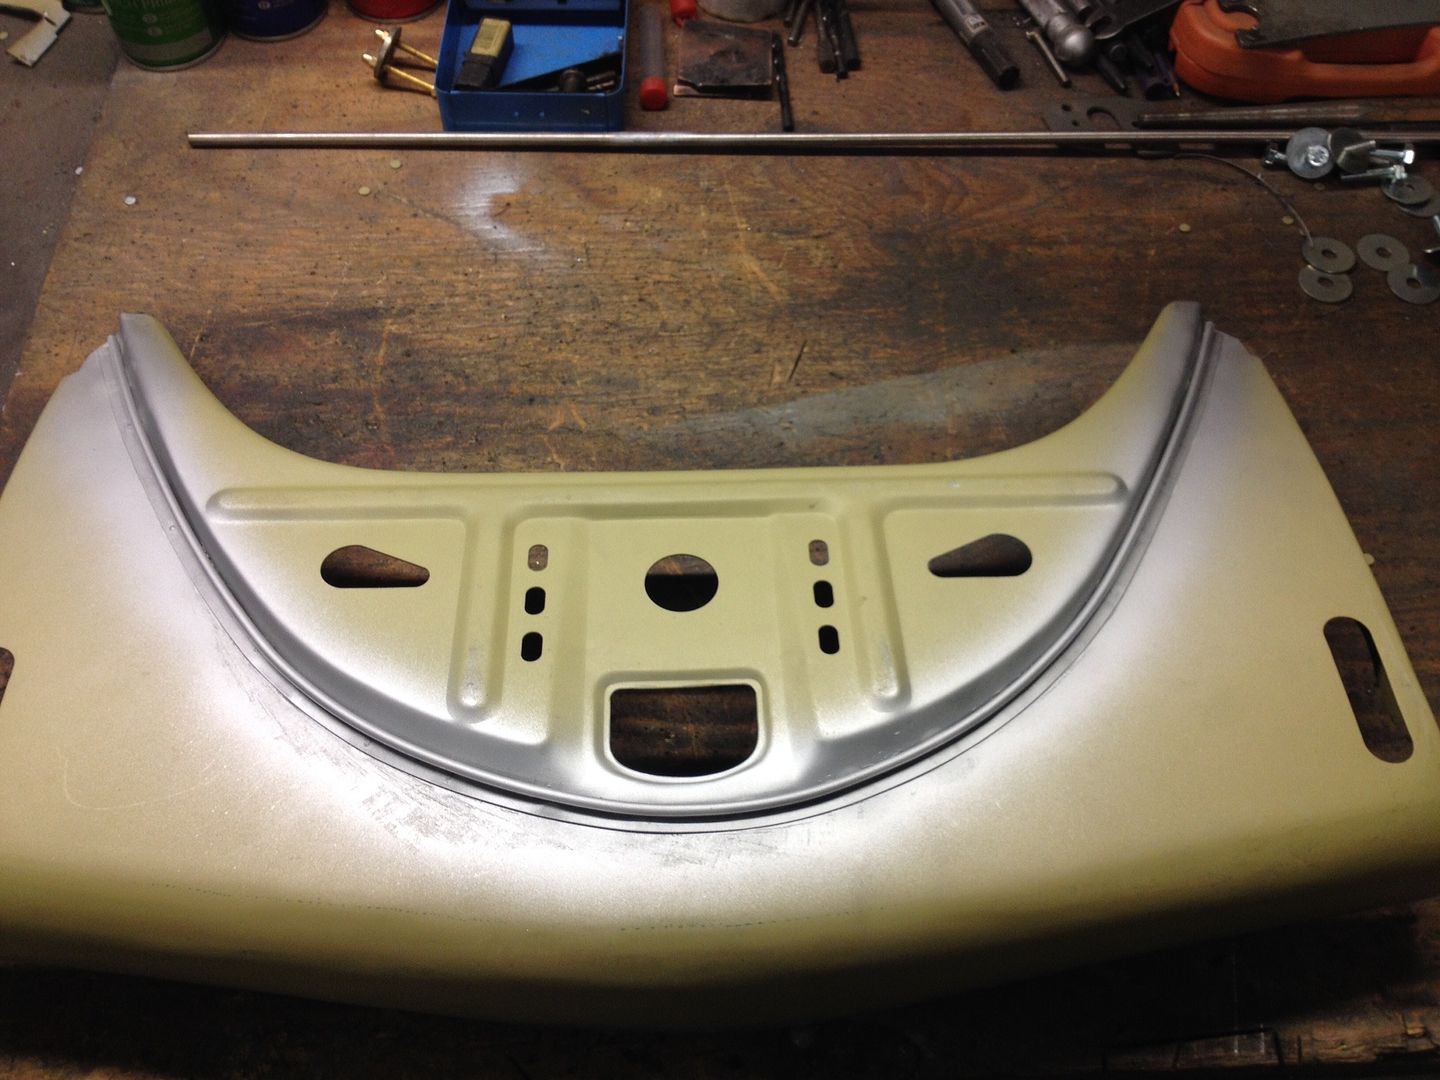 Wings on to check fitment 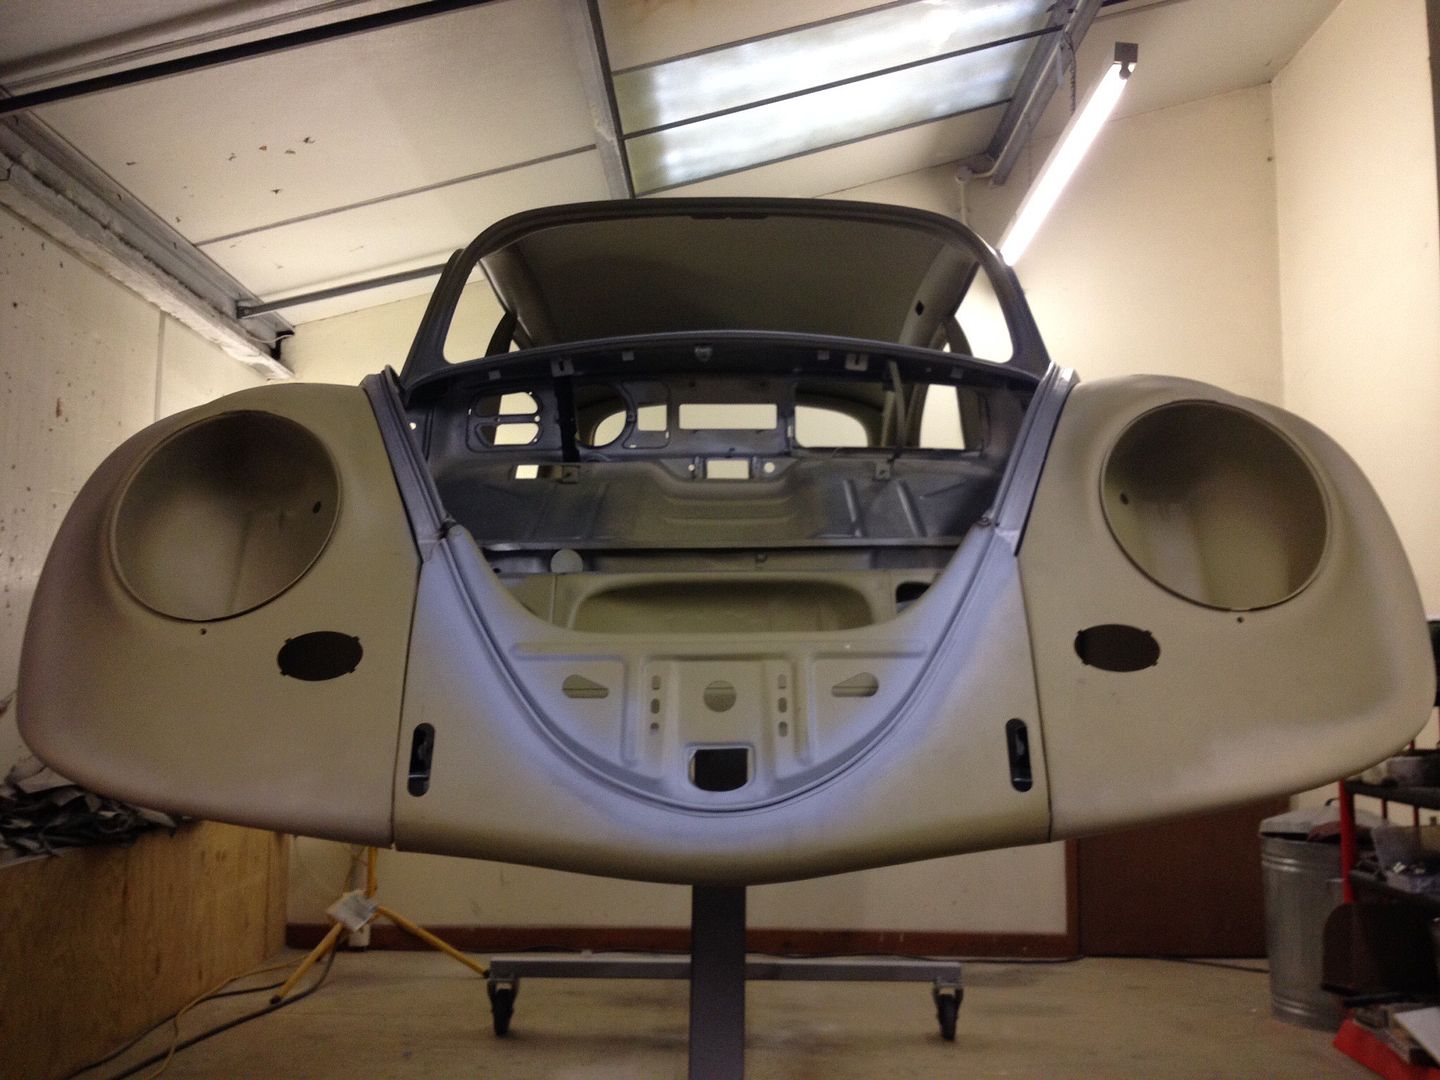 Edge needed trimming straight, it was a bit off 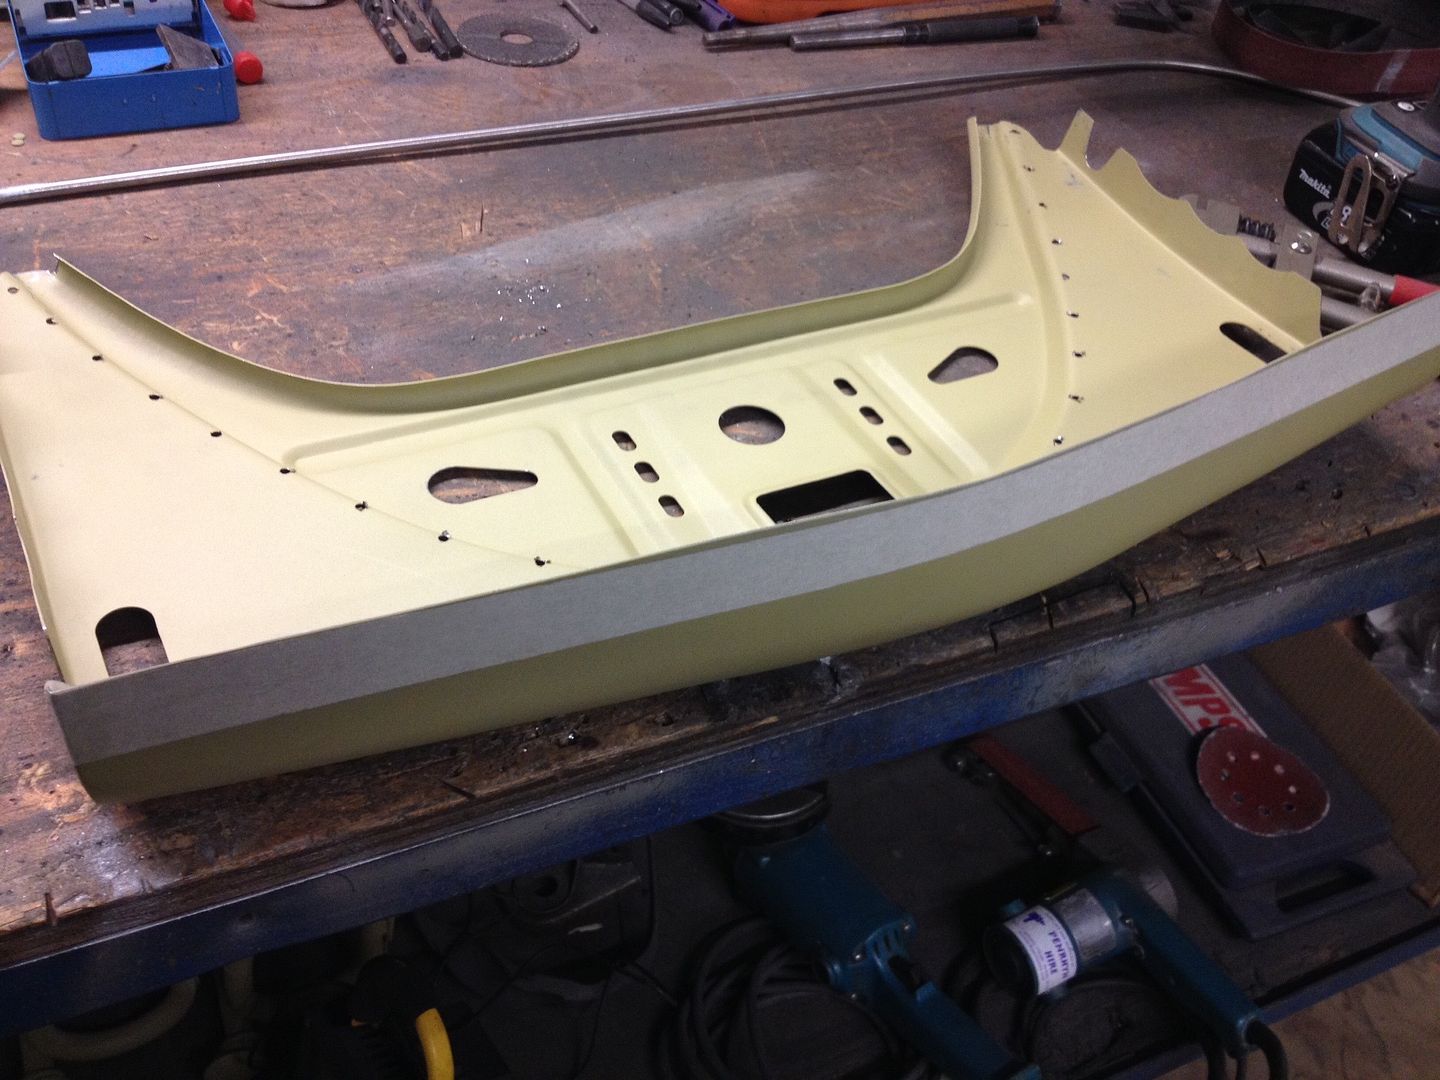 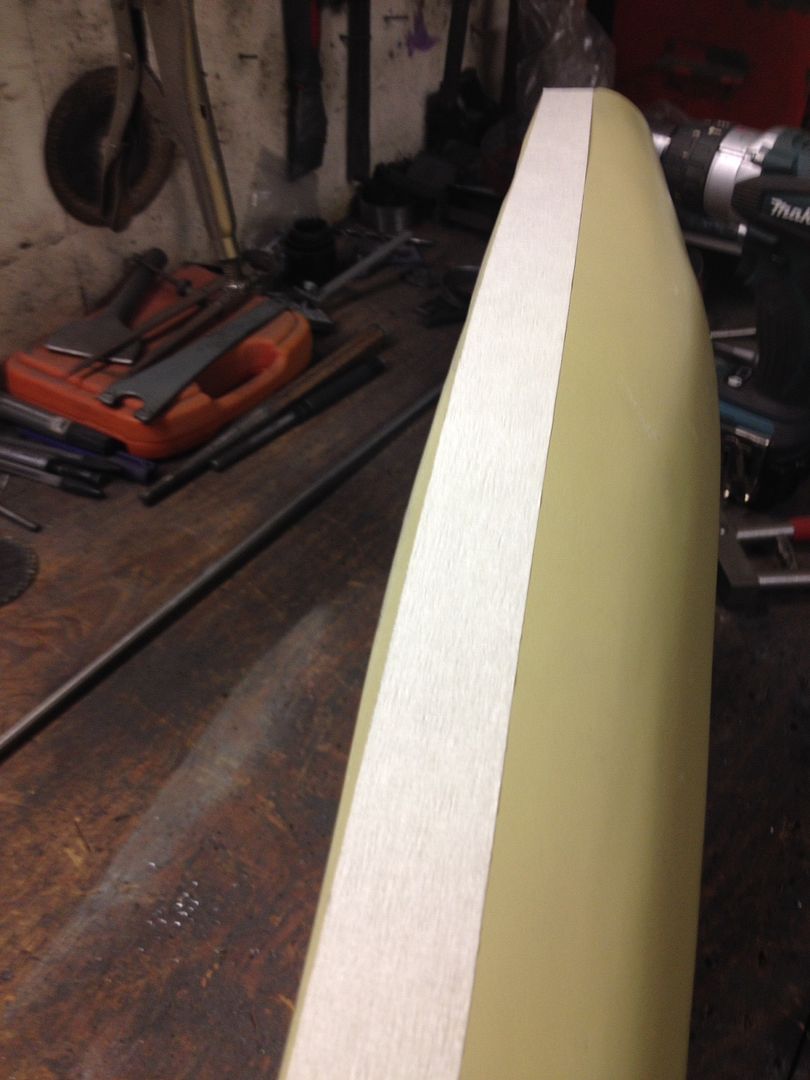 The factory used to braze the corner on like this so that what I had to do 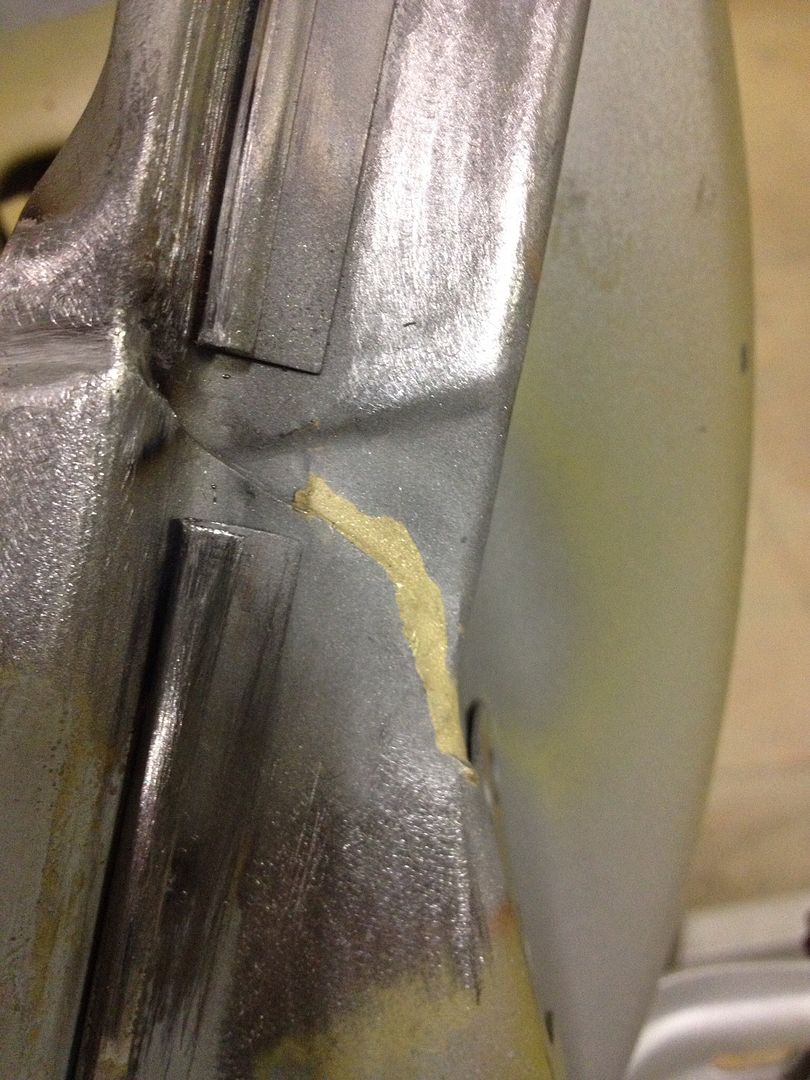 One side done 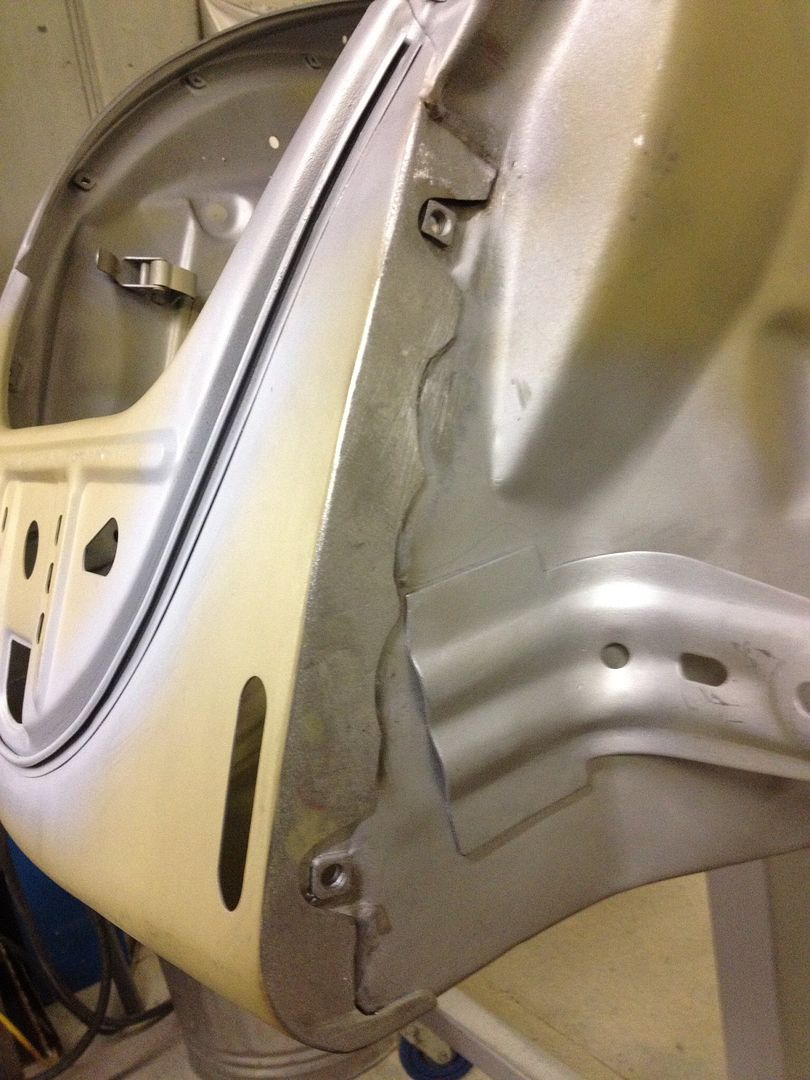 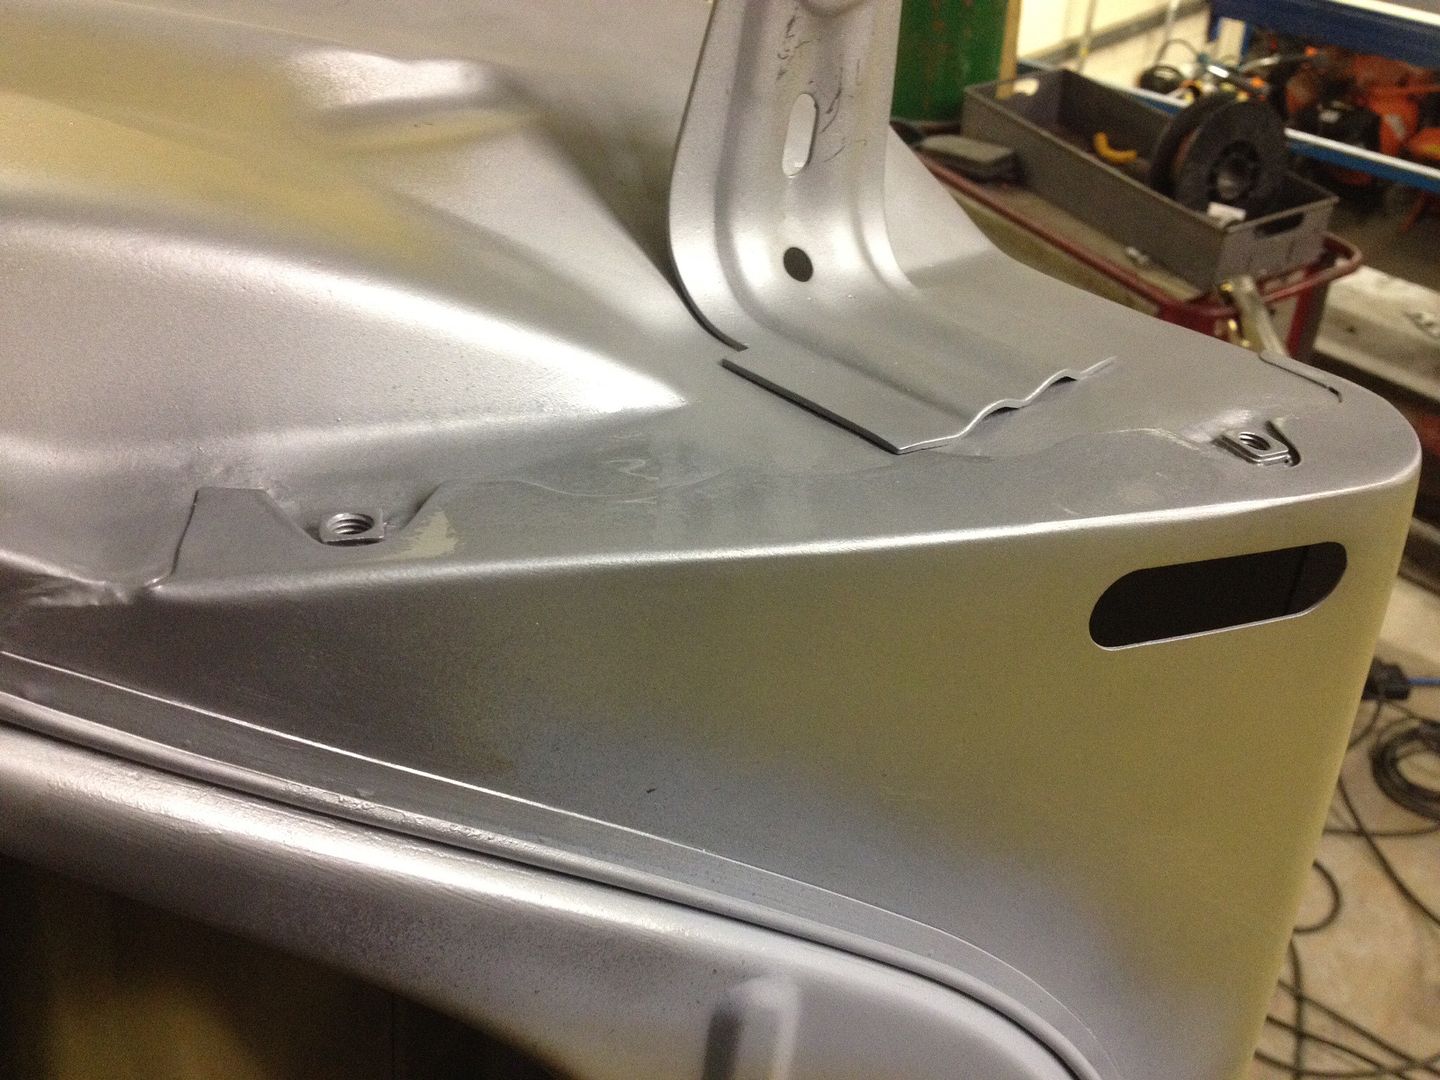 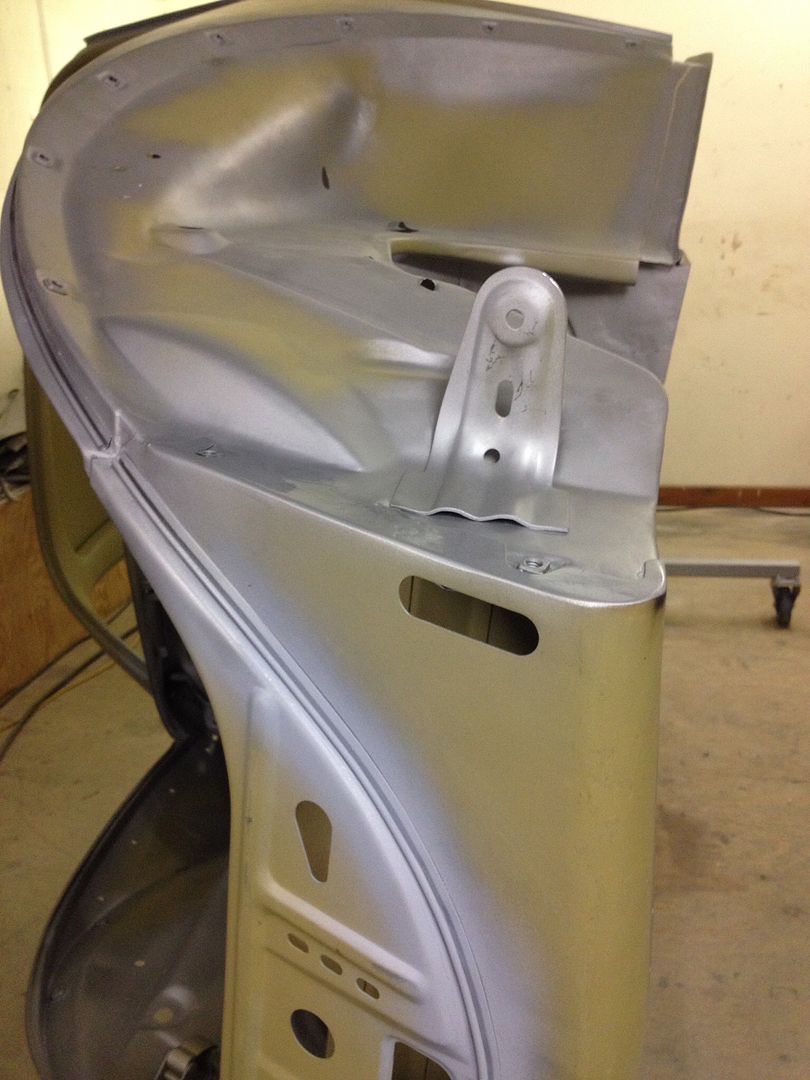 Sorted 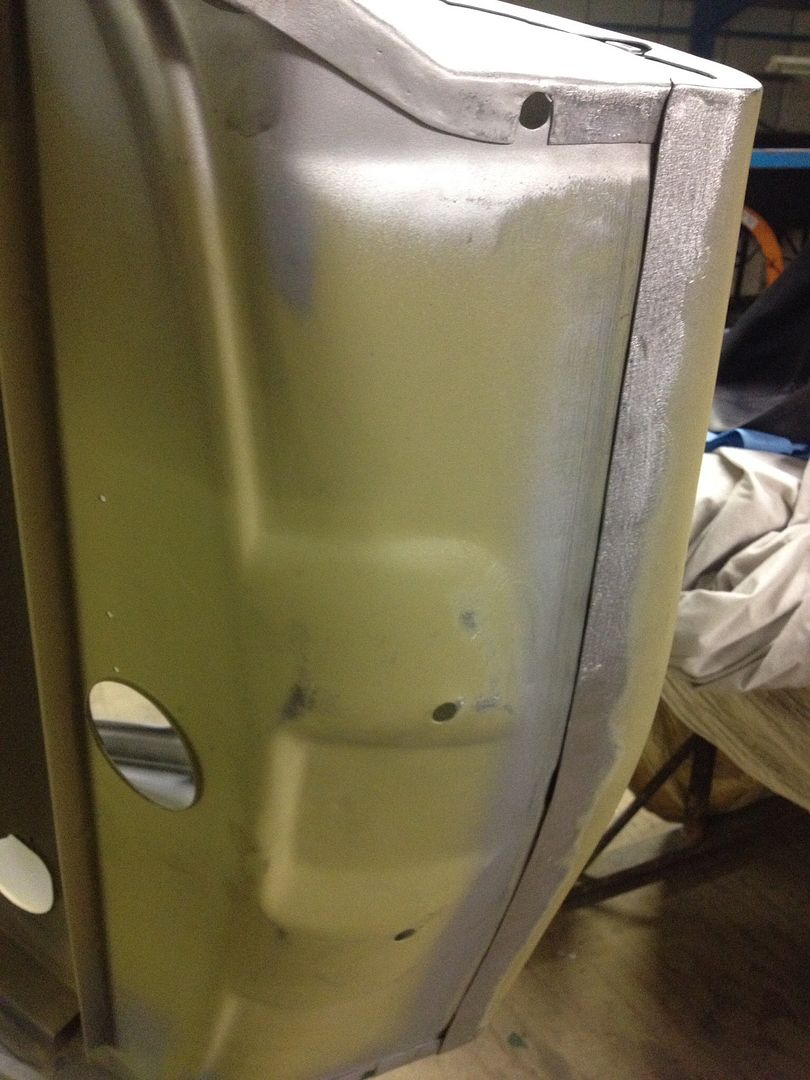 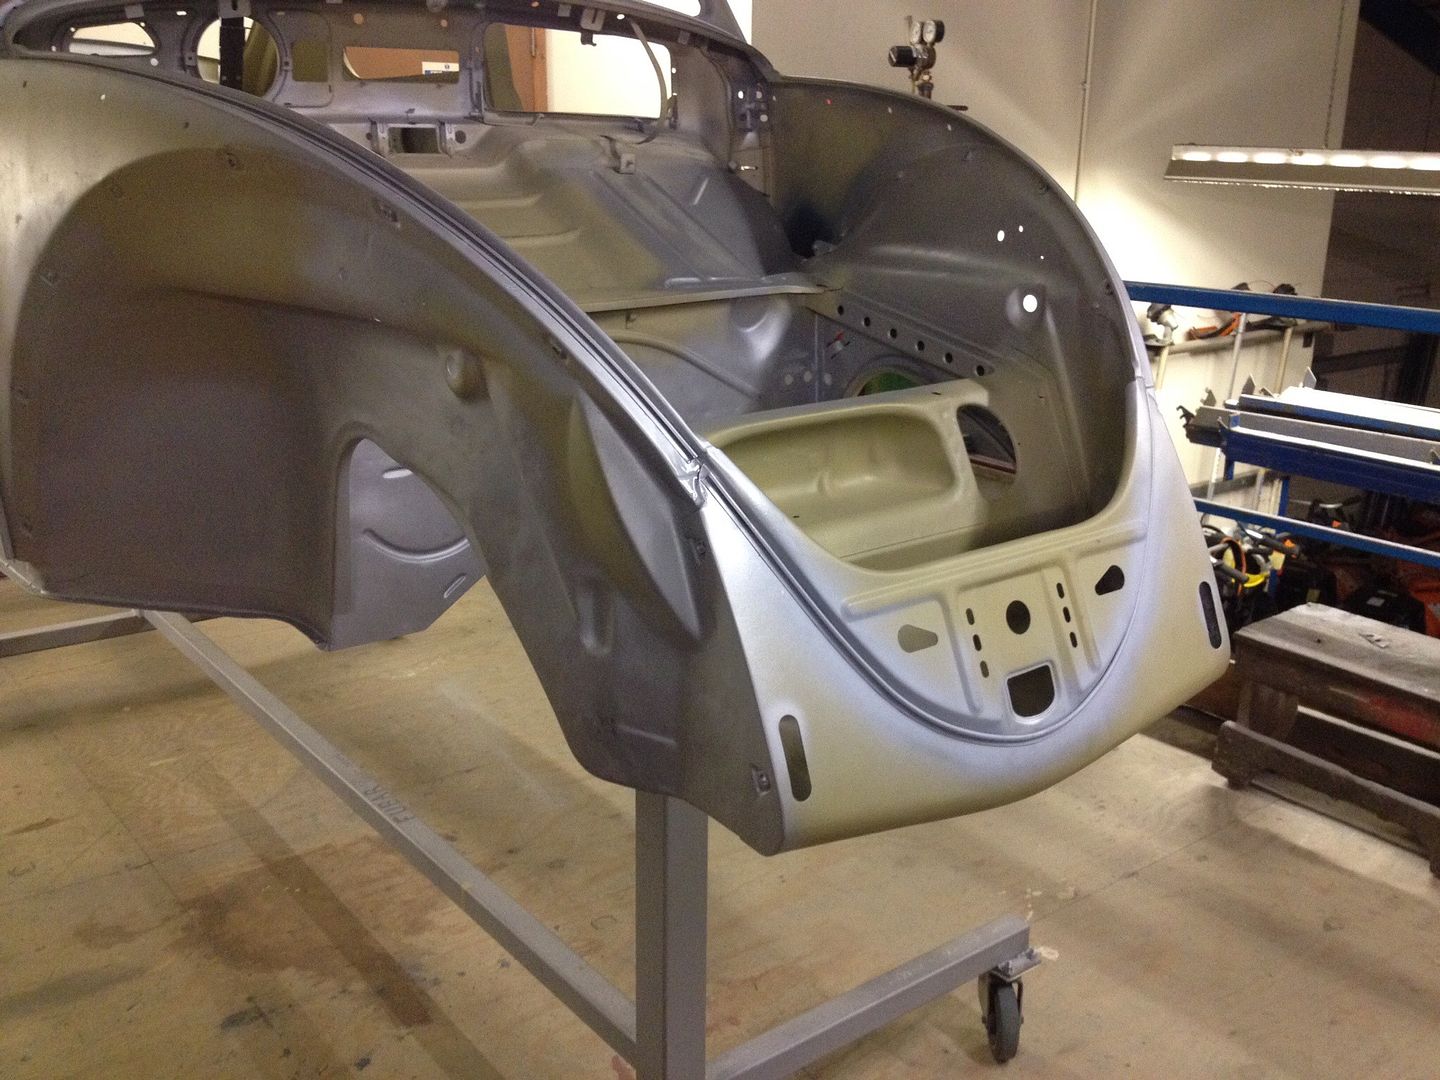 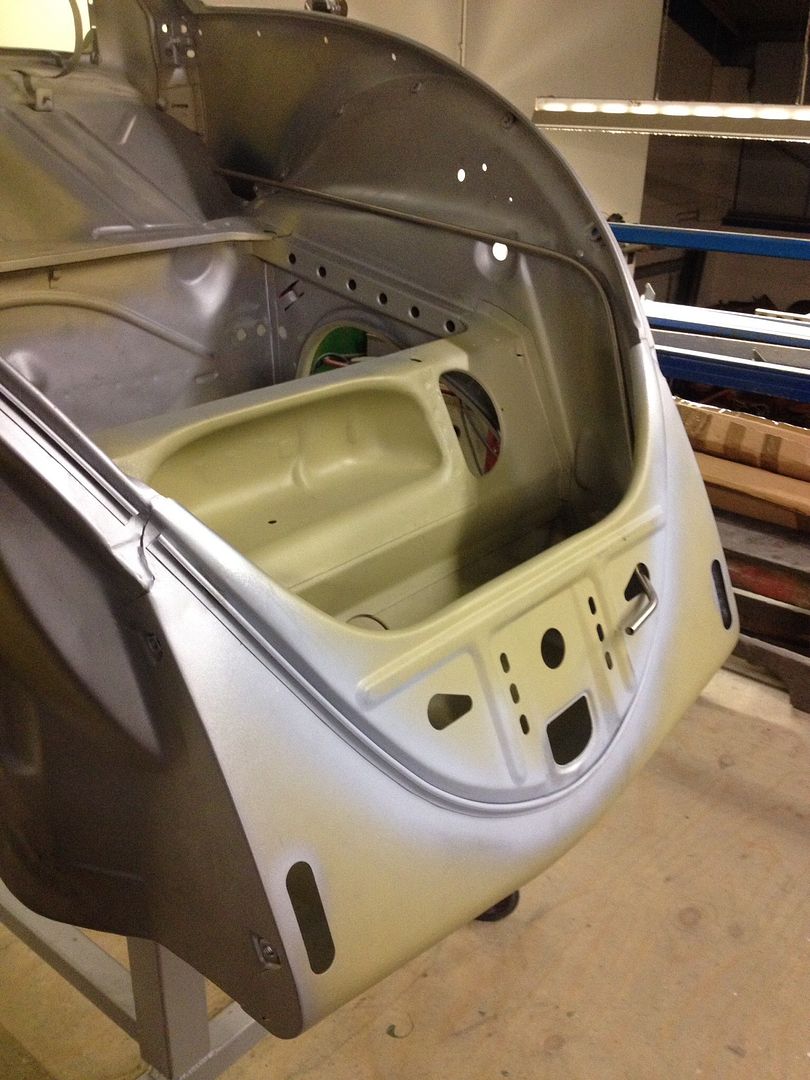 Even this small job took a whole day, roughly 8 hours to do and that was not including welding on the seal strip because I did that the night before. Its crazy where the time goes. This is really it for a while, I have just the wings to work on and a small job on one of the doors and after that its getting it prepped for paint. There is lots I haven't shown but I will update next year. Happy Christmas to everyone! |
|
|
|
|
Logged
|
|
|
|
|
Matty c
|
|
« Reply #203 on: December 29, 2015, 23:05:51 pm » |
|
Awesome workmanship dude! I have a question regarding the sealing strip on the rear valence, I'm about to do the same thing & was wondering how you managed to put the curve into it without any puckering on the inside edge? I got my strip from autocraft too but it came completely straight  |
|
|
|
|
Logged
|
67heaven
|
|
|
|
vwhelmot
|
|
« Reply #204 on: December 30, 2015, 10:39:31 am » |
|
I managed to find a length of steel rod that I could insert into the sealing strip so that when you form it and bend it etc it will not kink. I bent it as I welded it, little at a time. After I finished , the dowel rod could be just pulled out easy. The job still took time and with the rear valence make sure the strip is high enough not to foul the decklid. Mine took two attempts |
|
|
|
|
Logged
|
|
|
|
PiL
Newbie

Posts: 44
|
|
« Reply #205 on: December 30, 2015, 19:38:24 pm » |
|
What spot weld drill/ cutter do you use? I'm looking for a new one and could do with a recommendation.
Cheers Paul
|
|
|
|
|
Logged
|
|
|
|
|
vwhelmot
|
|
« Reply #206 on: December 30, 2015, 20:31:24 pm » |
|
These are the best I've come across, they work best when instead of using a centre pop , use a small drill to make a dimple first. This way the cutter won't wander at the start. http://www.ebay.co.uk/ulk/itm/351041392853 |
|
|
|
« Last Edit: December 31, 2015, 18:40:54 pm by vwhelmot »
|
Logged
|
|
|
|
|
|
|
vwhelmot
|
|
« Reply #208 on: January 24, 2016, 20:47:50 pm » |
|
|
|
|
|
|
Logged
|
|
|
|
|
|
|
 The Cal-look Lounge


 Author