|
Andy Sykes
|
 |
« on: February 28, 2011, 00:10:56 am » |
|
has anybody narrowed a set of pre 87 arms im sure ive seen 1 set done before looking for pros and cons
cheers andy
|
|
|
|
|
 Logged
|
I love the haters they make me famous.
im building this not just putting parts together, they are two totally different things
Your only here once turn it up to 11
|
|
|
|
StrokerMcDell
|
|
« Reply #1 on: February 28, 2011, 11:59:39 am » |
|
Hi Andy, I think its quite easy ......    Jason started off by buying my pre 87 ally arms and finished off with the back end looking like this. |
|
|
|
« Last Edit: March 02, 2011, 21:43:14 pm by StrokerMcDell »
|
Logged
|
ACE 116
10.67 @ 123mph York 2010
10.89 @ 125mph York 2009
Momentum 99octane pump gas
|
|
|
|
Andy Sykes
|
|
« Reply #2 on: February 28, 2011, 20:37:32 pm » |
|
Cool thanks that's given me a few ideas watch this space
|
|
|
|
|
Logged
|
I love the haters they make me famous.
im building this not just putting parts together, they are two totally different things
Your only here once turn it up to 11
|
|
|
Jay Aldred
Newbie

Posts: 39
|
|
« Reply #3 on: March 20, 2011, 13:17:43 pm » |
|
|
|
|
|
|
Logged
|
|
|
|
|
Andy Sykes
|
|
« Reply #4 on: March 20, 2011, 13:45:17 pm » |
|
|
|
|
|
|
Logged
|
I love the haters they make me famous.
im building this not just putting parts together, they are two totally different things
Your only here once turn it up to 11
|
|
|
Jay Aldred
Newbie
Posts: 39
|
|
« Reply #5 on: March 20, 2011, 17:49:26 pm » |
|
I have to say thats quite impressive I had a set of those porsche ally a-arms first off before I took te route I have, didn`t consider cutting them, wasn`t brave enough and I have never tried welding ally. Do you loose any depth narrowing them or geomtrically do they stay the same just narrower?.
I love they way people solve problem in so many different ways and end up with the same result, how much narrower have you gone?.
cheers
Jay..
|
|
|
|
|
Logged
|
|
|
|
|
Andy Sykes
|
|
« Reply #6 on: March 20, 2011, 19:21:59 pm » |
|
I have to say thats quite impressive I had a set of those porsche ally a-arms first off before I took te route I have, didn`t consider cutting them, wasn`t brave enough and I have never tried welding ally. Do you loose any depth narrowing them or geomtrically do they stay the same just narrower?.
I love they way people solve problem in so many different ways and end up with the same result, how much narrower have you gone?.
cheers
Jay..
cheers, geometrically they stay the same thats why i made the jig, i can tig but im not good enough to takle these i have some mates in a unit around the corner from me who are the dogs when it comes to welding so they are doing the welds on the arms when ive got everything in place. So far i have taken 50mm out but that may change when i have mocked it all up I made some solid mounts today fromthis then welded the to the G50 its not going to move now lol 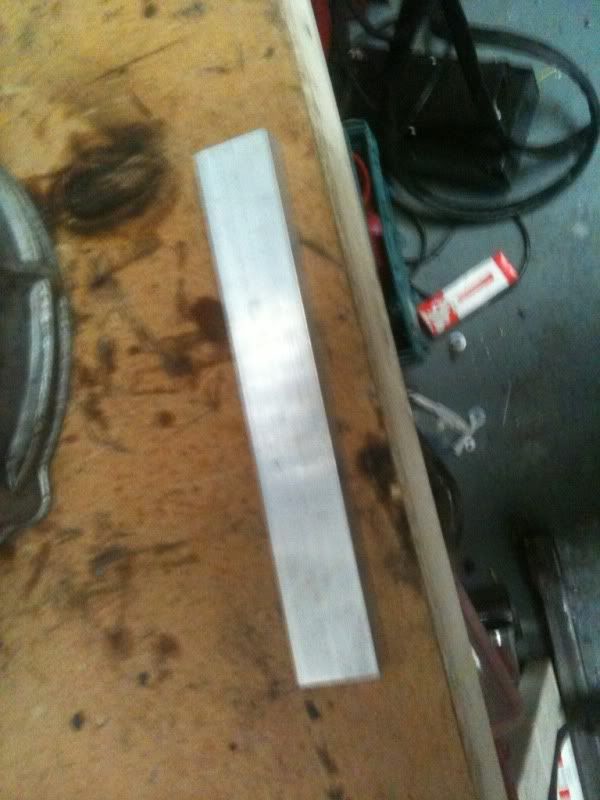 G50 back in  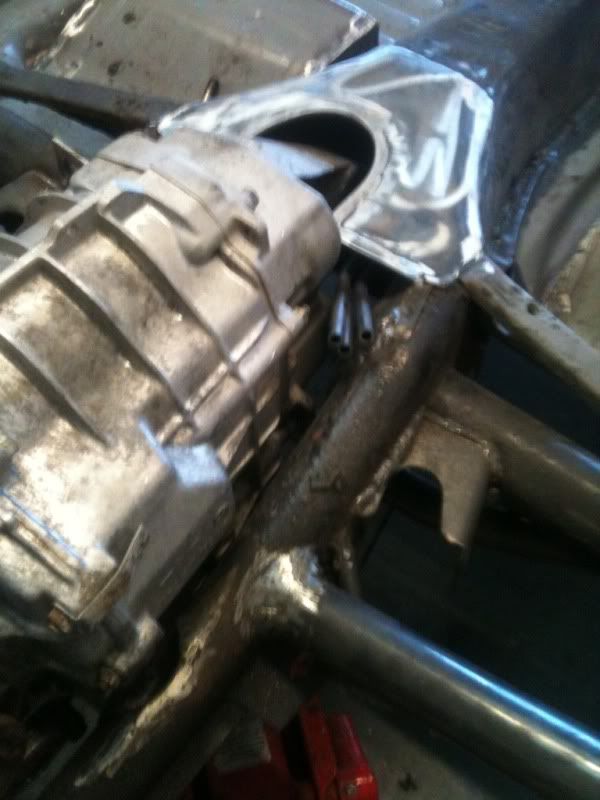 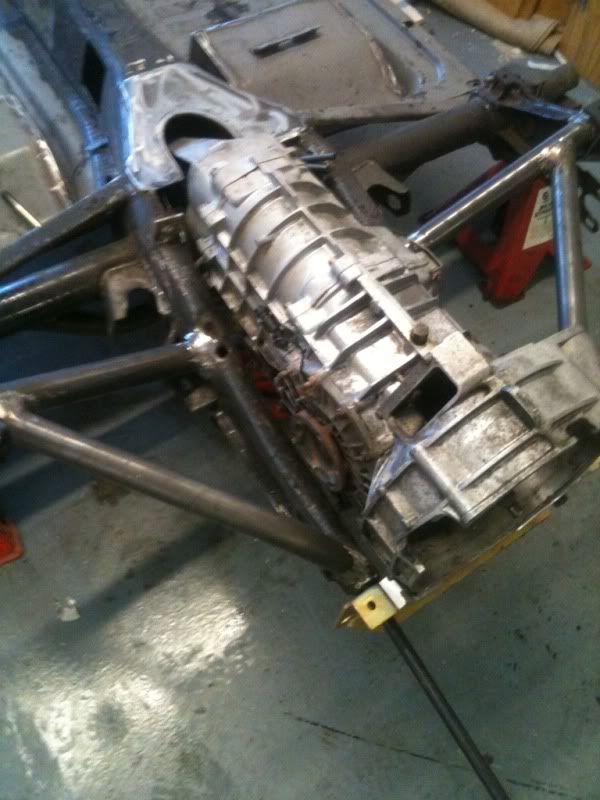 cheers andy |
|
|
|
|
Logged
|
I love the haters they make me famous.
im building this not just putting parts together, they are two totally different things
Your only here once turn it up to 11
|
|
|
|
Andy Sykes
|
|
« Reply #7 on: March 23, 2011, 12:52:19 pm » |
|
|
|
|
|
|
Logged
|
I love the haters they make me famous.
im building this not just putting parts together, they are two totally different things
Your only here once turn it up to 11
|
|
|
|
dannyboy
|
|
« Reply #8 on: March 24, 2011, 00:04:22 am » |
|
no bird shit there m8 looks good |
|
|
|
|
Logged
|
|
|
|
|
Andy Sykes
|
|
« Reply #9 on: March 25, 2011, 17:38:57 pm » |
|
no bird shit there m8 looks good cheers thanks slight change in plan im mounting the ladder bar to were thw spring plate attched to 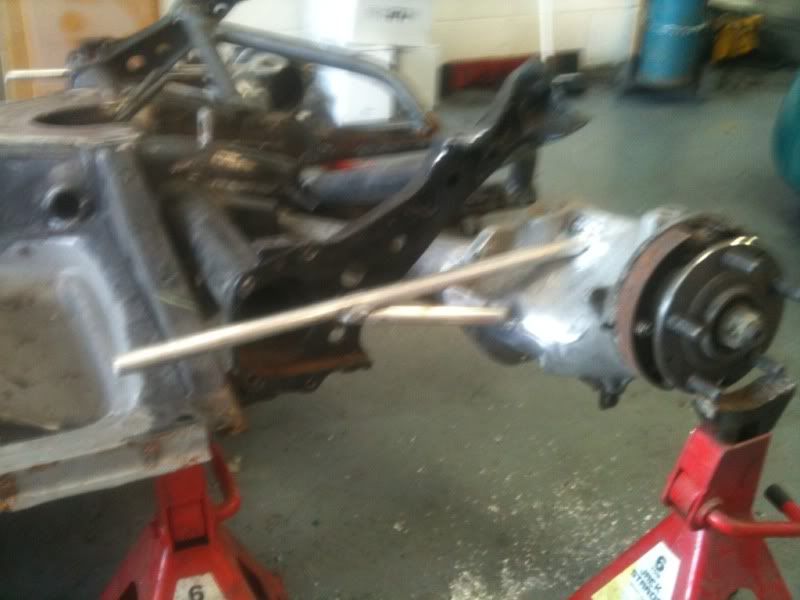 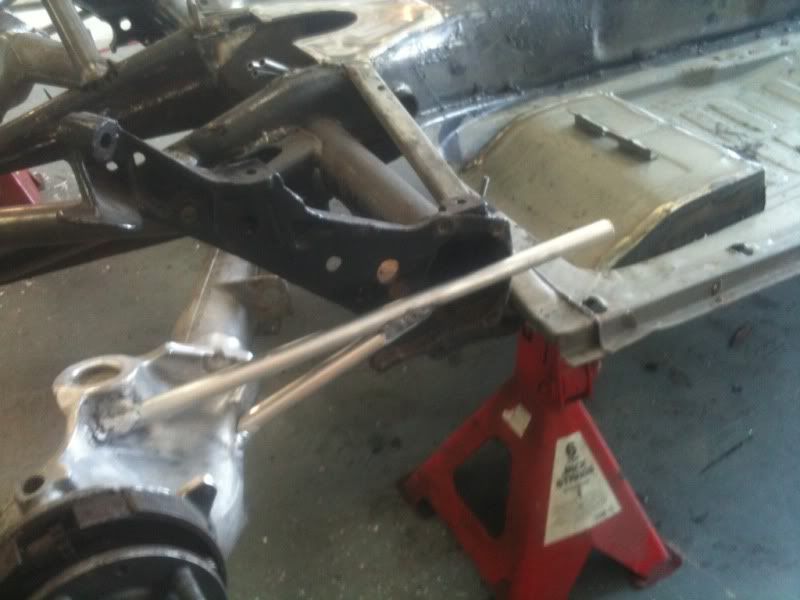 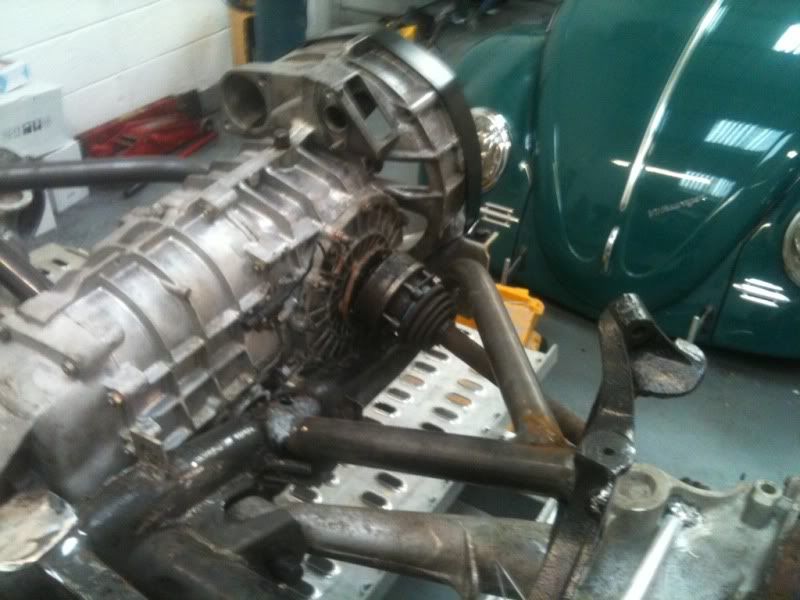 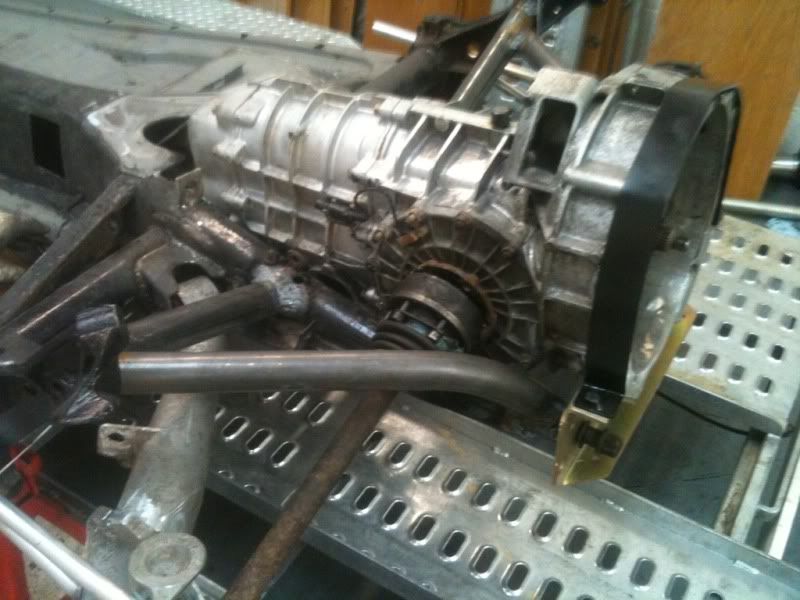 ive got to shorten the drive shafts or find some the fit ive ordered some coilovers with a few differnt springs so i can expriment with spring rates ect cheers andy |
|
|
|
|
Logged
|
I love the haters they make me famous.
im building this not just putting parts together, they are two totally different things
Your only here once turn it up to 11
|
|
|
|
TexasTom
|
|
« Reply #10 on: March 25, 2011, 18:38:53 pm » |
|
Andy,
Have you considered welding some flat aluminum plates to your control arms to locate the ladder bars? That way, you could capture rod ends at the top and bottom with thru-bolts, use steel rods for the ladder bars for strength, and everything would be adjustable.
Looks like a fun project ...
TxT
|
|
|
|
|
Logged
|
Work, work, WORK!
Modesty accepted here ...
|
|
|
|
Andy Sykes
|
|
« Reply #11 on: March 26, 2011, 08:36:28 am » |
|
Andy,
Have you considered welding some flat aluminum plates to your control arms to locate the ladder bars? That way, you could capture rod ends at the top and bottom with thru-bolts, use steel rods for the ladder bars for strength, and everything would be adjustable.
Looks like a fun project ...
TxT
i hadnt untill then sounds a better plan than mine watch this space cheers andy |
|
|
|
|
Logged
|
I love the haters they make me famous.
im building this not just putting parts together, they are two totally different things
Your only here once turn it up to 11
|
|
|
|
StrokerMcDell
|
|
« Reply #12 on: March 27, 2011, 22:50:33 pm » |
|
Not completely sure what Tom means but although mine is S/A it can maybe be done in a similar way.  |
|
|
|
|
Logged
|
ACE 116
10.67 @ 123mph York 2010
10.89 @ 125mph York 2009
Momentum 99octane pump gas
|
|
|
|
Andy Sykes
|
|
« Reply #13 on: March 28, 2011, 16:02:20 pm » |
|
so here is the plan looks like this will be solid when its welded 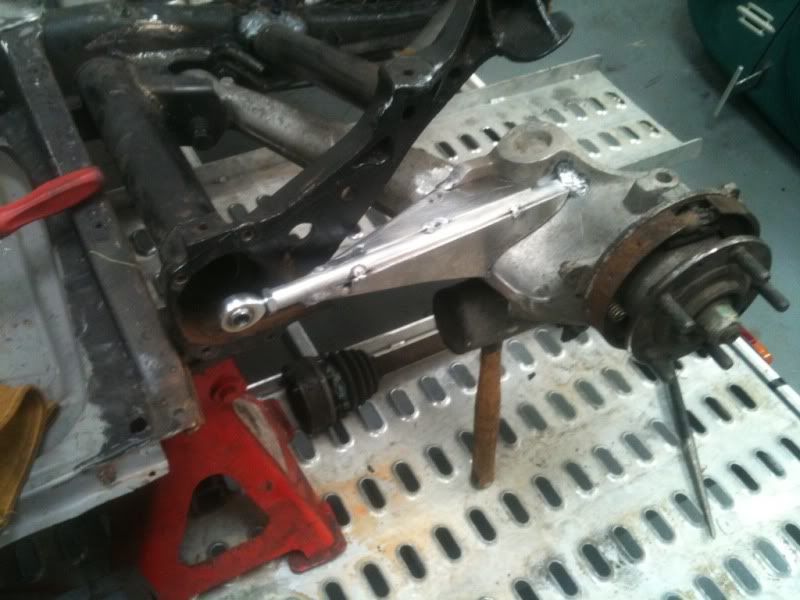 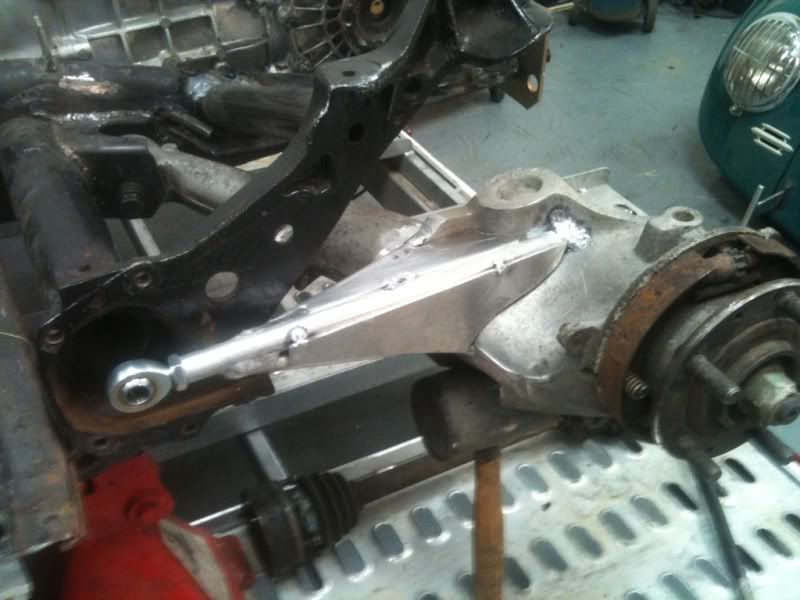 cheers andy |
|
|
|
|
Logged
|
I love the haters they make me famous.
im building this not just putting parts together, they are two totally different things
Your only here once turn it up to 11
|
|
|
Jay Aldred
Newbie
Posts: 39
|
|
« Reply #14 on: March 29, 2011, 08:43:30 am » |
|
so here is the plan looks like this will be solid when its welded cheers andy Andy thats spot on and will ork very well, that was my plan before I built the a-arms from scratch. |
|
|
|
|
Logged
|
|
|
|
|
Andy Sykes
|
|
« Reply #15 on: March 29, 2011, 19:42:49 pm » |
|
cheers :)bit more fettling this afternoon after my trip to Hull and Bradford i think you can see what happening here  Jon the master welder on the case welding up the arms fully i dont trust myself with this bit yet on alloy 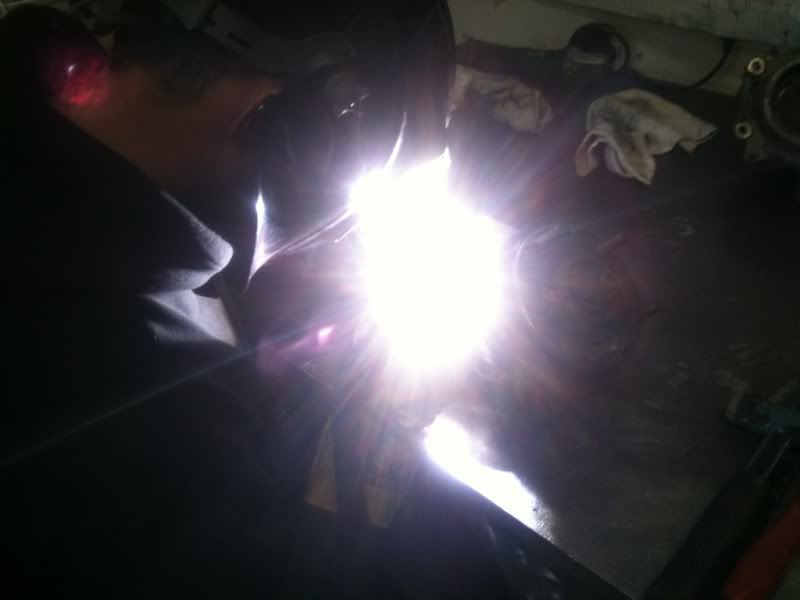 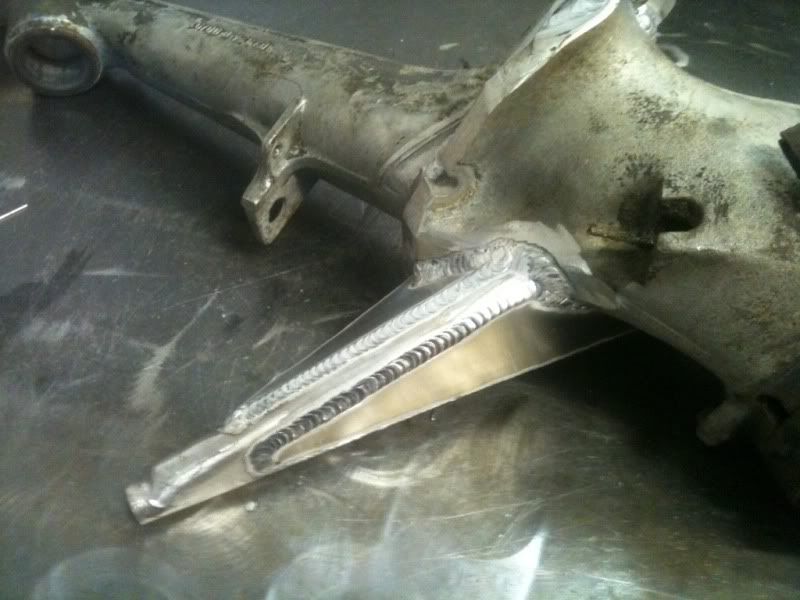 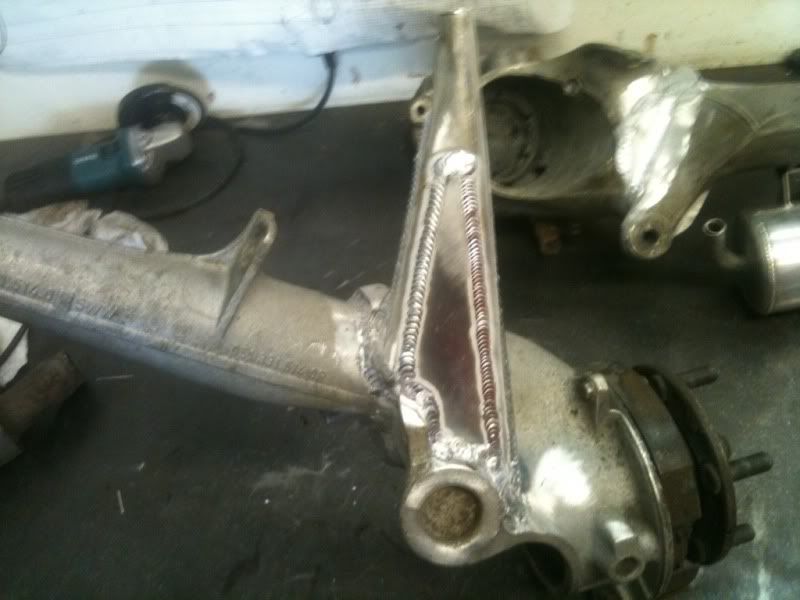 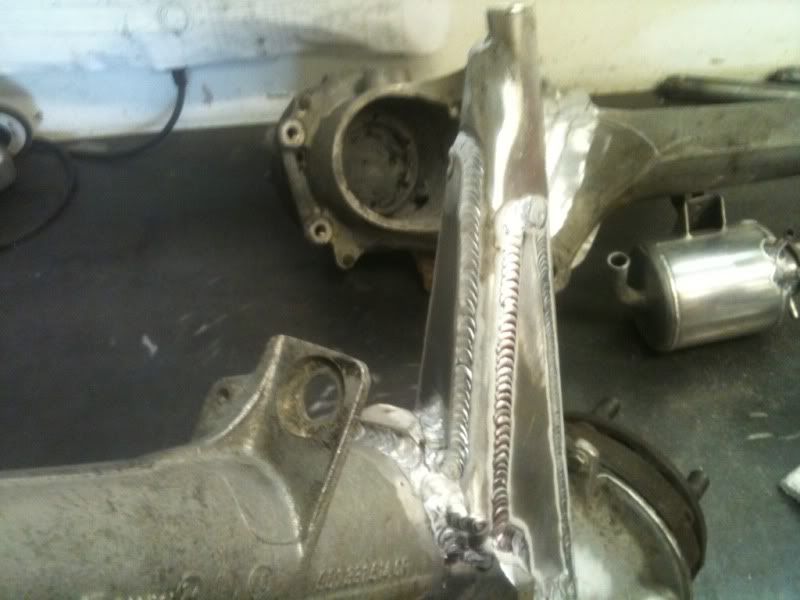 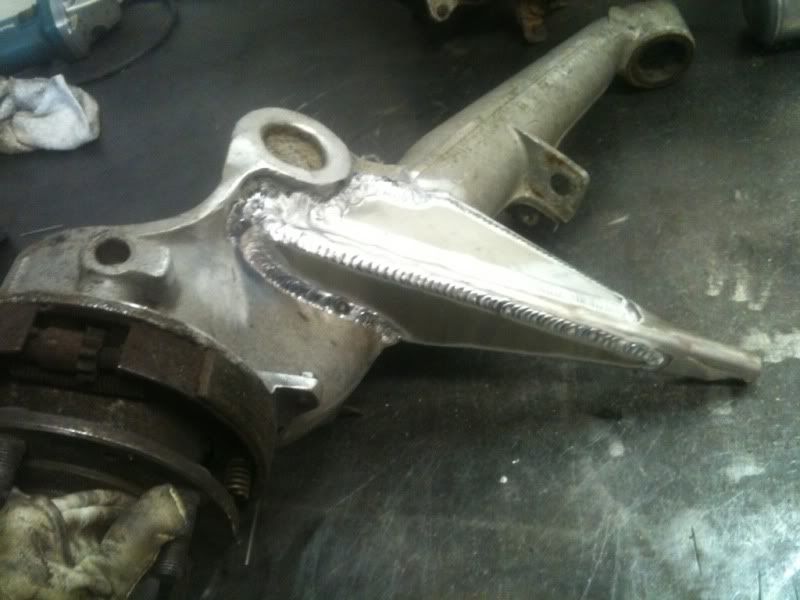 were getting there now im going to shorten axles this week too cheers andy |
|
|
|
|
Logged
|
I love the haters they make me famous.
im building this not just putting parts together, they are two totally different things
Your only here once turn it up to 11
|
|
|
|
Frallan
|
|
« Reply #16 on: March 30, 2011, 03:31:19 am » |
|
Really like what you are doing.
I am sure it will work well.
Now one suggestion for building further on the safety factor would be to do a steel end plate for the Uniball to thread in to a steel attachment plate with three four bolts to the arm, instead of aluminium.
|
|
|
|
|
Logged
|
|
|
|
Jay Aldred
Newbie
Posts: 39
|
|
« Reply #17 on: March 30, 2011, 09:20:30 am » |
|
Really like what you are doing.
I am sure it will work well.
Now one suggestion for building further on the safety factor would be to do a steel end plate for the Uniball to thread in to a steel attachment plate with three four bolts to the arm, instead of aluminium.
Unless you use T6 which is compaable to steel, coming to gether well, oh and I envy the quality of the welding, I can tig weld steel but have had little success on aluminium, all down to the machine no doubt and practice. |
|
|
|
|
Logged
|
|
|
|
|
Andy Sykes
|
|
« Reply #18 on: March 30, 2011, 14:58:41 pm » |
|
bit more done cut and weled a 6mm plate for the uniball to bolt to i will make an alumium cap tmw 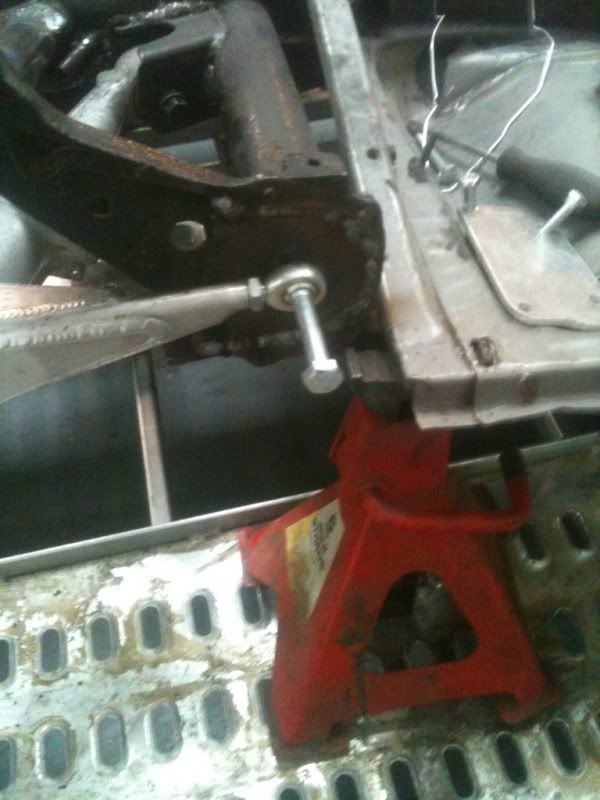 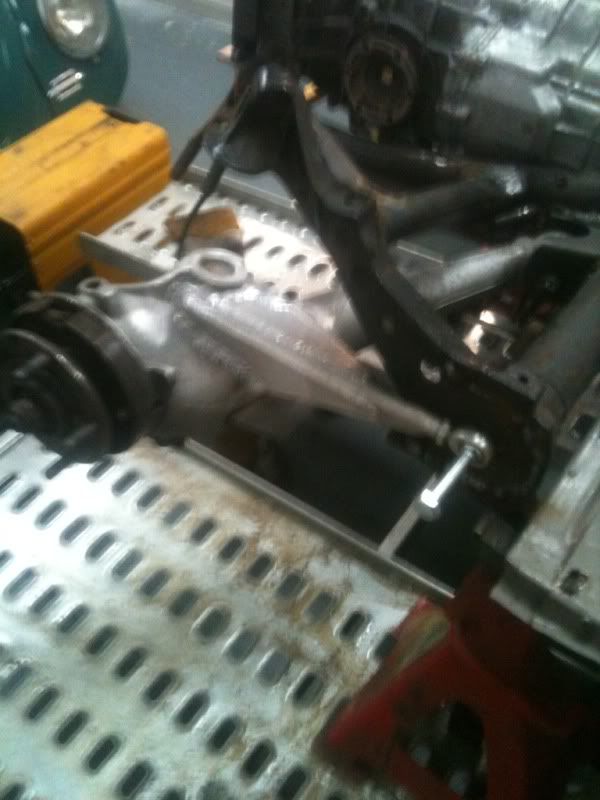 shock mounts still line up 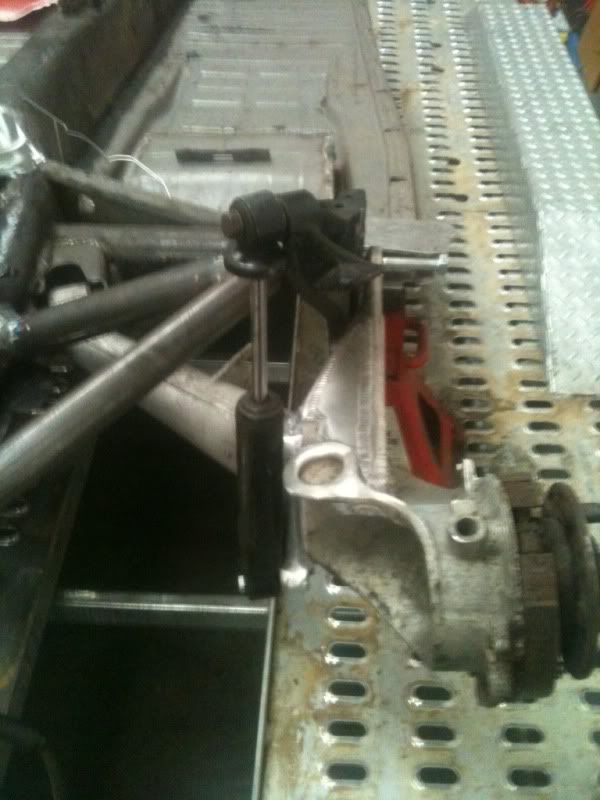 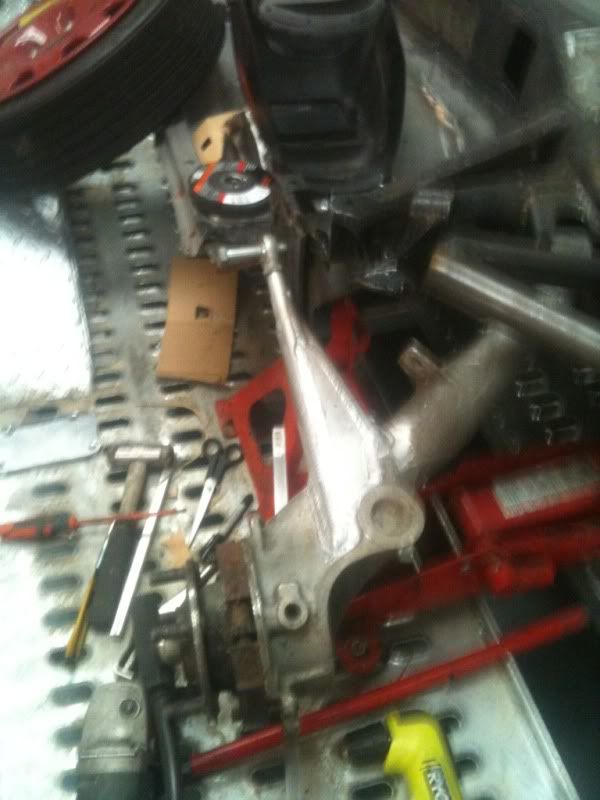 cheers andy |
|
|
|
|
Logged
|
I love the haters they make me famous.
im building this not just putting parts together, they are two totally different things
Your only here once turn it up to 11
|
|
|
|
Andy Sykes
|
|
« Reply #19 on: March 30, 2011, 17:40:41 pm » |
|
after some frantic rushing about this afternoon talking to Quaife they pointed me in the direction of R&N enginnering who make one offs for them so im know having complete new shafts made next week they seamed very helpful so cut up a 944 shaft  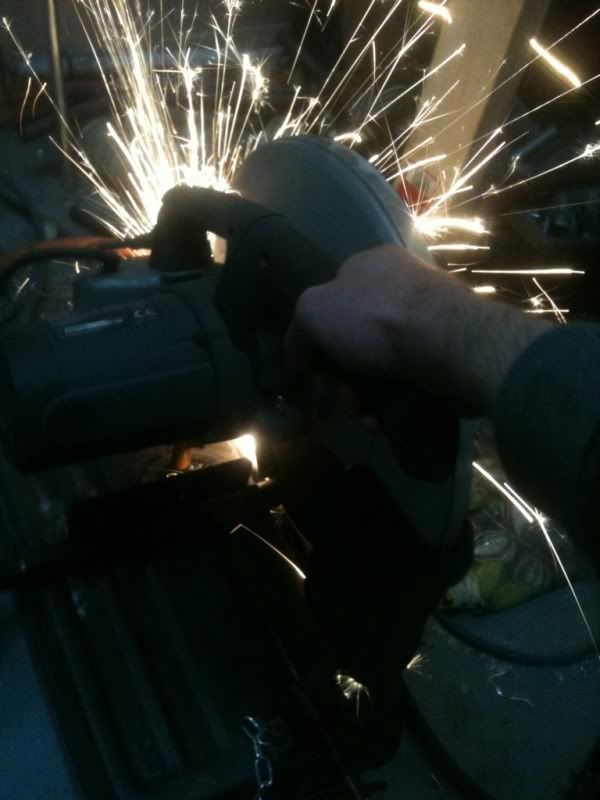 944 is the soild one G50 is hollow 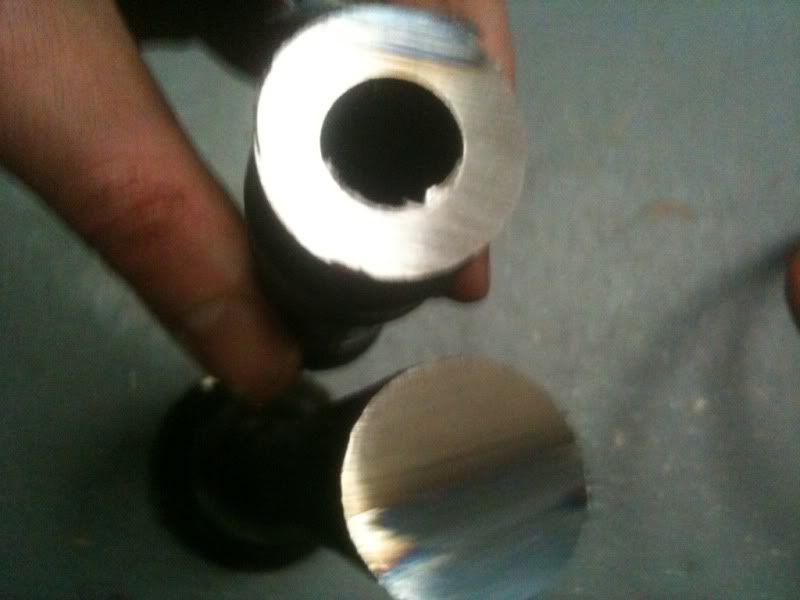 measured the new shaft lengh and TIG welded up 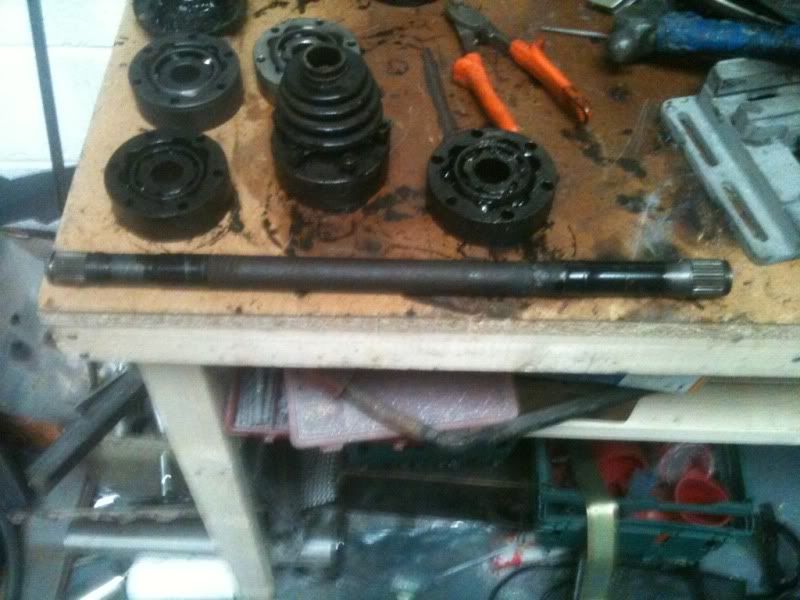 trial fitted 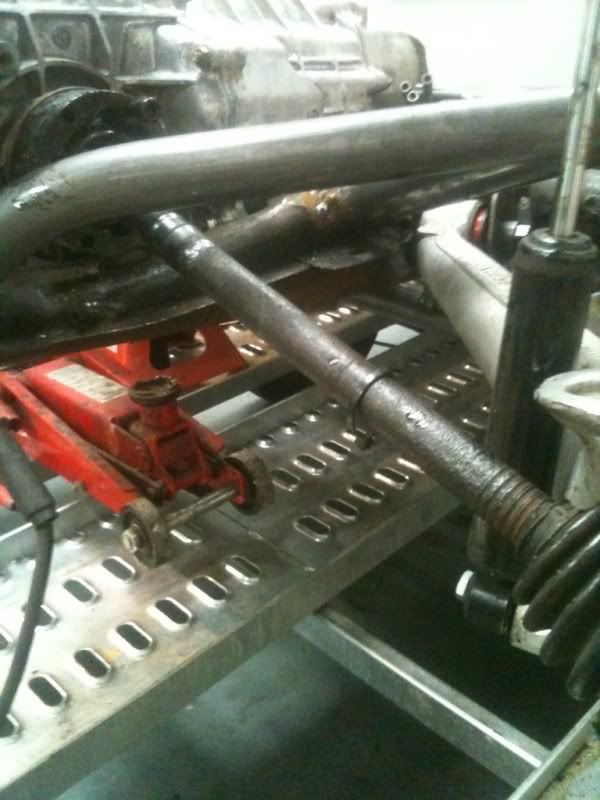 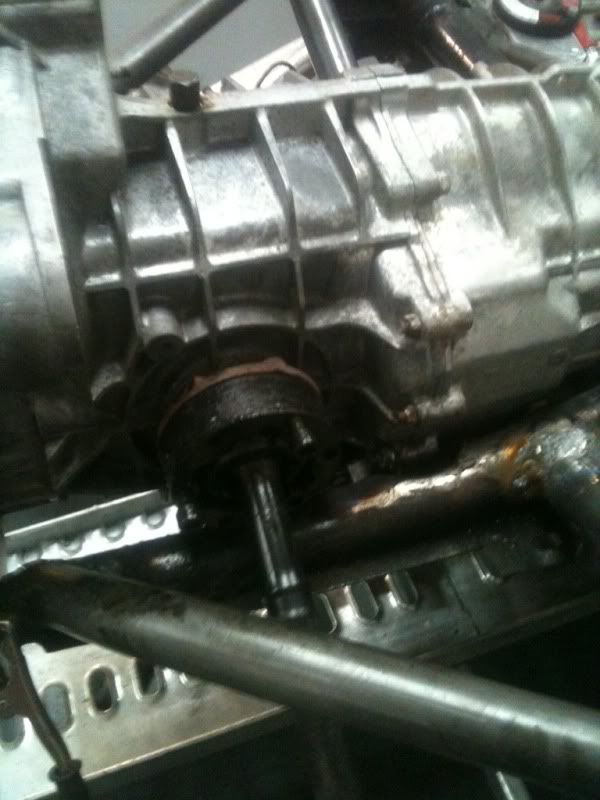 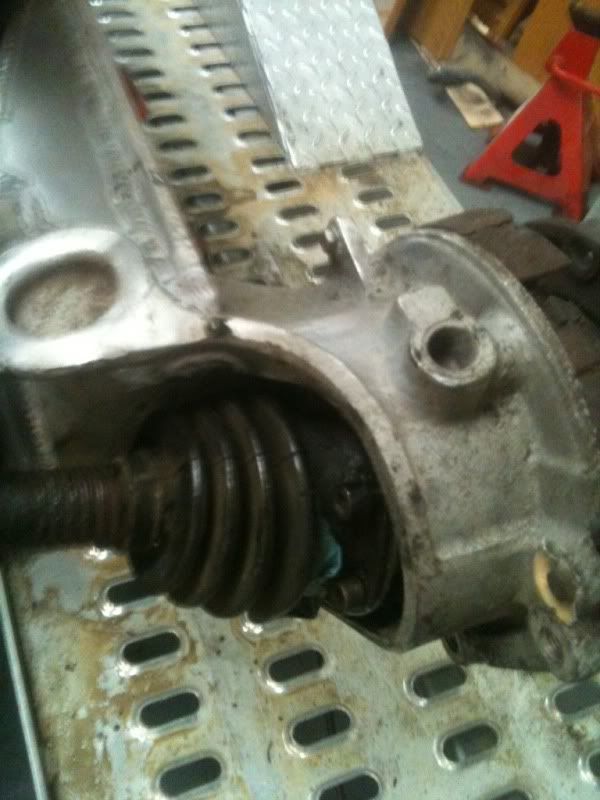 Ive posted the cut and shut shaft off to have two machined but 1 has to be 15mm shorter cheers andy |
|
|
|
|
Logged
|
I love the haters they make me famous.
im building this not just putting parts together, they are two totally different things
Your only here once turn it up to 11
|
|
|
|
Bruce
|
|
« Reply #20 on: March 31, 2011, 06:07:56 am » |
|
944 is the soild one G50 is hollow That is very interesting, I didn't know they were hollow. Can you measure the ID and OD? And the OD of the 944 shaft? |
|
|
|
|
Logged
|
|
|
|
|
Andy Sykes
|
|
« Reply #21 on: March 31, 2011, 16:25:19 pm » |
|
no probs the the OD of the G50 is 29mm ID is 9mm the 944 OD is 26mm I spent most of the afternoon modifying Mr Porsches parts i think ive made it work 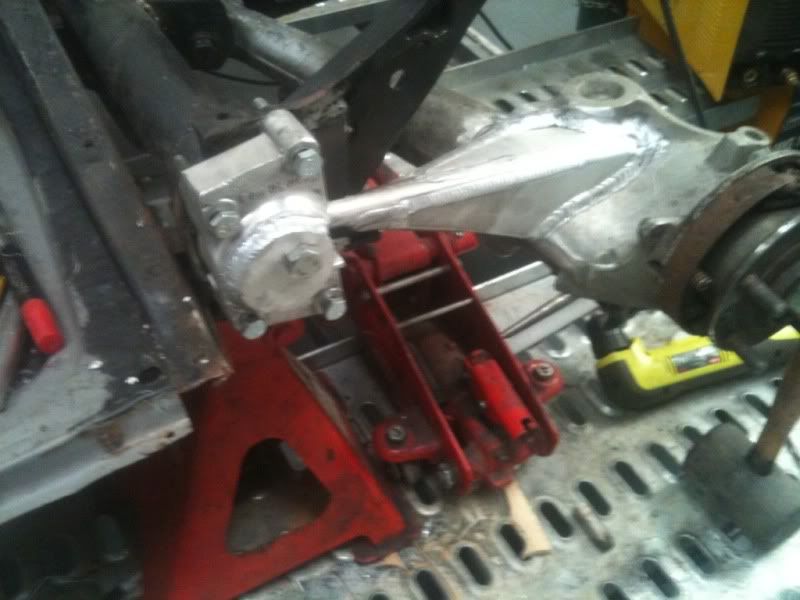  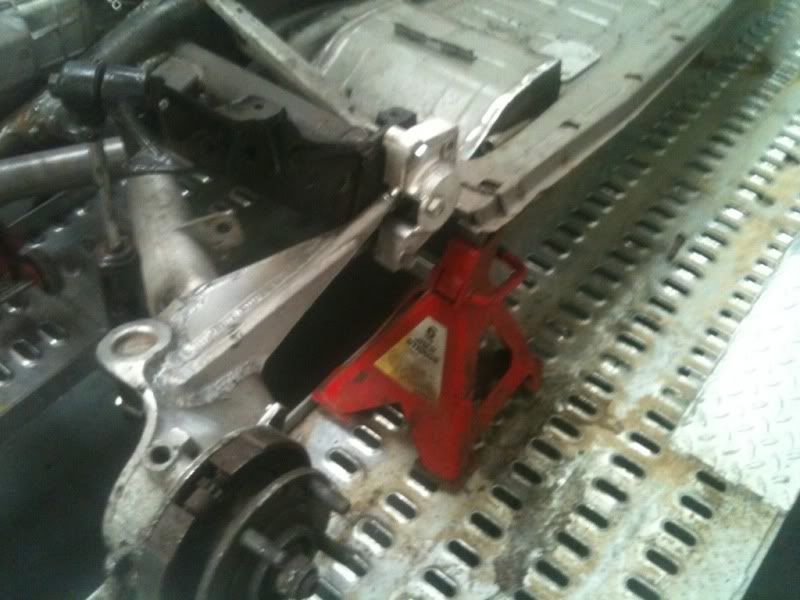 cheers andy |
|
|
|
|
Logged
|
I love the haters they make me famous.
im building this not just putting parts together, they are two totally different things
Your only here once turn it up to 11
|
|
|
|
Bruce
|
|
« Reply #22 on: April 01, 2011, 06:51:12 am » |
|
no probs the the OD of the G50 is 29mm ID is 9mm the 944 OD is 26mm Thanks for that info. After a few quick calculations, the G50 shafts are 53% stronger, while weighing only 12% more. |
|
|
|
« Last Edit: April 01, 2011, 21:39:40 pm by Bruce »
|
Logged
|
|
|
|
|
Andy Sykes
|
|
« Reply #23 on: April 01, 2011, 14:12:29 pm » |
|
thats great info i think i will get my new shafts driiled to match the G50 shafts
cheers andy
|
|
|
|
|
Logged
|
I love the haters they make me famous.
im building this not just putting parts together, they are two totally different things
Your only here once turn it up to 11
|
|
|
|
Zach Gomulka
|
|
« Reply #24 on: April 01, 2011, 15:12:56 pm » |
|
Very impressive work here. Well done!!
|
|
|
|
|
Logged
|
Born in the '80s, stuck in the '70s.
|
|
|
|
Bruce
|
|
« Reply #25 on: April 01, 2011, 21:38:22 pm » |
|
thats great info i think i will get my new shafts driiled to match the G50 shafts Just remember, a drilled shaft is always weaker than a solid shaft of the same OD. The BIG difference is the weight. With the G50 shaft, the 9mm hole reduces it's strength by only 0.9%. The 9mm hole reduces the shaft's weight by almost 10% |
|
|
|
|
Logged
|
|
|
|
|
Zach Gomulka
|
|
« Reply #26 on: April 01, 2011, 21:48:39 pm » |
|
Where do you find someone who can drill that??
|
|
|
|
|
Logged
|
Born in the '80s, stuck in the '70s.
|
|
|
|
Frallan
|
|
« Reply #27 on: April 02, 2011, 02:15:49 am » |
|
Now one suggestion for building further on the safety factor would be to do a steel end plate for the Uniball to thread in to a steel attachment plate with three four bolts to the arm, instead of aluminium.
[/quote]
Unless you use T6 which is compaable to steel, coming to gether well, oh and I envy the quality of the welding, I can tig weld steel but have had little success on aluminium, all down to the machine no doubt and practice.
What I remember from my years building airplanes, T6 is not a good idea to weld on. Long time ago so I might remember wrong.
Should it not be normalized or T3 prior to welding and then treated to T6?
|
|
|
|
|
Logged
|
|
|
|
|
Bruce
|
|
« Reply #28 on: April 02, 2011, 02:59:40 am » |
|
Where do you find someone who can drill that?? They get drilled on a lathe. It's not difficult, it's just slow going. |
|
|
|
|
Logged
|
|
|
|
Jay Aldred
Newbie
Posts: 39
|
|
« Reply #29 on: April 04, 2011, 09:45:40 am » |
|
Now one suggestion for building further on the safety factor would be to do a steel end plate for the Uniball to thread in to a steel attachment plate with three four bolts to the arm, instead of aluminium.
Unless you use T6 which is compaable to steel, coming to gether well, oh and I envy the quality of the welding, I can tig weld steel but have had little success on aluminium, all down to the machine no doubt and practice. What I remember from my years building airplanes, T6 is not a good idea to weld on. Long time ago so I might remember wrong. Should it not be normalized or T3 prior to welding and then treated to T6? [/quote] With the end plate no welding required otherwise you are right it would need to be normalised to return the granualar structre back to it orginal state. |
|
|
|
|
Logged
|
|
|
|
|
 The Cal-look Lounge


 Author