sparkieben
Newbie

Posts: 20
|
 |
« on: July 01, 2011, 21:38:23 pm » |
|
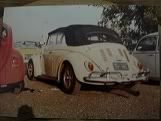
Hi just wanted to introduce my self my names ben and live in the uk. I thought i would show you my current resto on a car that i have owned for the past 16 years now. My plan was just a quick tidy up of the inner wings as they were looking a little tired,I knew that the car had been plated quite heavy by the previous owner.I bought it as a rolling shell in primer and just got it painted and drove it gradually adding to it. It deserved to be restored correctly as i think its a rare car It was built in april 1961 and is a genuine golde ragtop and a one year only model. Its based on the cal look theme but was running a turbo motor,I would love to build a larger 48 ida engine one day but for now it will stay the way it was. 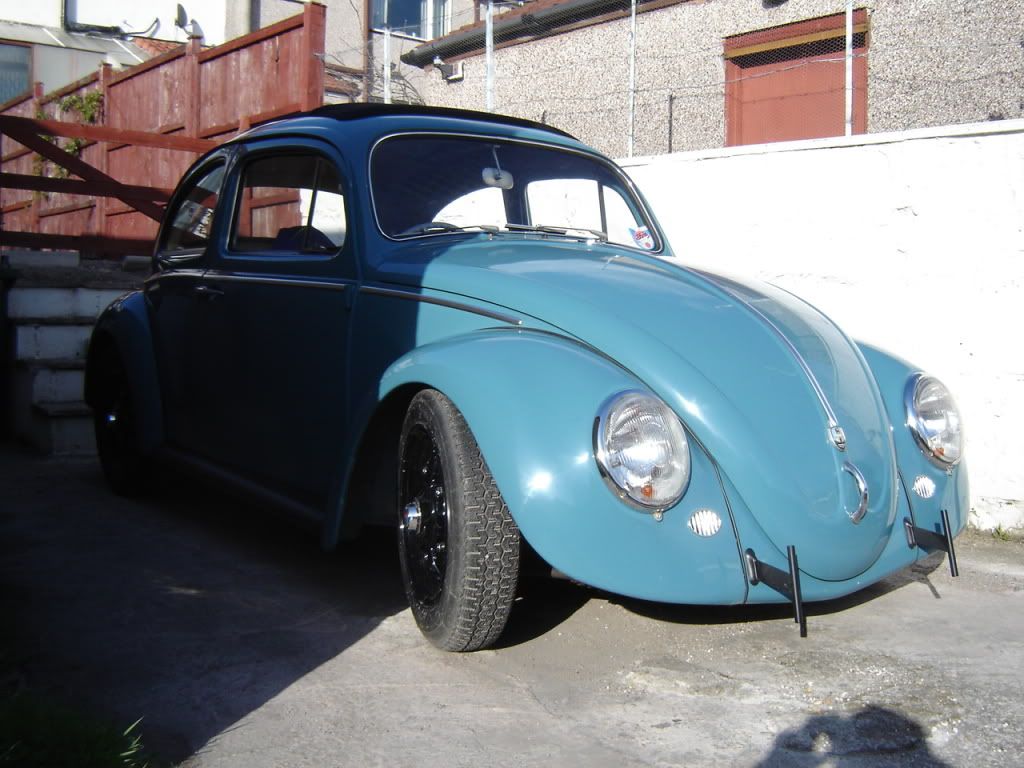 Ive had lots of great fun in this car and its pretty quick. It runs on black sprintstars and has beard seats in grey fitted,  I started the resto a while back and its going to be put back to how it was but correct panels welded in and a colour change,I love gulf blue but there are to many cars in that colour at the moment plus i think its time for a change as its having a make over. thanks for your interest ben |
|
|
|
« Last Edit: November 26, 2011, 17:54:14 pm by sparkieben »
|
 Logged
|
|
|
|
|
Nico86
|
|
« Reply #1 on: July 01, 2011, 22:34:38 pm » |
|
Welcome to The Lounge, good looking bug!
|
|
|
|
|
Logged
|
|
|
|
sparkieben
Newbie
Posts: 20
|
|
« Reply #2 on: July 02, 2011, 11:53:27 am » |
|
Thankyou Nico its appreciated
The car needed a lot of repairs as once stripped out to a bare shell it became evident
My plan was to strip it out and get it structurally sound so that it could be sent out for blasting
Heres the list of repairs needed and the panels ive used
Rear quarters both sides (genuine)
Rear cross members (heritage)
Front inner wings lower (repro)
Door pillars (hookys)
Front bulk head repairs (homemade)
Spare wheel wheel (repro)
Doors x2 (nos)
Rear bumper mounts (hookys)
|
|
|
|
|
Logged
|
|
|
|
sparkieben
Newbie
Posts: 20
|
|
« Reply #3 on: July 02, 2011, 21:19:39 pm » |
|
Im not going to bore you with hundreds of photos of every panel i have cut out and replaced so heres a few so you can get the ideal of how looks can be deceiving The start of the strip down  Drivers inner wing  Rear quarter panel cut out  The story continues through out the car really with practically every repair panel in the book has been grafted in so that was my reason for wanting to replace them correctly,To be honest this car had gone to far to be saved but i have a lot of fond memories in this car and seeing i have owned it for sixteen years it was only right to be brought back. |
|
|
|
|
Logged
|
|
|
|
sparkieben
Newbie
Posts: 20
|
|
« Reply #4 on: July 02, 2011, 21:40:41 pm » |
|
I managed to source some nos doors. 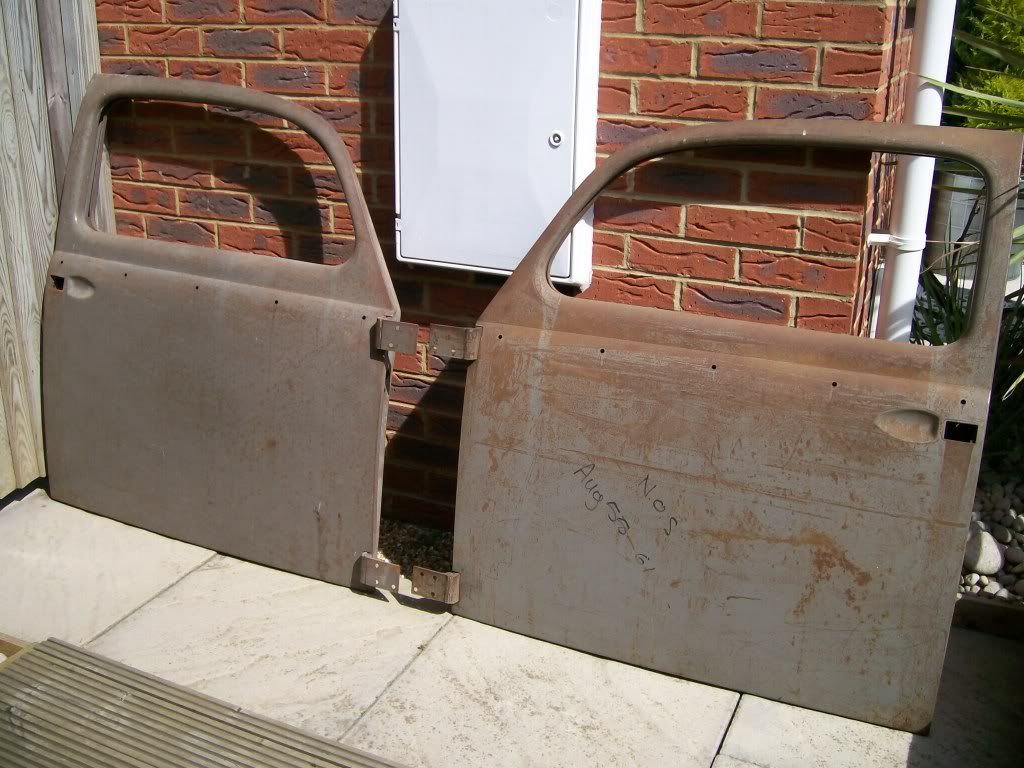 Once most of the structural welding was complete it was sent off to be blasted. This pic shows the shell with both rear quarters replaced and the new cross members fitted but some repairs still needed to the floor 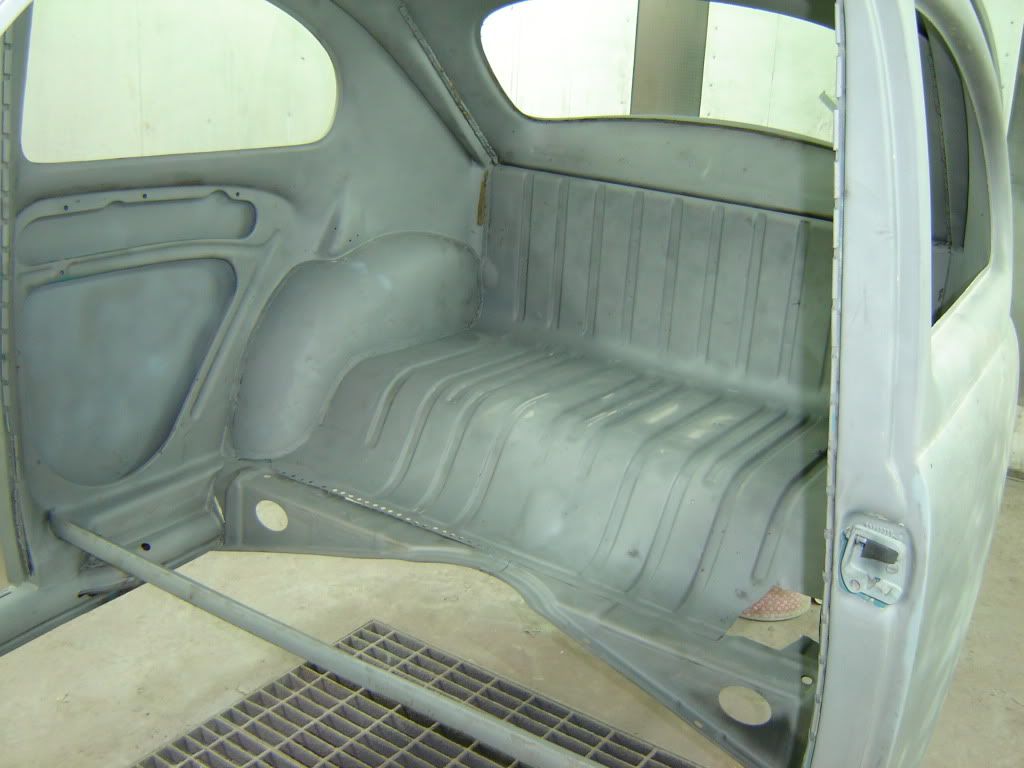 The car is awaiting etch primer here The suspension mounting panels and rear bumper mounts are being replaced with early ones as they are different on the later quarter panels 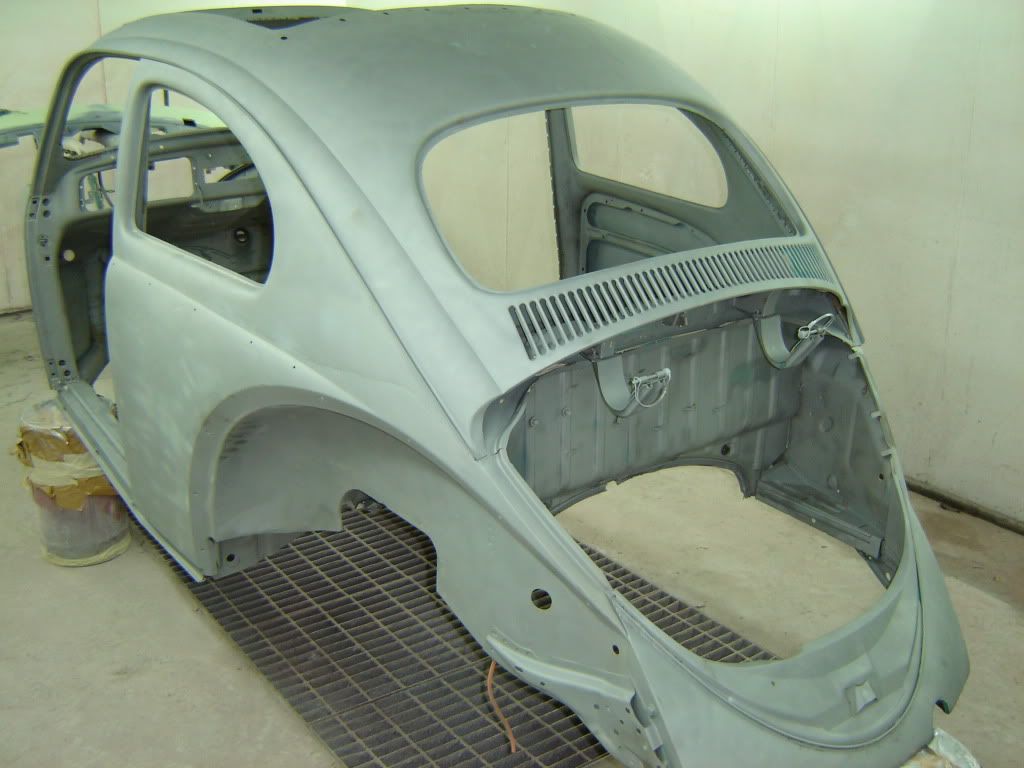 Thankfully the shell is quite straight now and does not need to much filler work before the primer stage Im pleased with the outcome as i now have a nice solid shell |
|
|
|
|
Logged
|
|
|
|
sparkieben
Newbie
Posts: 20
|
|
« Reply #5 on: November 26, 2011, 18:18:09 pm » |
|
|
|
|
|
|
Logged
|
|
|
|
|
Hotrodvw
|
|
« Reply #6 on: November 27, 2011, 07:31:13 am » |
|
Awesome!  |
|
|
|
|
Logged
|
|
|
|
|
jamiep_jamiep
|
|
« Reply #7 on: November 27, 2011, 20:11:40 pm » |
|
Wow! That is fantastic....
|
|
|
|
|
Logged
|
|
|
|
sparkieben
Newbie
Posts: 20
|
|
« Reply #8 on: November 27, 2011, 20:52:08 pm » |
|
Thanks hotrodvw and cheers jamie its been hard graft and the positive comments is really appreciated
|
|
|
|
|
Logged
|
|
|
|
|
Matty c
|
|
« Reply #9 on: November 27, 2011, 21:06:09 pm » |
|
Bitchen work there ben but you forgot to weld up the trim holes  Seriously though this is good stuff, keep it up. Matt |
|
|
|
|
Logged
|
67heaven
|
|
|
|
fredy66
|
|
« Reply #10 on: November 28, 2011, 11:35:37 am » |
|
looking good man
|
|
|
|
|
Logged
|
arabia slugs
|
|
|
|
Todi
|
|
« Reply #11 on: November 28, 2011, 15:13:02 pm » |
|
Love it !
|
|
|
|
|
Logged
|
|
|
|
Worm
DKK
Hero Member
Posts: 762
Whose stupid idea was that?
|
|
« Reply #12 on: November 29, 2011, 01:32:05 am » |
|
Perfect! Fantastic color choice.
|
|
|
|
|
Logged
|
  "Pretending to know everything closes the door on whats really there" |
|
|
|
danny gabbard
|
|
« Reply #13 on: November 30, 2011, 22:34:43 pm » |
|
Another great build ! Thanks for posting pictures.
|
|
|
|
|
Logged
|
A poor craftsman, Blame's it on poor tools. GAB-FAB shop # 775 246-3069
|
|
|
allmenplayon10
Jr. Member
Posts: 69
|
|
« Reply #14 on: December 02, 2011, 21:08:43 pm » |
|
awesome  |
|
|
|
|
Logged
|
All men play on 10
Never gonna turn down again
1961 Type1 Cal
|
|
|
sparkieben
Newbie
Posts: 20
|
|
« Reply #15 on: December 03, 2011, 12:17:24 pm » |
|
Thankyou for all the nice comments
for some reason i have lost the pics for the stage of the panels being cut out and new welded in hence why they are missing at the begining,
I have mock fitted the engine and started making the new loom now and trying to make it look factory but with extra cables for the msd ignition etc.
Its difficult trying to draw the cables through the pvc casing but hopefully it should look good,
My fuel lines also arrived this morning so hopefully in a week or so it should be running
I will try to take some more pics today and upload later thanks ben
|
|
|
|
|
Logged
|
|
|
|
ianmac
Jr. Member
Posts: 68
|
|
« Reply #16 on: December 05, 2011, 22:58:13 pm » |
|
Nice work |
|
|
|
|
Logged
|
|
|
|
|
too old for this
|
|
« Reply #17 on: December 18, 2011, 20:22:03 pm » |
|
Hey Ben..fantastic work,nice to see you kept with it  |
|
|
|
|
Logged
|
JG54
|
|
|
61ragtop
Newbie
Posts: 45
|
|
« Reply #18 on: January 07, 2012, 18:05:51 pm » |
|
Looking great ben, any chance of a pic of your front inner 1/4's need a comparison for mine
cheers james
|
|
|
|
|
Logged
|
|
|
|
Nick
Newbie
Posts: 25
|
|
« Reply #19 on: January 11, 2012, 17:09:47 pm » |
|
Cooool ! Great colour and very clean !  |
|
|
|
|
Logged
|
|
|
|
sparkieben
Newbie
Posts: 20
|
|
« Reply #20 on: February 05, 2012, 16:24:41 pm » |
|
Here you are james this is a pic of the front inner wings from inside the car 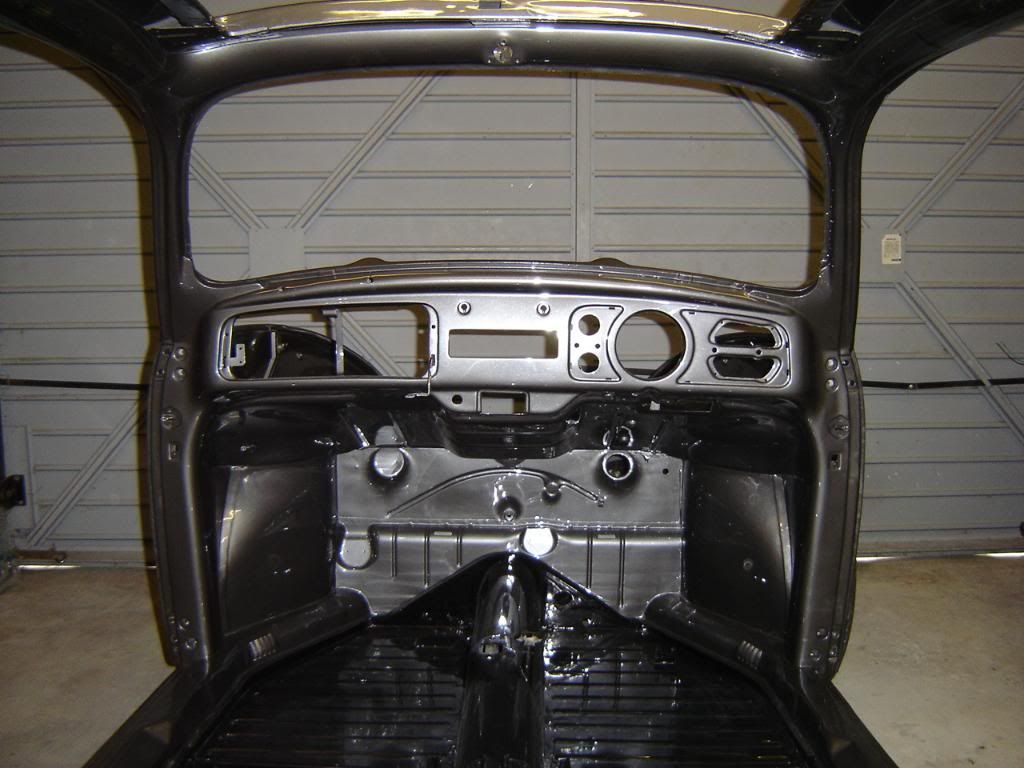 I have been busy working on the car as i said the engine has been put in the car for the purpose of wiring it, 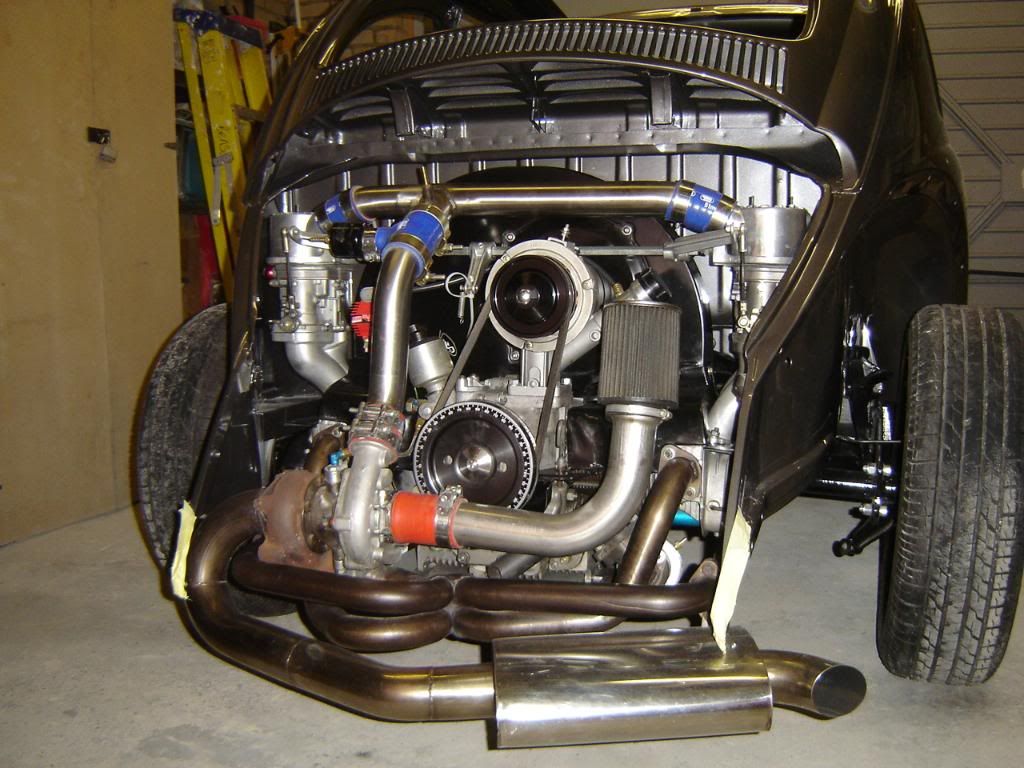 The loom is all made now and engine removed so i can lift up the body to fit the pan gasket. The wings,bonnet and decklid are all prepped and currently sat in the body shop waiting for colour, my plan this afternoon is to replace the nylon guide bush in the tunnel and fit the berg shifter,ive been told this can be a fiddly little job so hope it goes well Thanks for reading ben |
|
|
|
|
Logged
|
|
|
|
|
Andy Sykes
|
|
« Reply #21 on: February 05, 2012, 18:05:29 pm » |
|
Looks awesome well done  Cheers andy |
|
|
|
|
Logged
|
I love the haters they make me famous.
im building this not just putting parts together, they are two totally different things
Your only here once turn it up to 11
|
|
|
|
jamiep_jamiep
|
|
« Reply #22 on: February 06, 2012, 09:23:34 am » |
|
Wow!
|
|
|
|
|
Logged
|
|
|
|
|
thejohn66
|
|
« Reply #23 on: February 06, 2012, 10:33:30 am » |
|
Looks great, what is the engine spec? |
|
|
|
|
Logged
|
Bitburg motor boating club member.
|
|
|
sparkieben
Newbie
Posts: 20
|
|
« Reply #24 on: February 06, 2012, 19:39:53 pm » |
|
Hi the engine is only a small 2 ltr that was in the car before the resto began,I have not done anything to the engine as it was running fine before so fingers crossed it will still be ok,The turbo is a little undersized as it was the first one i bought when it was built .Ive decided to upgrade the ignition as it was running a 009 with points and condensor so now it will be having a msd system.
spec
msd digital 6 and blaster coil
as41 case
cb performance 74mm crankshaft and lightened flywheel
kennedy stage 2 and daiken disc
cb straight cut gears and web 86a camshaft
cb H beam rods
manton pushrods
cb 1.4 rockers
O43 heads 42 inlets 37.5 ex ,dual springs
45 trim turbo 42/48
stainless header and exhaust
cb wastegate and bailey dump valve
45 drla dellortos which were sent to italy to be turbo prepared
Originally built by myself and then i fancied a cam change so i went up to yorkshire for a couple of days and with the help of daz from Aircooled performance we changed the cam and did some head porting and reassembled it,
I really enjoyed spending some time with daz and nige as the banter between them is certainly entertaining,if your reading this daz I hope your all well and thanks once again for your expertise and hospitality.
Like i said earlier in the thread the engine will stay as it was for now as im more than happy with it.
Thanks ben
|
|
|
|
|
Logged
|
|
|
|
papapsi
Newbie
Posts: 46
|
|
« Reply #25 on: February 06, 2012, 22:32:24 pm » |
|
i'm nige's brother. i'm sure he will be pleased to know you enjoyed his entertaining company. nice looking car by the way. |
|
|
|
|
Logged
|
|
|
|
54Kab
Full Member
Posts: 102
Steve Mortimer
|
|
« Reply #26 on: February 07, 2012, 11:55:10 am » |
|
Wow. Only just seen this thread. That finish is stunning. What colour is that?
|
|
|
|
|
Logged
|
---------------------------------------------------------
'Super Sano Street cars' for me, thank you
|
|
|
|
peach_
|
|
« Reply #27 on: February 07, 2012, 20:44:04 pm » |
|
fantastic Keep us up to date dude
|
|
|
|
|
Logged
|
1966 java green looker- 2276 Street Machine, with standard gear box@ 14.5 (2013), With Pro Street Box @ 13.5 (2014), still more to come! SAS RENN-WAGENS and proud  #CALLOOKDRAGS |
|
|
sparkieben
Newbie
Posts: 20
|
|
« Reply #28 on: February 07, 2012, 22:04:35 pm » |
|
Thanks the colour is a new aston martin colour
The body shell, doors,rear valance and small dashboard parts are all painted now just the wings and bonnet to go
The shifter coupling is fitted and my berg is in and im very pleased with the gearshift nice and responsive i will try to upload a pic later thanks ben
|
|
|
|
« Last Edit: February 09, 2012, 01:31:13 am by sparkieben »
|
Logged
|
|
|
|
|
thejohn66
|
|
« Reply #29 on: February 10, 2012, 12:53:35 pm » |
|
I'm loving the subtle turbo "cal look". Looks fantastic |
|
|
|
|
Logged
|
Bitburg motor boating club member.
|
|
|
|
 The Cal-look Lounge


 Author