The Cal-look Lounge
Welcome, Guest. Please login or register.
Did you miss your activation email?
November 23, 2024, 02:19:14 am

Login with username, password and session length
Thank you for your support!
Search:     Advanced search
351205 Posts in 28655 Topics by 6853 Members
Latest Member: Hacksaw Racing
* Home This Year's European Top 20 lists All Time European Top 20 lists Search Login Register
+  The Cal-look Lounge
|-+  Cal-look/High Performance
| |-+  In Da Werks
| | |-+  Fubar 64
« previous next »
Pages: 1 2 3 [4] 5 6 ... 13 Print
Author Topic: Fubar 64  (Read 185121 times)
vwhelmot
Hero Member
*****
Posts: 687


« Reply #90 on: June 29, 2015, 21:36:08 pm »

Cut out


I first had to make an infill panel to make up for the indent left from the pressing used for the later heater outlet.


Onto the roller with some fresh steel. I used the old section to get the correct curve.


« Last Edit: June 29, 2015, 21:38:46 pm by vwhelmot » Logged
vwhelmot
Hero Member
*****
Posts: 687


« Reply #91 on: June 29, 2015, 21:41:12 pm »


Logged
vwhelmot
Hero Member
*****
Posts: 687


« Reply #92 on: June 30, 2015, 08:08:14 am »

Next to go was the cheap heater vent pressing. I did toy with the idea of replacing this with a genuine section of vents but went for the smooth look anyway.


Traced a line to cut the extra wide lip down too


better


Logged
vwhelmot
Hero Member
*****
Posts: 687


« Reply #93 on: June 30, 2015, 09:02:02 am »

Other side smoothed and trimmed too


Modified for the correct smooth style


Logged
vwhelmot
Hero Member
*****
Posts: 687


« Reply #94 on: June 30, 2015, 09:39:13 am »

Now the next section to get attention was the door pillar. Now I could have just used a chunk of filler to smooth over the seam and job done as it was not rusty or welded in the wrong place but that wasn't going to cut it and I needed access to the wing nutserts on the front quarter panel. I thought about what options I had , door pillar repair panels are not high enough to get decent access so I managed to get a nos dash and pillar panel so I could cut that up instead.


Nos door pillar


Goes to show what lies beneath. This seam was only about seven years old as the front quarter had been replaced in the crash. Lack of weld through primer.


As you can see, the nutserts were wrong. Access was still a pain in the arse and also I had to replicate the original look as they are visible from inside the bonnet. Trusty press tool was used again.

Grinding off the incorrect nutsert took a while as not to damage the panel.


They were well stuck on!


Indent making


Outside


A square hole was made to accept the genuine nutsert


Inside


Both


Each nut was blasted and the inside of the quarter was too.


Now , silver soldering the nut in place was tricky, limited access and heat damage.


Nearly done


Logged
vwhelmot
Hero Member
*****
Posts: 687


« Reply #95 on: June 30, 2015, 09:55:59 am »

Just the inside of the pillar was used. I wanted the seam to be flawless.


The wiring hole was in the wrong place too.


Used a dimple die to give it a little custom touch  Cheesy


Filler piece and welded up the old wiring hole


New was made closer to the pillar.


I added a second tab so to keep the main loom tidier.


Now before welding in the panel, I epoxy primed the lower front quarter on the inside so that it is protected and the correct colour. I have premixed colour matched  (near as dammit) epoxy. There is now way to get this coverage after the panel is welded back on.


I had blasted this area before paint.


Logged
karl h
Hero Member
*****
Posts: 931


« Reply #96 on: June 30, 2015, 10:55:03 am »

what kind of weld-through primer do you use?
Logged

vwhelmot
Hero Member
*****
Posts: 687


« Reply #97 on: June 30, 2015, 12:27:37 pm »

upol Wed#2 Good stuff
Logged
vwhelmot
Hero Member
*****
Posts: 687


« Reply #98 on: June 30, 2015, 12:36:14 pm »

Half way through welding it in


nicer than before


Logged
BeetleBug
Hero Member
*****
Posts: 2836


Snabba grabben...


« Reply #99 on: June 30, 2015, 12:53:22 pm »

upol Wed#2 Good stuff

Volvo also have a really good one:
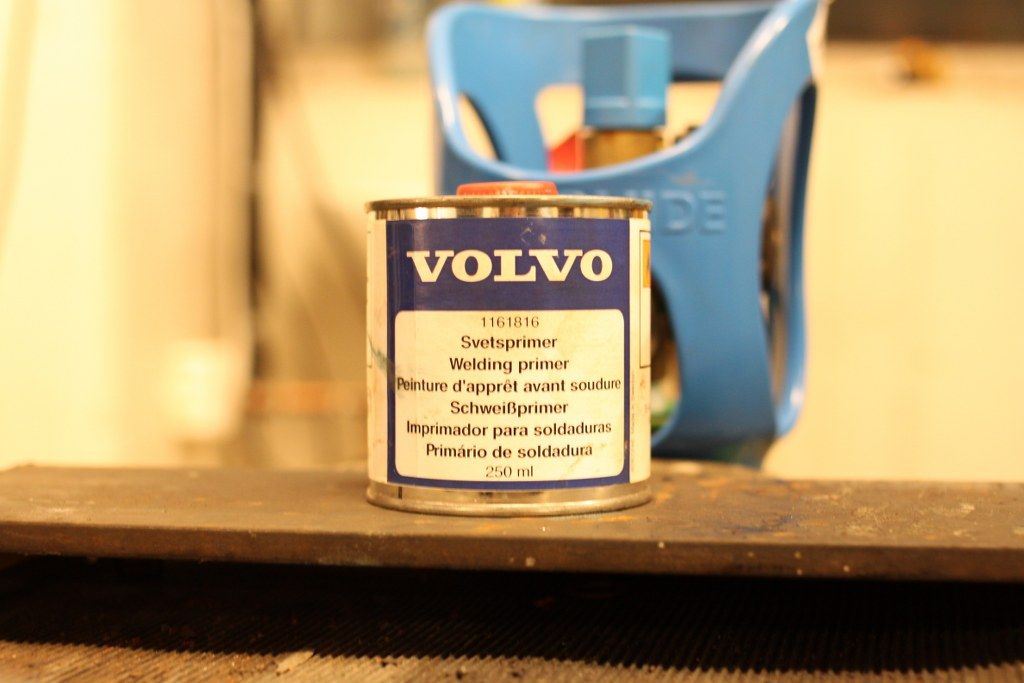


Best rgs
BB
Logged

10.41 - 100ci - 1641ccm - 400hp
vwhelmot
Hero Member
*****
Posts: 687


« Reply #100 on: June 30, 2015, 13:28:49 pm »

Yeah but that's only for Volvos  Grin
Logged
VWGlassee
Full Member
***
Posts: 223


« Reply #101 on: June 30, 2015, 23:10:43 pm »

Really loving your resto!

Keep the updates commin'!  Cool
Logged

Get In, Sit Down, Shut Up, & Hold On
karl h
Hero Member
*****
Posts: 931


« Reply #102 on: July 01, 2015, 06:49:00 am »

i tried to get the upol primer, but no one in the uk will ship it to Austria Sad
Logged

vwhelmot
Hero Member
*****
Posts: 687


« Reply #103 on: July 01, 2015, 11:14:56 am »

I`m sure there are other products on the market  Smiley

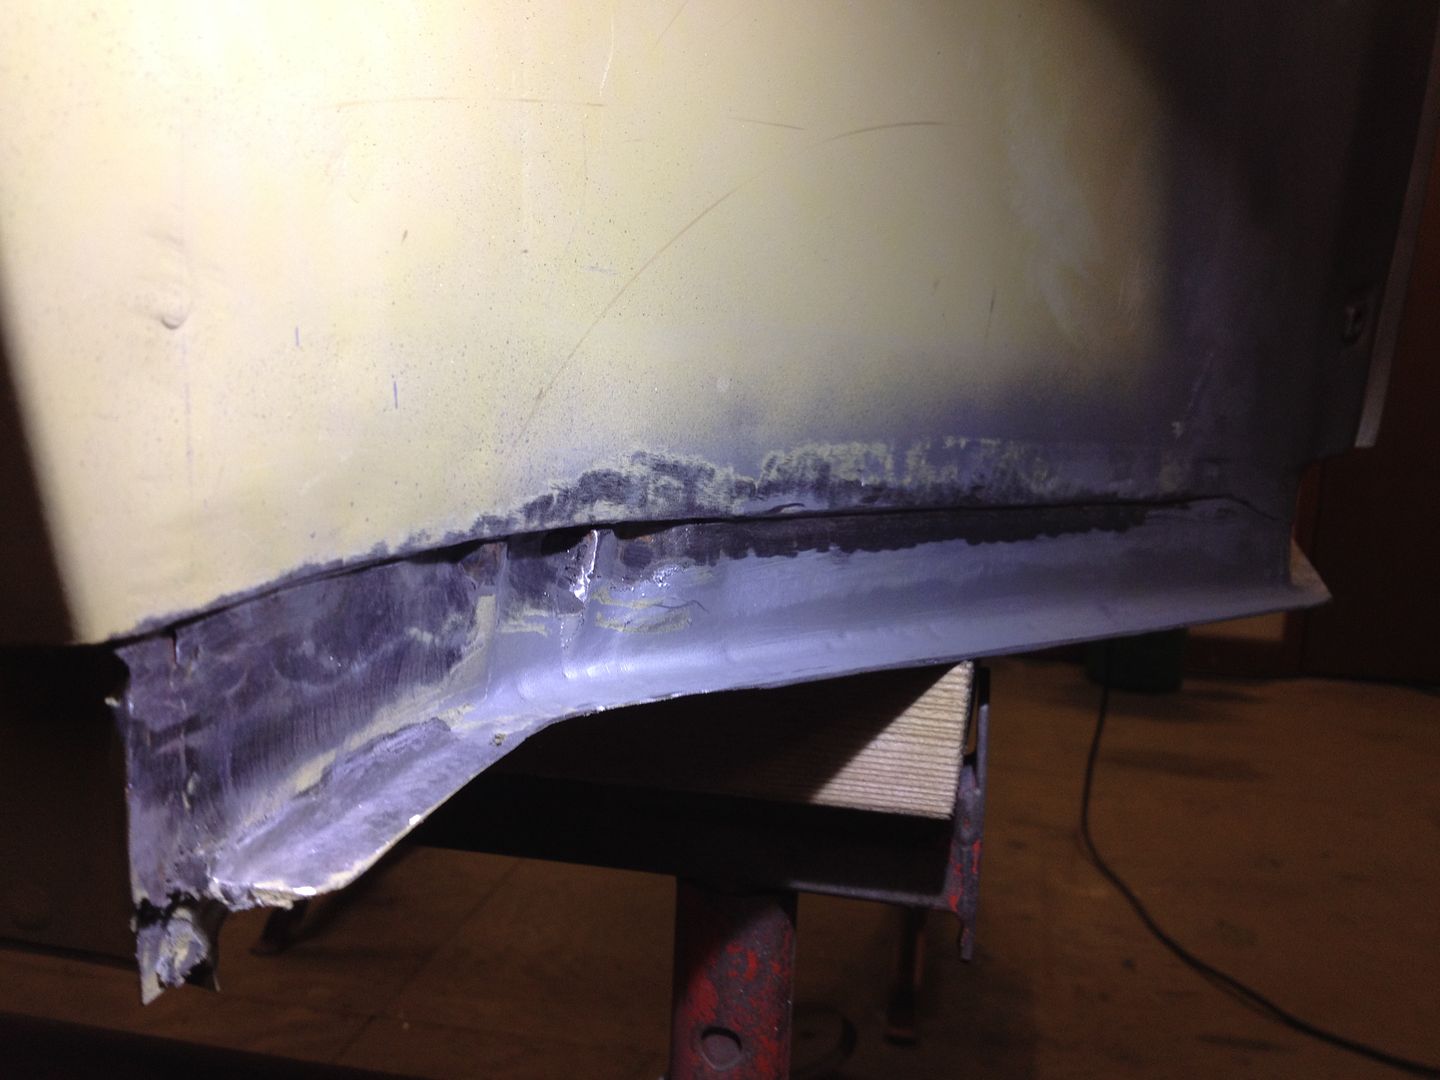
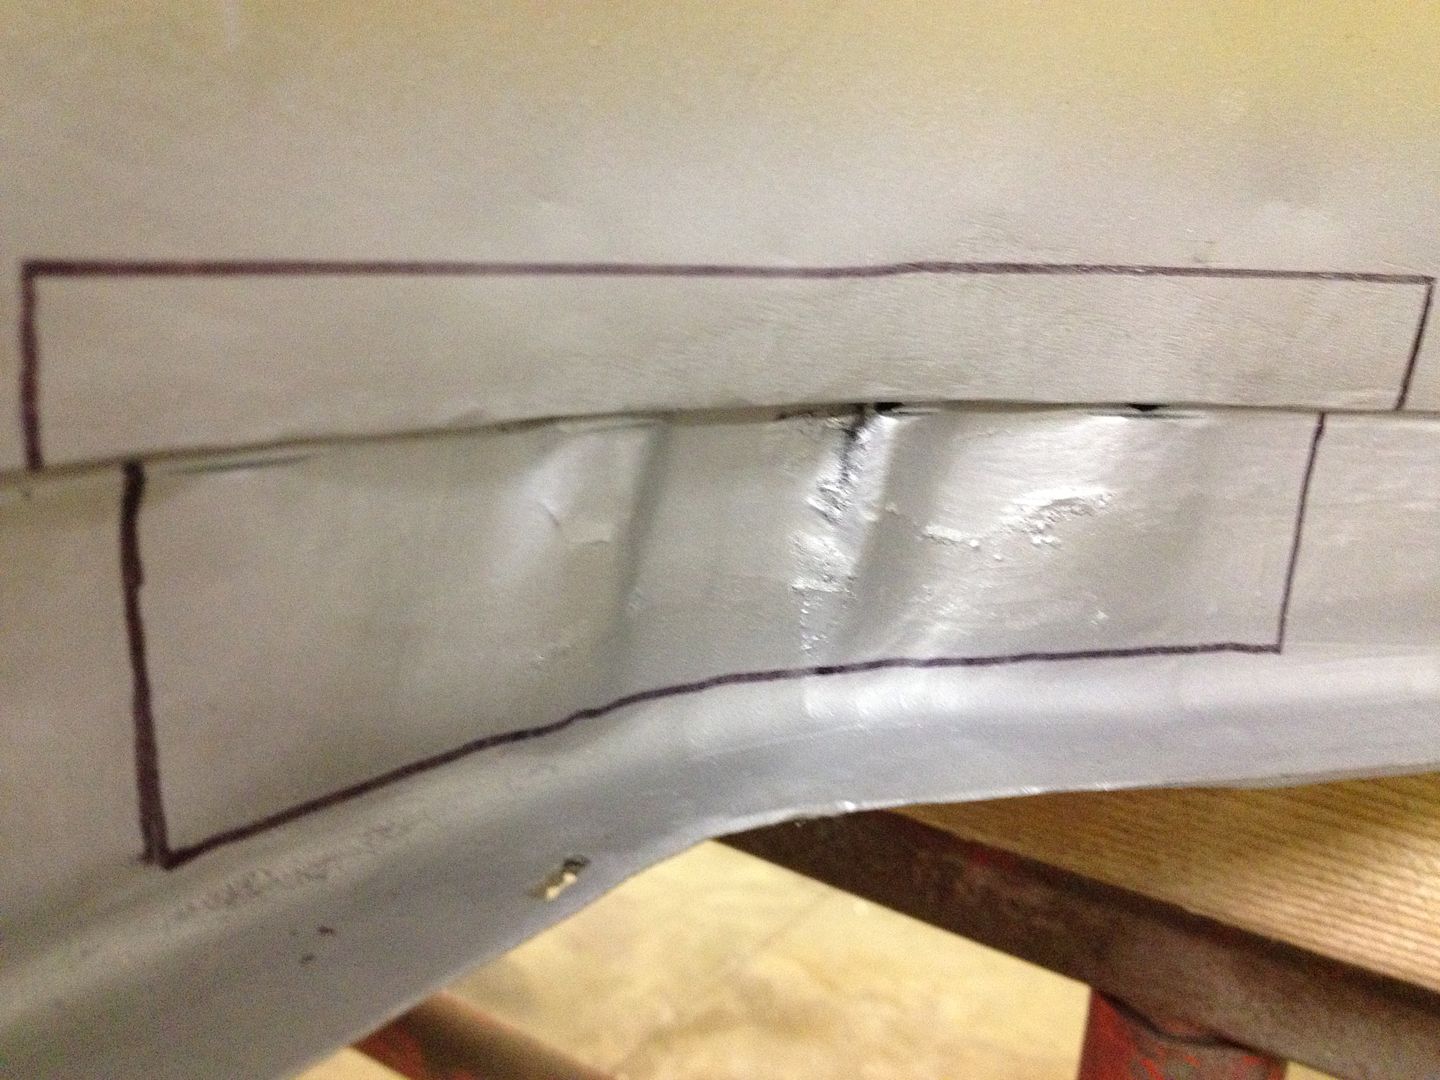
Next on the list was to do something about the poor quality pressing on the front of the channel. It had not been formed properly so I had to do something about it.
 The black line was where I had to cut the lower quarter as it sloped downwards and I wanted it straight.
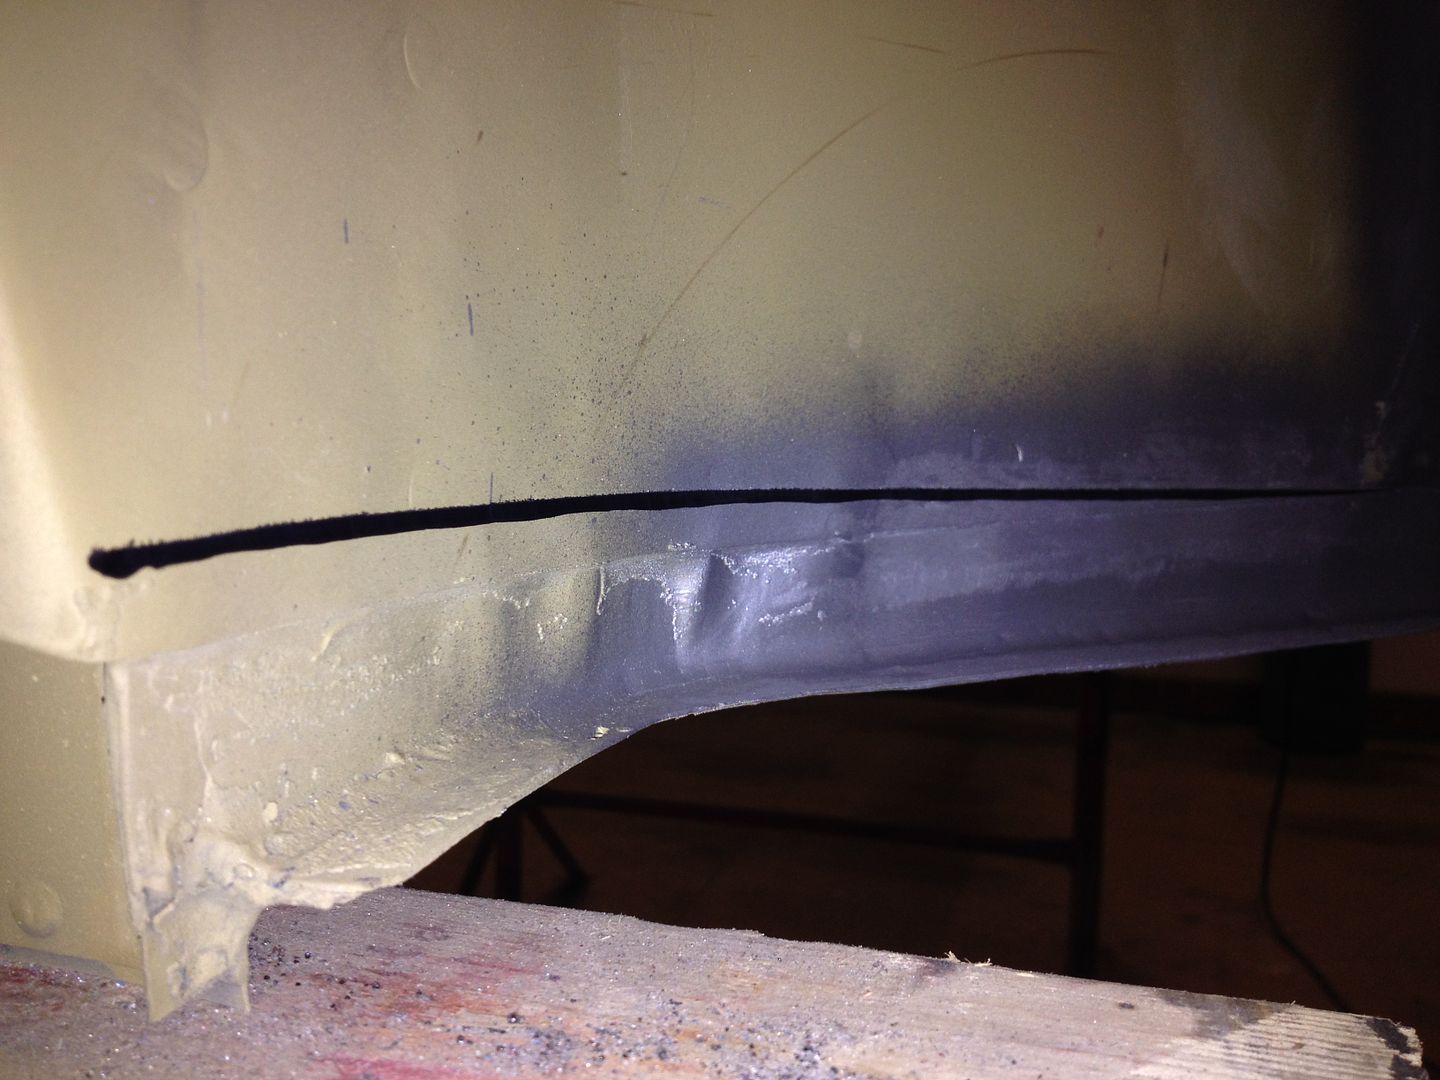


Trimmed straight first


These are the two sections I had to cut out


Done
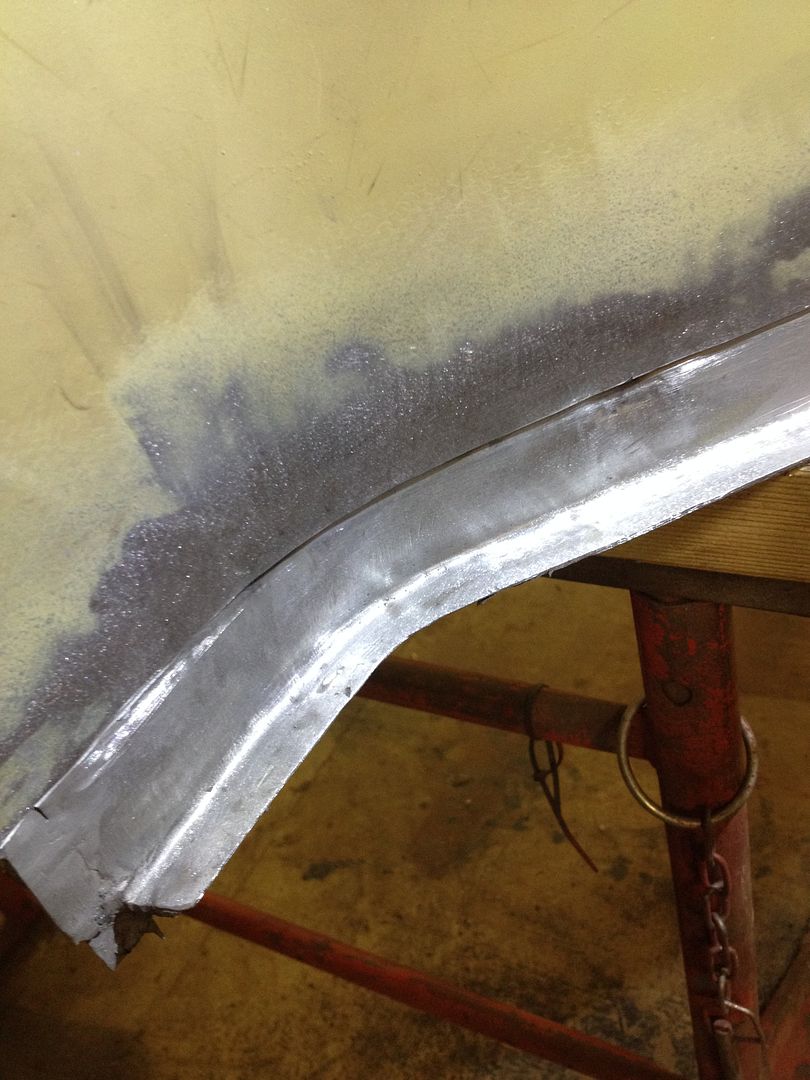


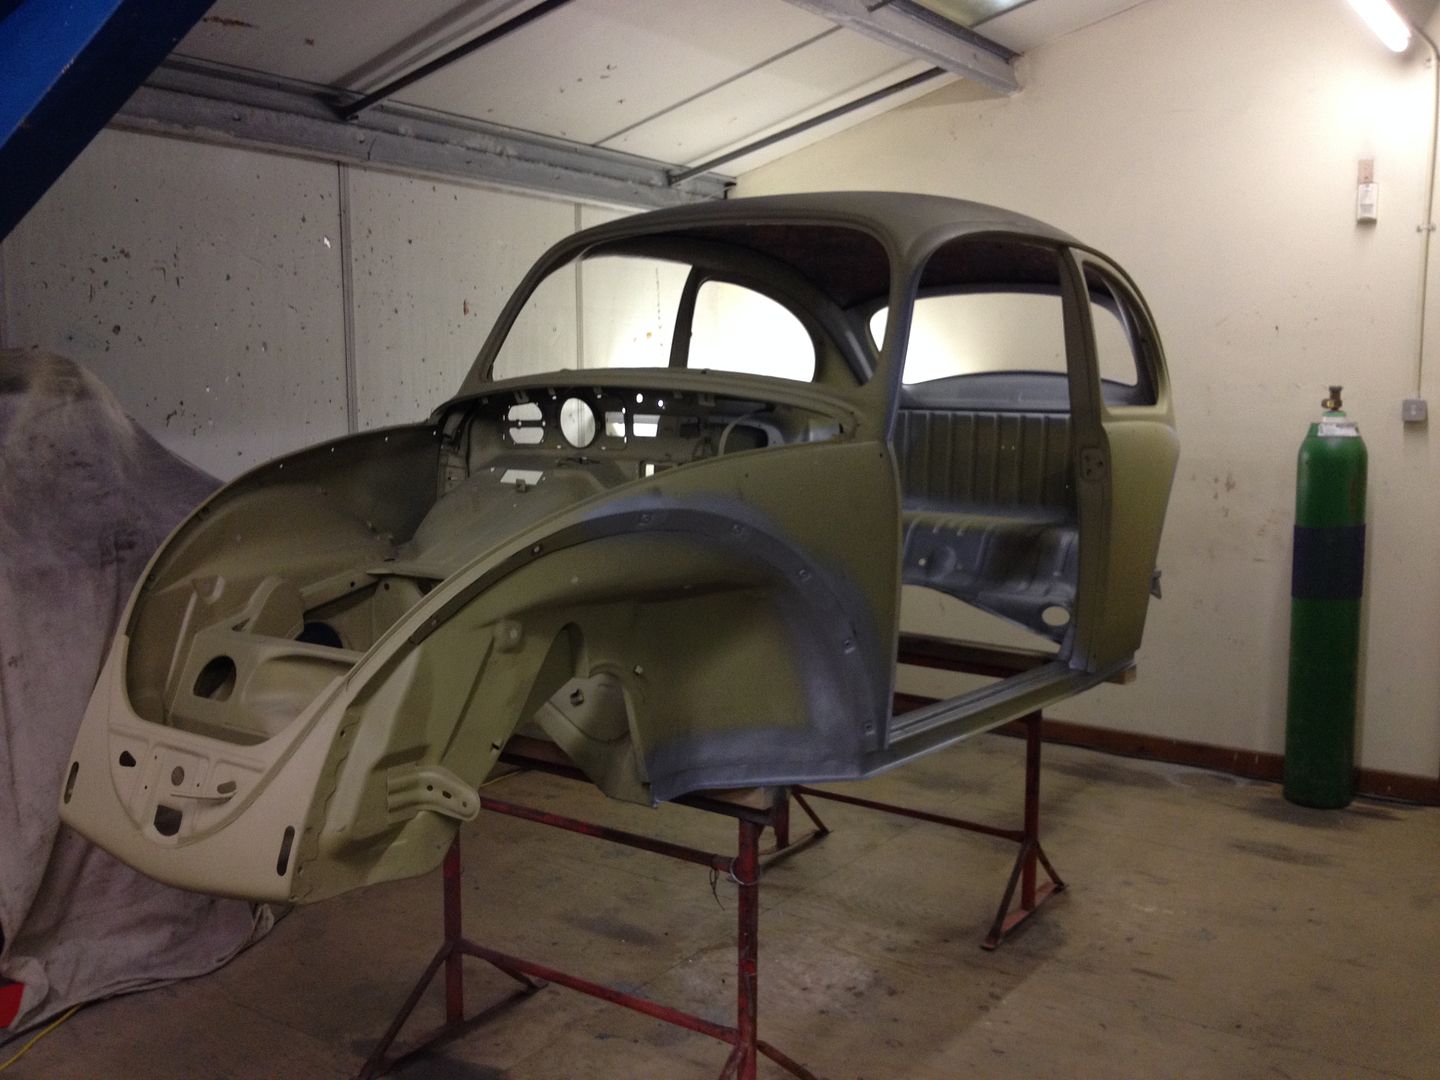
Up to this point the shell looked like this . More and more silver areas were added  Grin

Logged
vwhelmot
Hero Member
*****
Posts: 687


« Reply #104 on: July 01, 2015, 11:50:18 am »

I knew the other side would be a problem, I had tried to get a nos front quarter but failed so I was left with the job of rebuilding the original.  So much of it had been changed, Its had two front clips since I`ve known the car, so trying to put it back to how it should look like was going to be a lot of graft .  I started with the door pillar.


Cut out


Even though I had blasted the shell, there are still areas where you cannot get too..   Rusty shit.


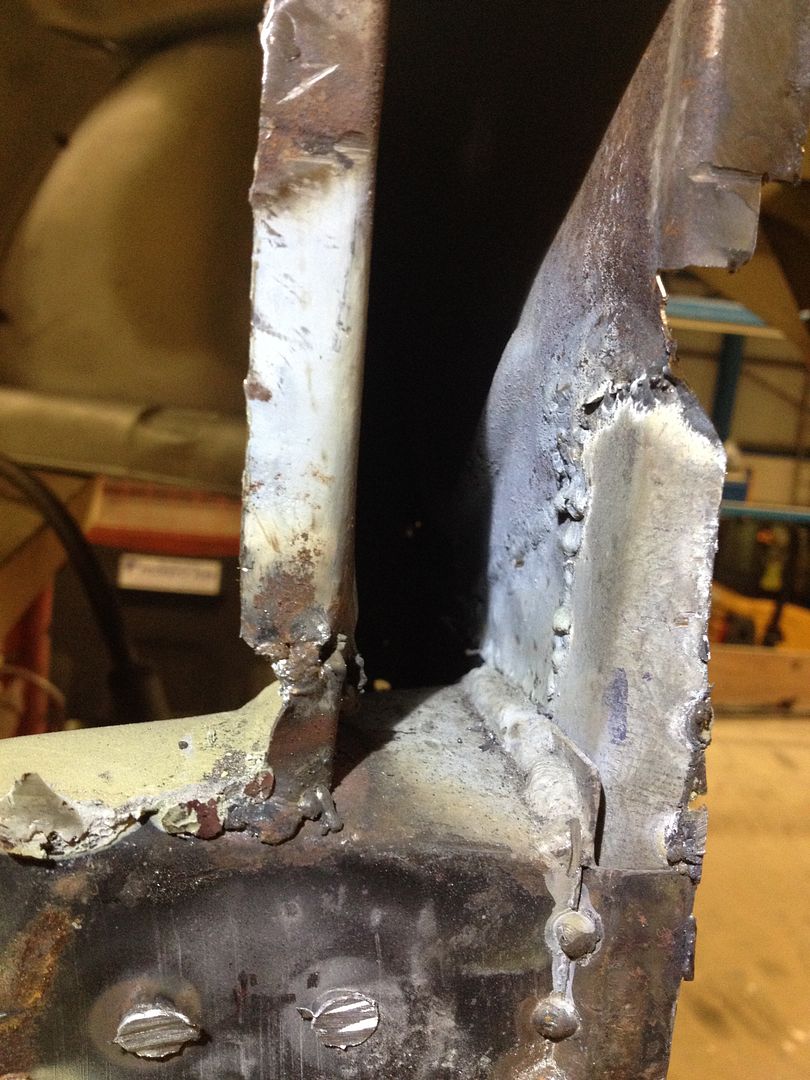
The door pillar is made up of two skins and I`ve wondered about how many cars  are out there with just the outer skin welded and not the inner strengthener panel touched . I used a Hookys panel for this which I straight away drilled out the spot welds to separate them.


Tool


Hidden rust


Welded and smoothed


I blasted the whole area


Blasted all this


Trial fitting the outer. Notice that the seam does not line up as the panel was too long.


Rest of it fitted nice


First tack


Door on to check gaps


I had to cut and adjust the seam so it lined up correctly


Nearly there, tonnes of time spent here.


I drilled and spot welded the inner to the outer like it should be done.


No filler reqd  Grin


I cant believe I`m skipping through all this so quick, its taken a lot of hours to get to just this point and there is a lot more to come. Hope I`m entertaining you and not boring you with my shit. I just wanted to show what has been done so that when its finished its not just the same car tidied up.  Many many hours have been put into all the other detail stuff too. I think I should slow this thread down a bit.  Cheesy


Logged
BeetleBug
Hero Member
*****
Posts: 2836


Snabba grabben...


« Reply #105 on: July 01, 2015, 12:13:03 pm »

I cant believe I`m skipping through all this so quick, its taken a lot of hours to get to just this point and there is a lot more to come. Hope I`m entertaining you and not boring you with my shit. I just wanted to show what has been done so that when its finished its not just the same car tidied up.  Many many hours have been put into all the other detail stuff too. I think I should slow this thread down a bit.  Cheesy

Please keep the updates coming. You are setting new standards and it is really interesting to see all the work you have done and your detailed pictures.

Best rgs
BB
Logged

10.41 - 100ci - 1641ccm - 400hp
Eddie DVK
Hero Member
*****
Posts: 866


« Reply #106 on: July 01, 2015, 12:26:46 pm »

I cant believe I`m skipping through all this so quick, its taken a lot of hours to get to just this point and there is a lot more to come. Hope I`m entertaining you and not boring you with my shit. I just wanted to show what has been done so that when its finished its not just the same car tidied up.  Many many hours have been put into all the other detail stuff too. I think I should slow this thread down a bit.  Cheesy

Please keep the updates coming. You are setting new standards and it is really interesting to see all the work you have done and your detailed pictures.

Best rgs
BB

Yep and the sh... part is it looks so easy...  Undecided Embarrassed

but I tried it sometimes I am not skilled yet..  Embarrassed
Logged

Regards Edgar

" Type 4, it is a completely different engine. You have to drive one to understand! "
vwhelmot
Hero Member
*****
Posts: 687


« Reply #107 on: July 02, 2015, 12:06:01 pm »

Ta muchly  Grin

Next was the front cross member or napoleons hat or what ever you call it. I decided to tackle this section next rather than the lower front O/S quarter because its best way round as you will see.

This bit


I had previously worked on this area and it was far from show worthy. In amongst the box of body cuts I got from the states I had a replacement cross member inc the front firewall which was still spot welded on..


Where it had been cut off he had caught a few of the seams which pleased me no end  Angry


This seam was missing completely  Angry


Nicely butchered


The missing seam was found still stuck on the quarter panel lower which I had bought too ( and never used as it was shit, really shit!)


I drilled the seam off and it would have been rude not to use it..


Tacked back on


Separated the two, at this point I had just blasted the outside.


Little bit of rot but nothing serious


Now, being that my car is RHD , I didn't see the point in keeping the ugly LHD dip switch recess as this area will not be carpeted because carpet hides nasties.  So I made this...


Also filled in the slots for the foot plates


Nice and flat


Logged
vwhelmot
Hero Member
*****
Posts: 687


« Reply #108 on: July 02, 2015, 12:45:48 pm »

Before I cut the cross member out , I cut out the horrible repair I did years ago on the front quarter. It was nasty..
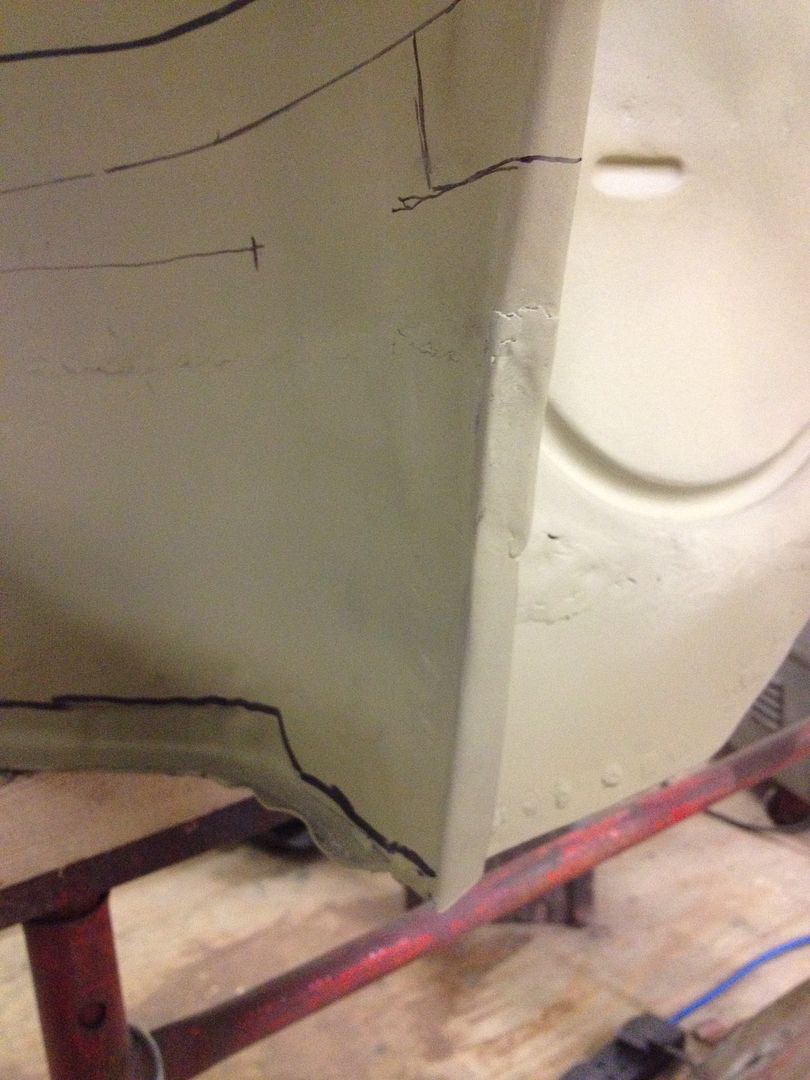


The 'needed' writing was there so there was no confusion as to what sections i needed when emailing people with photos with exactly what i wanted!
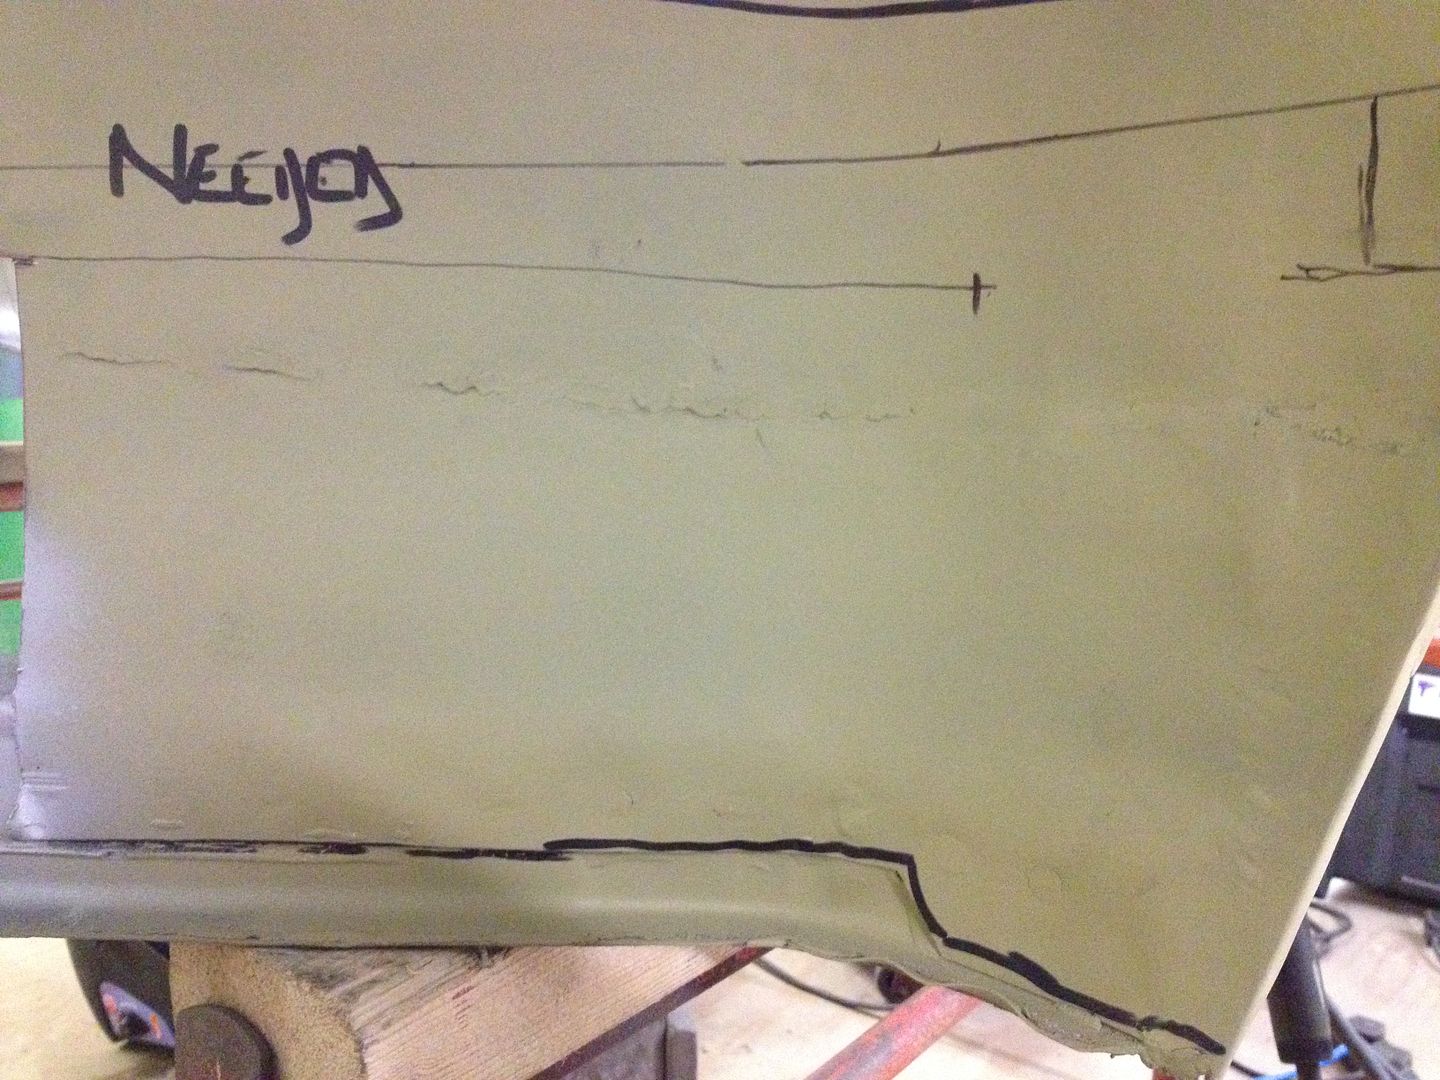


This is what it was hiding!  :shock:
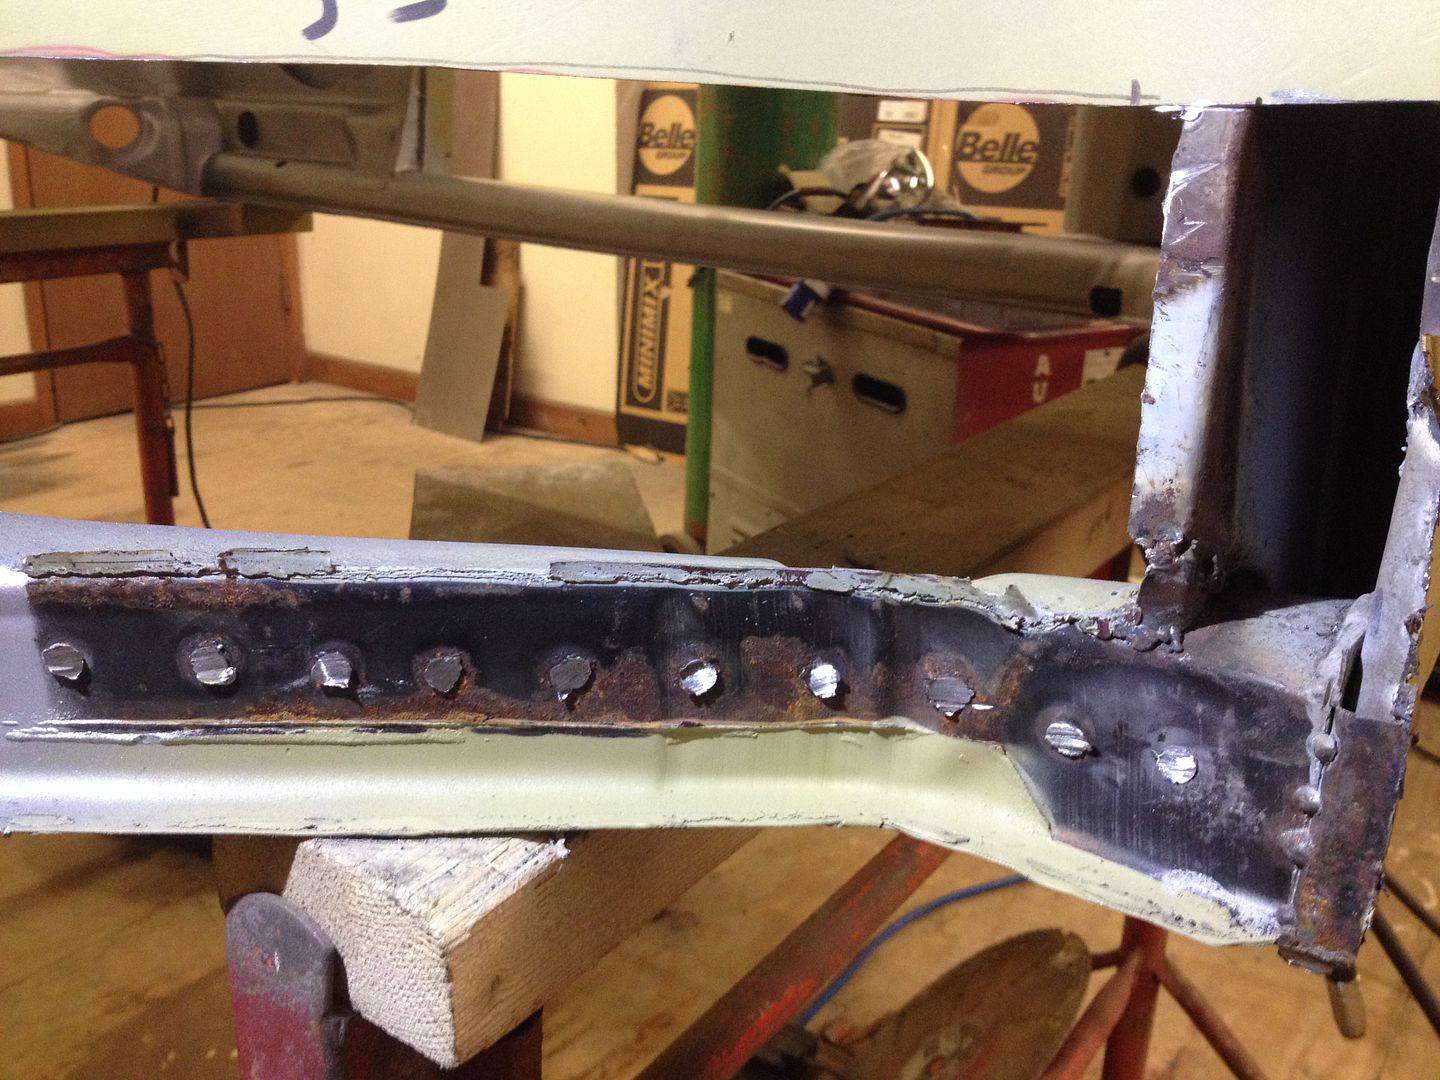


Told you it was nasty!
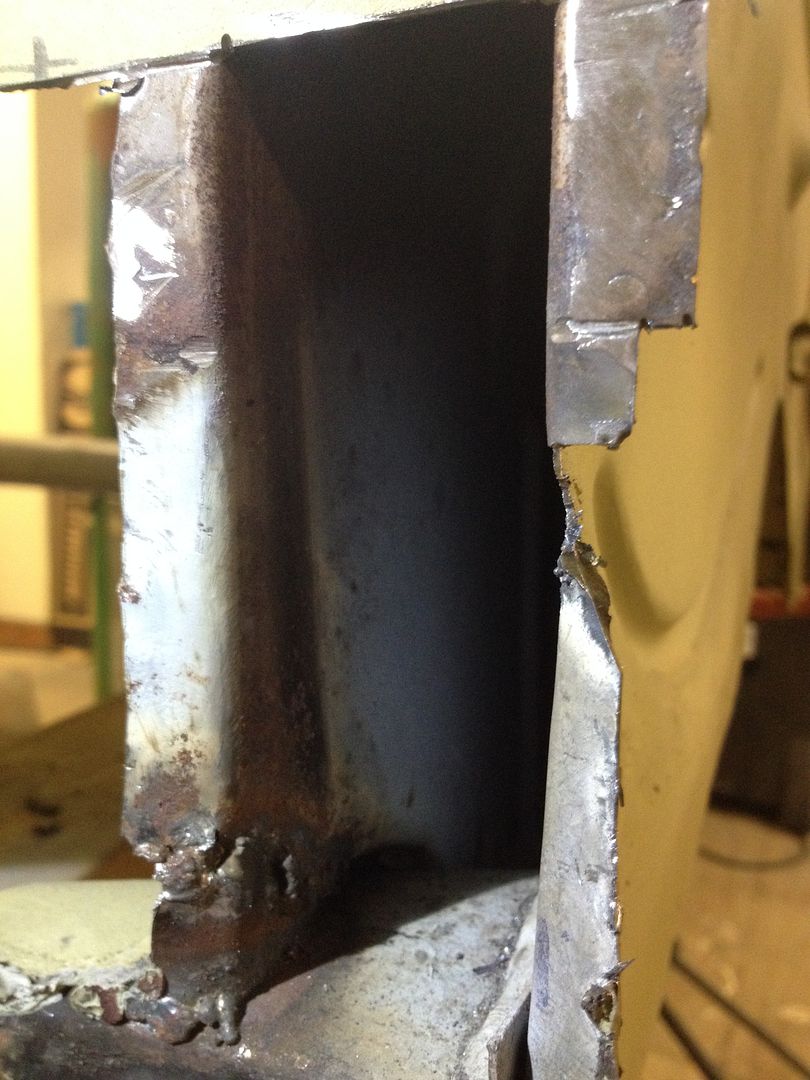


I was dreading this area to be honest, i knew it would be difficult to get it to look factory fresh.

Cut out the old one, which was a bastard of a job
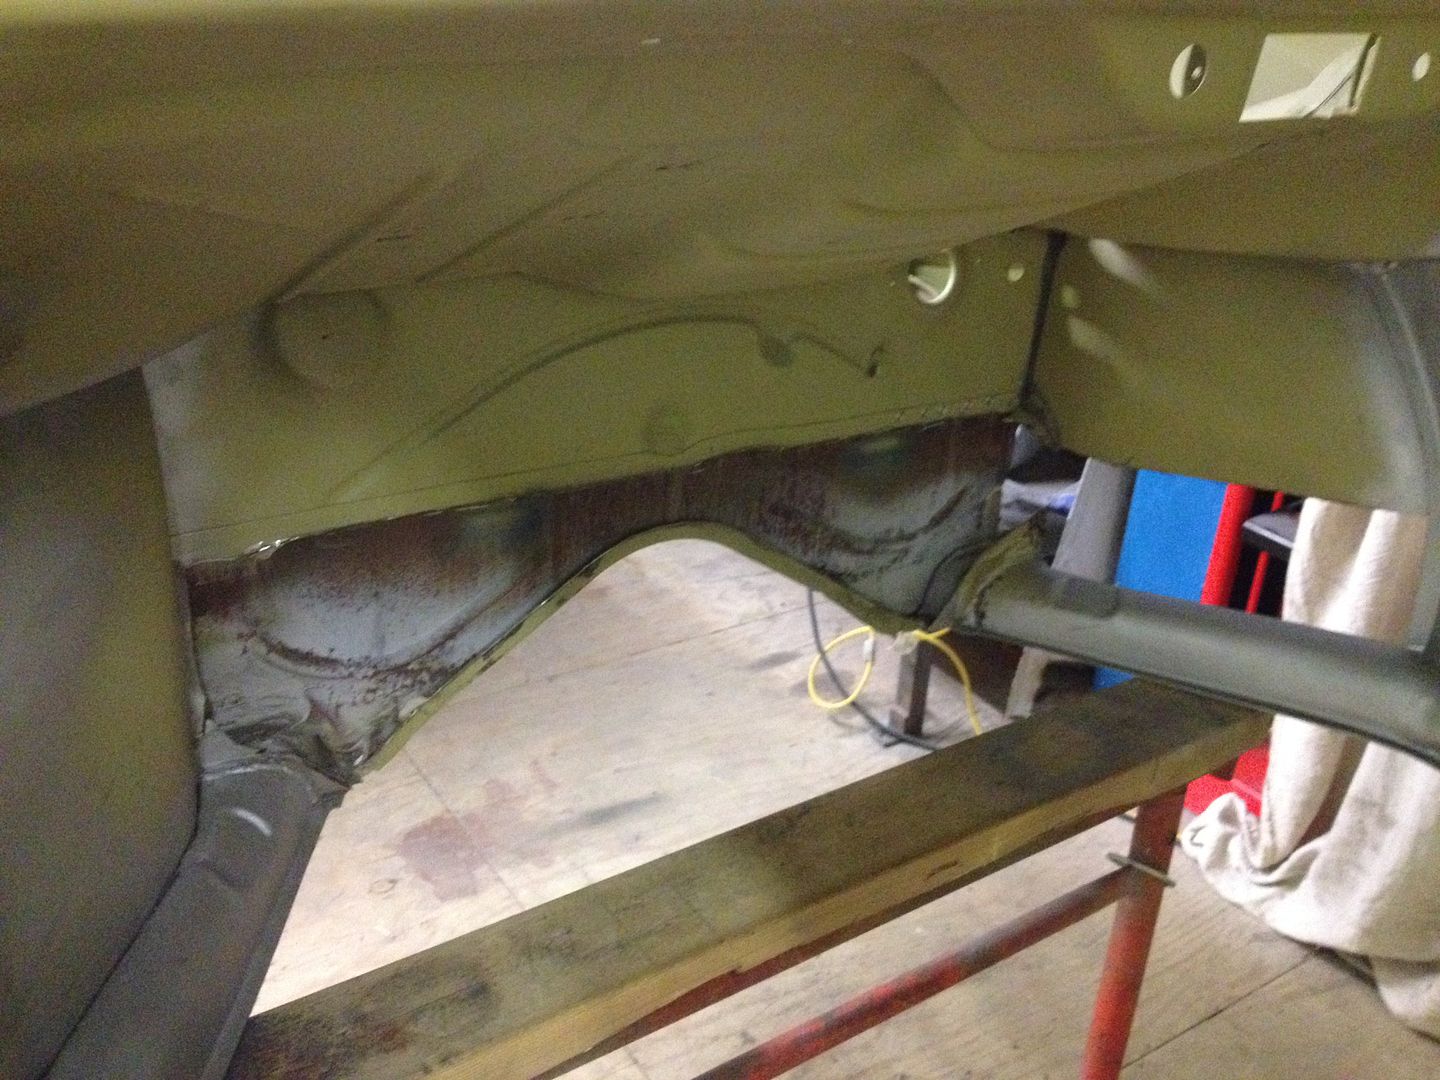


Job done.....
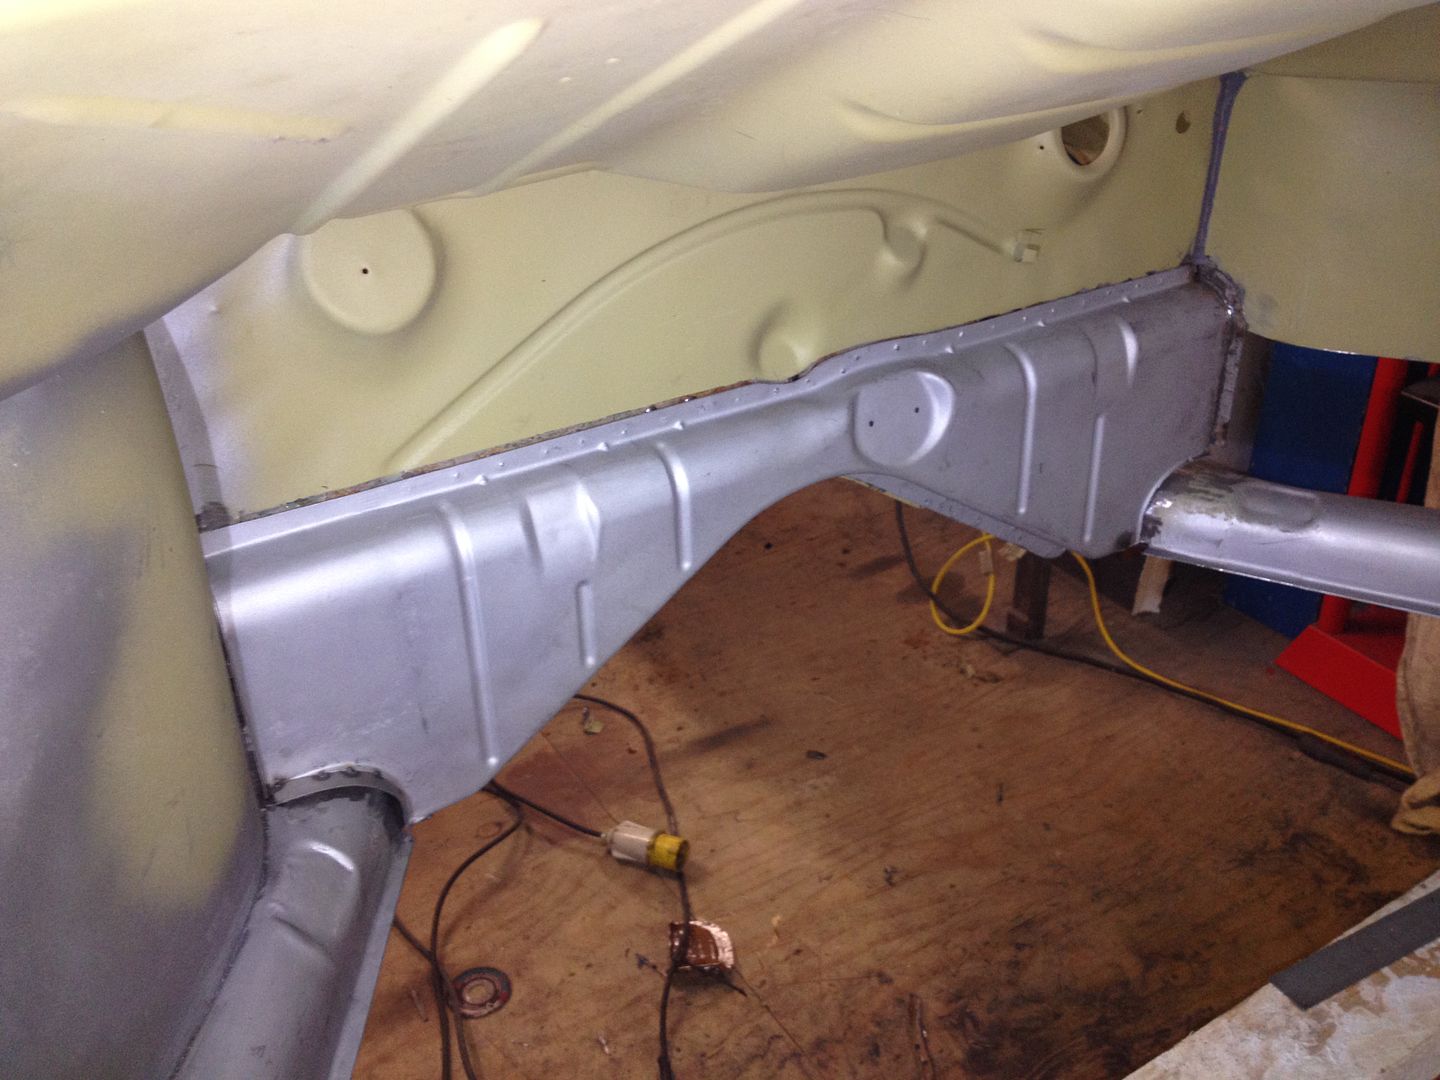


Only joking  Cheesy
Logged
karl h
Hero Member
*****
Posts: 931


« Reply #109 on: July 02, 2015, 13:53:24 pm »

going to smooth the boss where the steering column passes through the bulkhead on LHD cars?
Logged

vwhelmot
Hero Member
*****
Posts: 687


« Reply #110 on: July 02, 2015, 14:46:06 pm »

You got me !  Grin  I did think about it and I still might delete it but being that its a flat panel and thin sheet (0.6mm)  it would be really difficult to get it right and also I might use that raised area for something else.  Wink
Logged
vwhelmot
Hero Member
*****
Posts: 687


« Reply #111 on: July 03, 2015, 12:05:37 pm »

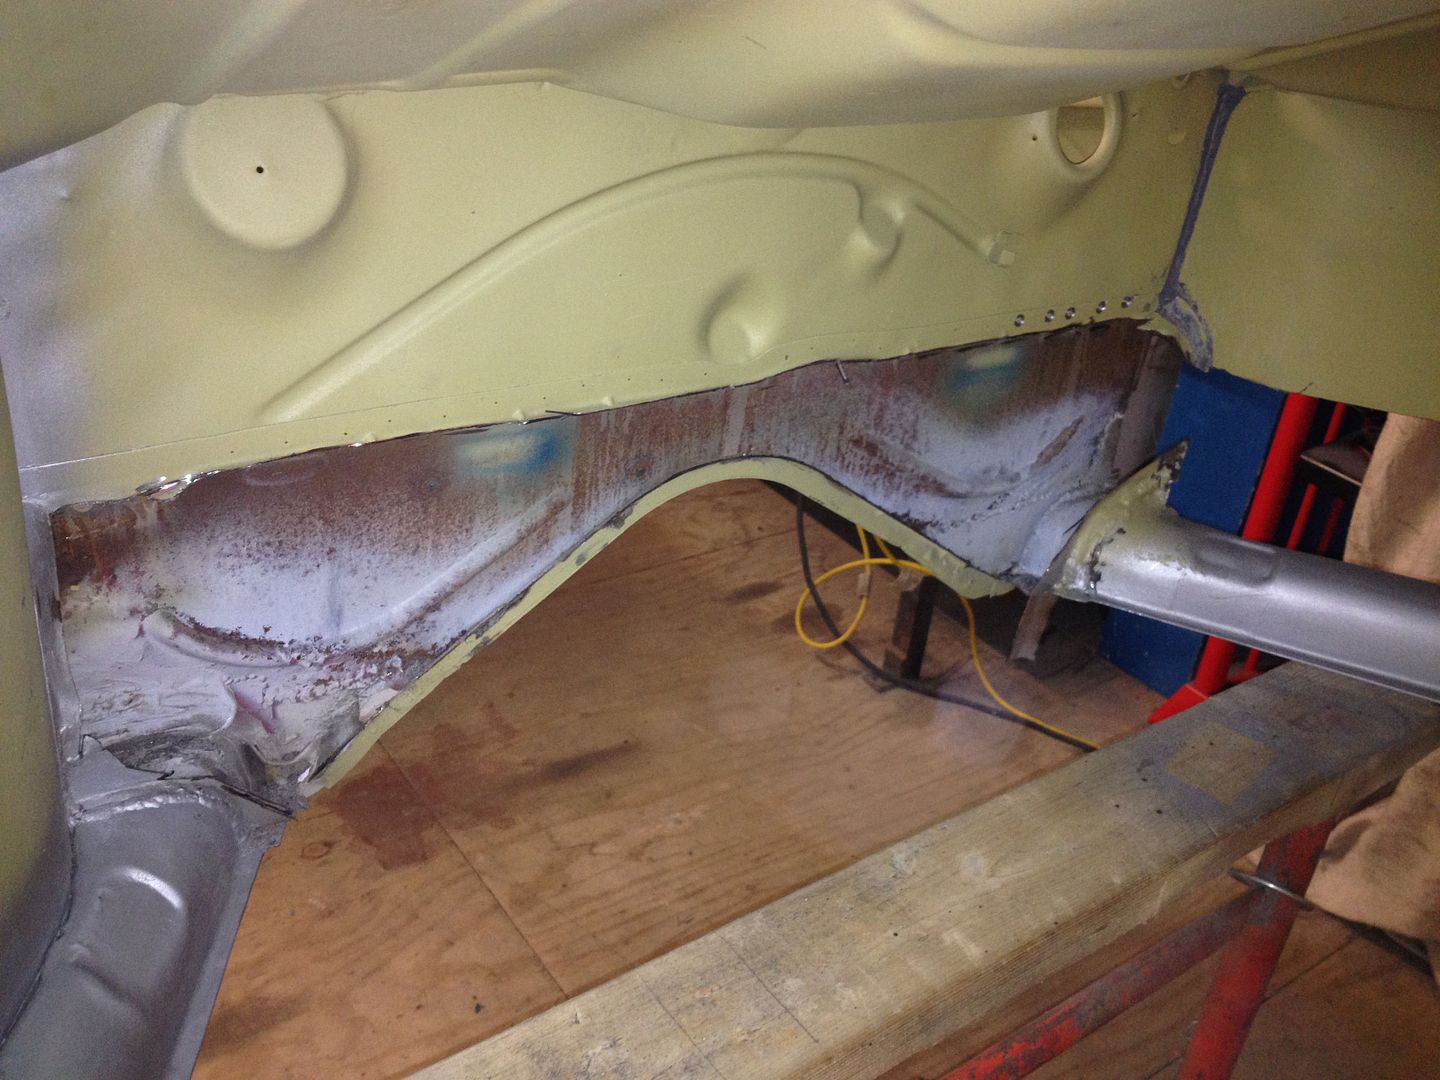
Started by cutting out the bad and cleaning up the channel. The end plate was shit , so I cut that off too.


I had this genuine end plate which was a little bit crusty but useable


Now the firewall. This is an area that's got to look right and unfortunately its made of thin steel. Why vw chose to use such thin steel I will never know. Even the replacement section I got from the states was thin and that was in good condition.  Welding thick to thin sheet is a no no , it will cause you all sorts of grief, not only clamping it in position , but welding it and finally flatting and dressing it after.

Good genuine vw replacement, original thickness of 0.6mm


Original on my car


Fortunately I had some correct thickness sheet to make my own section . Now you are prob wondering why I didn't use the one from the states? It had been butchered so I couldn't use it.  Angry


Used a straight edge and clamped my sheet to it after putting a 90 degree bend in it


Missing the dimple and we all know its all about the dimple!  As it happens, the dimple is not a straight forward shape to replicate as it has a flat surface where it sits on the inner bulkhead ,so making a press tool to get the shape 100% correct would be difficult.

See what I mean?


So I cut out the genuine dimple


Yet to sort out the end plate.


Also the seam does not flow straight, it has a ridge at the bottom to account for the channel end plate. I formed mine like the genuine one.


You can see here what its for


Still needed blasting at this point


Logged
vwhelmot
Hero Member
*****
Posts: 687


« Reply #112 on: July 03, 2015, 12:27:29 pm »

Cleaned up and blasted.


This side was really bad


Starting to look better


End plate needed a bit of work


Getting the repair panel into place. This takes ages to get right as I wanted a nice uniform weld gap as welding this thin sheet is difficult


Tacked


Nearly done


No filler  Cheesy


One of the biggest pain in the arse was seeing what you are doing , no kidding , being able to see what you are grinding without steaming goggles etc is half the battle!! I`ve found that a full face shield is the way to go, full protection and no steaming up , I combine this with a 3m mask. Makes all the difference.

Logged
Lids
Hero Member
*****
Posts: 3527


show me the chedder


WWW
« Reply #113 on: July 04, 2015, 15:22:18 pm »

This is an awesome thread your work is amazing.

It reminds me of the 50's cabriolet on restowagen all those years ago.
Logged

If there's enough horse shit around, there must be a pony!
Buy your ciderberry here.

http://www.thatcherscider.co.uk/
DHP 60
Newbie
*
Posts: 8


« Reply #114 on: July 04, 2015, 17:11:53 pm »

This is an awesome thread your work is amazing.

It reminds me of the 50's cabriolet on restowagen all those years ago.

Thought same thing. This is great work.
Logged
WCB Hitler's Hot Rod
Hero Member
*****
Posts: 1182


« Reply #115 on: July 05, 2015, 15:39:03 pm »

Keep 'em coming. This thread shows some amazing work. You're a true master at what you do. Unbelievable. I spend an hour just looking at your pics. How many hours do you have in time so far? I can only imagine!! Shocked
Logged

WARNING! BE PREPARED FOR A ROLLING BLACKOUT.

West Coast Blitz... "Motha Sucka!"

You may have some Swag, but I OWN da Swagoo!!

This right here is my 'lil Nazi-killa!
j-f
Hero Member
*****
Posts: 1605


Jean-François


WWW
« Reply #116 on: July 05, 2015, 19:51:47 pm »

Awesome work and great pictures! Very instructive! Thanks for sharing and to spend times taken pics and explain what you do. Wink
Logged
vwhelmot
Hero Member
*****
Posts: 687


« Reply #117 on: July 06, 2015, 10:13:11 am »

Thanks for the kind comments, I just love what I do and I`m doing it for myself and for no one else. 

This lot got blasted next


This side was going to be a lot of work as it was a mess and I had to replace a section of the smile  Grin


If you ignore the straight edge measuring that was going on, you can see the difference in the pressing. The panel I had got hold of was from a slightly earlier car and the smile was longer so that ruled out using the whole panel  Sad Angry   So I had to cut through the smile at a point and join it half way down which was very tricky as not only was it thin but I had a dip in the pressing to contend with...


Again , I cut off the end plate


I had a genuine end plate to use again


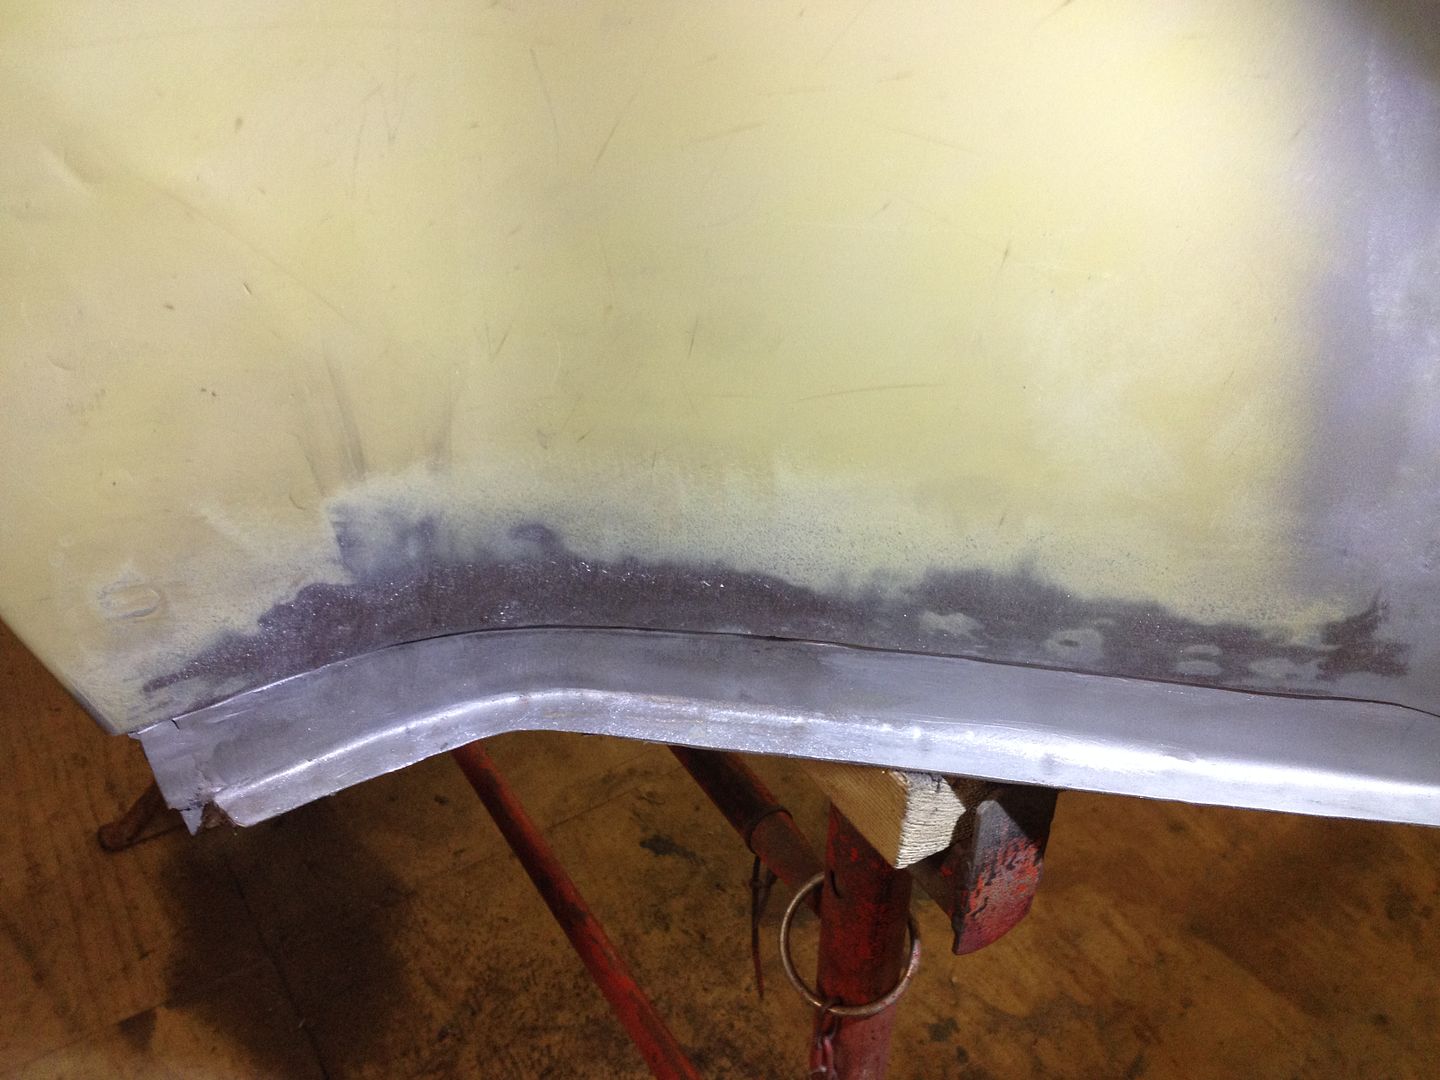
You can see that I bent the lower quarter to get better access to this area.  Blasted the surface rust away.


Part way through welding it on after careful measuring


I had already repaired the lower on the replacement panel as it was a little bit crusty


Nice fit which is half the battle


Final panel prep before tacking in


Finished the smile first as this bit was the most difficult


Logged
vwhelmot
Hero Member
*****
Posts: 687


« Reply #118 on: July 06, 2015, 10:45:25 am »

Nearly there


Bent the quarter back into shape and yet to weld the seam in place


Logged
vwhelmot
Hero Member
*****
Posts: 687


« Reply #119 on: July 06, 2015, 11:02:07 am »

In amongst the body cuts I had there was a section of the front cross member that showed me how it was welded from the factory. It was a bit untidy to be honest.


Made my own seam, it is a complex curve and took a bit of time to get right.


Other side


Slowly getting there


I also trimmed the late front quarter to the correct sixties style


« Last Edit: July 06, 2015, 11:18:12 am by vwhelmot » Logged
Pages: 1 2 3 [4] 5 6 ... 13 Print 
« previous next »
Jump to:  

Powered by MySQL Powered by PHP Powered by SMF 1.1.21 | SMF © 2015, Simple Machines Valid XHTML 1.0! Valid CSS!