|
Zach Gomulka
|
 |
« Reply #210 on: August 07, 2010, 23:04:12 pm » |
|
Hmmm... it does look good in silver...
|
|
|
|
|
 Logged
|
Born in the '80s, stuck in the '70s.
|
|
|
|
Donny B.
|
|
« Reply #211 on: August 08, 2010, 21:15:40 pm » |
|
Speaking of Donny, you want to fly out and stay a week in Florida and wire this thing? Grin That sounds like fun, however with money going the way it is around here I better stay put. You might want to check out this site: http://www.rebel-wire.com/vwkits.shtml. They have a 12 circuit kit for a bug for $185. They come highly recommended by the H.A.M.B. which is a pretty cool place to check out Hot Rod stuff... |
|
|
|
|
Logged
|
Don Bulitta
Wolfsburg Registry
|
|
|
|
louisb
|
|
« Reply #212 on: August 08, 2010, 22:40:44 pm » |
|
Actually, that is the same kit I was looking at already. Looks like a nice setup for a good price. And I agree, the HAMB is a great site.
--louis
|
|
|
|
|
Logged
|
Louis Brooks
The Beatings Will Continue Until Moral Improves!
|
|
|
|
Donny B.
|
|
« Reply #213 on: August 09, 2010, 04:45:02 am » |
|
I am probably going to rewire my '66 with that kit. On another note, my friend Dave Rosensteil today agreed to remove the dents from my front fender. You keep asking if I had it fixed. It wont be for a few weeks, but he will do it. I could not ask for a better person to do my body work.
|
|
|
|
|
Logged
|
Don Bulitta
Wolfsburg Registry
|
|
|
|
louisb
|
|
« Reply #214 on: August 09, 2010, 14:07:25 pm » |
|
Cool!
--louis
|
|
|
|
|
Logged
|
Louis Brooks
The Beatings Will Continue Until Moral Improves!
|
|
|
|
louisb
|
|
« Reply #215 on: August 15, 2010, 01:24:21 am » |
|
Put a coat of Rust Bullet on the bottom of the pan and painted the pan head and rear forks with Black Shell. The silver area will get coated in bed liner. I wanted to treat the inside of the tunnel for rust and came up with this solution. A bottle of Mar Hyde and a $10 garden sprayer. I sprayed it in the tunnel and then rotated the pan around a few times to get everything coated. Seems to have worked pretty well:  First coat of Black Shell:   My "new" beam for the buggy. It came off my barn find '66 from Arizona so it's rust free. The original ball joints are even in factory new specs for wear. Stripped it down and started wire brushing it off:  --louis |
|
|
|
|
Logged
|
Louis Brooks
The Beatings Will Continue Until Moral Improves!
|
|
|
|
Shubee2 (DSK)
|
|
« Reply #216 on: August 16, 2010, 03:49:16 am » |
|
Hey Louis You are making a mess of that Garage Floor LMAO!!!  |
|
|
|
|
Logged
|
Der Selten Kafers VW Club.
Founding Member Est: 1976
58 Ragtop Old School Cal Look
66 Cal Look Drag Car
67 Resto Cal Look
67 Chevy II Nova L79
02 Camaro Vert!
04 Corvette Vert!
04 Colorado Pickup
|
|
|
|
louisb
|
|
« Reply #217 on: August 16, 2010, 14:08:55 pm » |
|
Yeah I have already promised the wife I would paint the garage floor once I am done with the messy stuff.  --louis |
|
|
|
|
Logged
|
Louis Brooks
The Beatings Will Continue Until Moral Improves!
|
|
|
|
louisb
|
|
« Reply #218 on: August 19, 2010, 00:18:00 am » |
|
I seam sealed the pan yesterday and put a coat of Duplicolor bed liner on the bottom tonight.   This update brought to you by George Killian's finest Irish Red. :lol: --louis |
|
|
|
|
Logged
|
Louis Brooks
The Beatings Will Continue Until Moral Improves!
|
|
|
|
louisb
|
|
« Reply #219 on: August 23, 2010, 00:52:05 am » |
|
Finished painting the pan tonight. For some reason I ended up with a lot of texture in the Rust Bullet Black Shell. I am not sure if it is from the high humidity or if it was just some old product. If I were doing a show car I would probably spray it, but for a buggy that will get driven a lot, I am okay with it. I used a regular brush to apply both the rust bullet and the Dupli Color Undercoating since I did not want a lot of texture in the top. I am still deciding on if I want to go without any floor covering or if I will use a black rubber mat on the floor. I am also debating if I want to make a 1" to 1.5" lift for the body. More for some added head room when the top is on than anything. I am 6'4" and windshield is just at the top of my head. Now it is time to start prepping and bolting up the suspension.   --louis |
|
|
|
|
Logged
|
Louis Brooks
The Beatings Will Continue Until Moral Improves!
|
|
|
|
Bryan67
|
|
« Reply #220 on: August 23, 2010, 14:03:29 pm » |
|
What seats are you going to use? Maybe you should use some lower ones.
|
|
|
|
|
Logged
|
If you`re going to do something, do it right.
|
|
|
|
louisb
|
|
« Reply #221 on: August 23, 2010, 14:11:04 pm » |
|
I have a set of EMPI suspension seats and they are on the floor already. (And leaned back some from stock.) I don't think it would be too hard to fab up something like this:  That is a 3" lift which is more than I want. I would stick with a 1" or 1.5" x 1.5" tubing. It will also give me a good solid mounting point for the cage. --louis |
|
|
|
|
Logged
|
Louis Brooks
The Beatings Will Continue Until Moral Improves!
|
|
|
|
Mauro Cattan
|
|
« Reply #222 on: September 03, 2010, 18:10:42 pm » |
|
Hi Louis, I'm building an old school Baja Bug but I've a problem....maybe you can help me. The rear deck lid (like Manx one) doesn't match the body so I need to straighten it. I tried to warm up and straighten the piece with a jack positioned in the center, but this did not work. When I removed the jack the piace is returned in bad shape. How can I do?  Thanks Mauro |
|
|
|
|
Logged
|
|
|
|
|
louisb
|
|
« Reply #223 on: September 04, 2010, 13:29:38 pm » |
|
Hi Mauro,
I used a combination of heat and stretching to get it back into shape. I had to keep pressure on it for several days. It also required that I stretch it farther than the original shape as it would spring back. Hope that helps.
--louis
|
|
|
|
|
Logged
|
Louis Brooks
The Beatings Will Continue Until Moral Improves!
|
|
|
|
Mauro Cattan
|
|
« Reply #224 on: September 05, 2010, 17:58:29 pm » |
|
aaah ok......for several days!
I had warm up only one time. I will try again
Thanks
Mauro
|
|
|
|
|
Logged
|
|
|
|
|
louisb
|
|
« Reply #225 on: September 06, 2010, 23:30:55 pm » |
|
Been working on the lift for the buggy but not many pics. Here is the 1.5" x 1.5" lift tack welded for mock up. The sheet metal sections in the picture will form the section over the napoleons hat.  Since deciding on the lift I am thinking about running side pods to camouflage the lift. I was also thinking I might be able to hide some storage compartments in the side pods as well. Any one ever do that? I know Meyers offered some pods with built in storage. --louis |
|
|
|
|
Logged
|
Louis Brooks
The Beatings Will Continue Until Moral Improves!
|
|
|
|
Neil Davies
|
|
« Reply #226 on: September 07, 2010, 09:06:15 am » |
|
Louis, personally I wouldn't use the sidepods - I think it tries to modernise the design of the classic buggy just too much. I'd make some nerf bars that stick out from the lift kit and use them to fit jerry cans and a couple of tool chests to if you really want the extra storage.
|
|
|
|
|
Logged
|
2007cc, 48IDFs, street car. 14.45@93 on pump fuel, treads, muffler and fanbelt. October 2017!
|
|
|
|
louisb
|
|
« Reply #227 on: September 07, 2010, 14:13:19 pm » |
|
I go back and forth. I like the way it looks on this buggy: 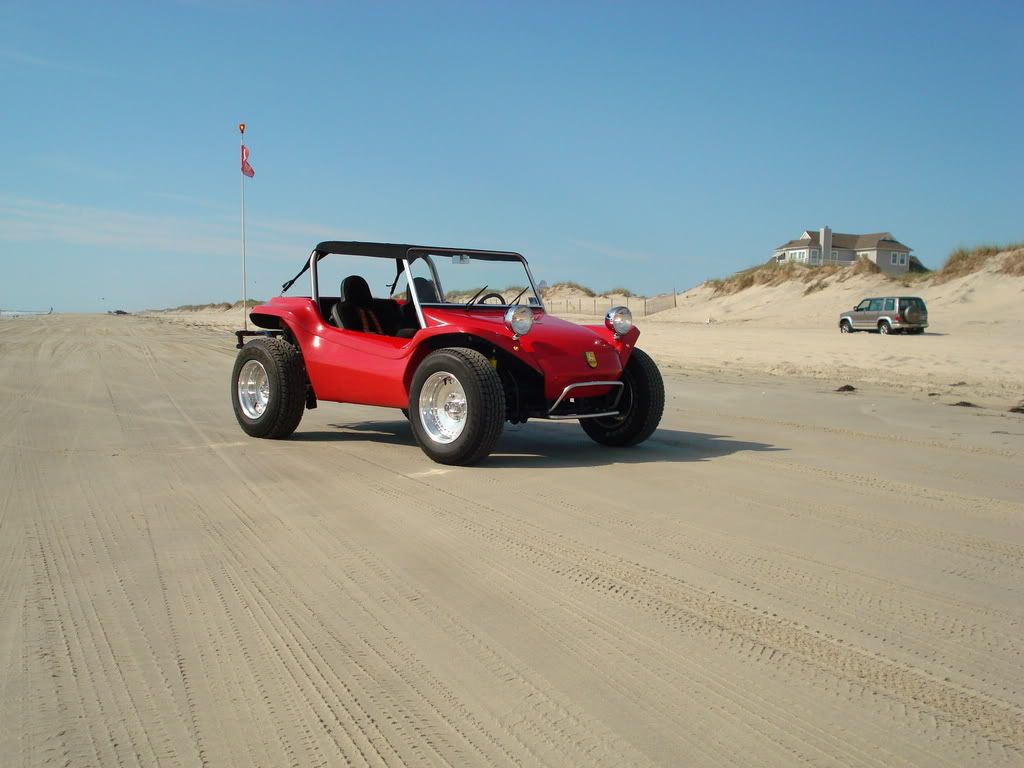 But as you say, not very traditional looking. --louis |
|
|
|
|
Logged
|
Louis Brooks
The Beatings Will Continue Until Moral Improves!
|
|
|
|
louisb
|
|
« Reply #228 on: September 10, 2010, 18:54:55 pm » |
|
Spent 5 hours fabing up the front crossmember today out 14 gauge sheet metal and I am beat. Got everything tacked together and the body mocked up for a trial fit. Looks like everything is where it is supposed to be so that was a relief. Now I need to finish welding and grinding everything.   I think the 1.5" lift will be just right for what I want. Oh, and I think I have talked myself out of the side pods again. But I am considering the side nerf bars built so I could put a gas can and some tools in it. --louis |
|
|
|
|
Logged
|
Louis Brooks
The Beatings Will Continue Until Moral Improves!
|
|
|
|
Donny B.
|
|
« Reply #229 on: September 17, 2010, 14:03:40 pm » |
|
Louis, I have always liked the side pods and regardless of what folks say they were doing them back in the late '60s so that should be traditional enough. I think they give it a finished look. If you plan to do a lot of off road stuff then perhaps the side nerfs would be better. If you are just running on the beach then it wouldn't matter. I just remember Steve McQueen in the Thomas Crown Affair blasting on the beach in his Manx....
|
|
|
|
|
Logged
|
Don Bulitta
Wolfsburg Registry
|
|
|
|
louisb
|
|
« Reply #230 on: September 18, 2010, 01:05:28 am » |
|
Hi Don, hows it going? I think the most off road driving this buggy will see is some trail riding when I go camping. I am still kicking the idea around for the side pods but who knows. Right now I am trying to get it up and rolling by Oct 23 when it is supposed to go get a full cage installed. A lot of work ahead to get there.
Thanks,
--louis
|
|
|
|
|
Logged
|
Louis Brooks
The Beatings Will Continue Until Moral Improves!
|
|
|
|
kingsburgphil
|
|
« Reply #231 on: September 18, 2010, 05:00:05 am » |
|
Louis, I have always liked the side pods and regardless of what folks say they were doing them back in the late '60s so that should be traditional enough. I think they give it a finished look. If you plan to do a lot of off road stuff then perhaps the side nerfs would be better. If you are just running on the beach then it wouldn't matter. I just remember Steve McQueen in the Thomas Crown Affair blasting on the beach in his Manx....
For what its worth I'll offer my 2 cents worth, I agree with Donny. I recall the 60's/70s well, when two distinctive types of Manx's were popular. The offroad look with Jackman's/Norseman's and KC Hi liters or the street look, slightly lowered, side pods,60 series tires and hard/soft tops. The choices are yours of course, but if it were mine I'd lay in woven roving over cardboard tubes and foam filled plastic bags in the side pods. Cheap insurance in a dangerous world....IMHO |
|
|
|
|
Logged
|
|
|
|
|
Bryan67
|
|
« Reply #232 on: September 18, 2010, 06:31:43 am » |
|
Sorry, but I`m going with the unpopular vote. I say no side pods and the bottom half black.
|
|
|
|
|
Logged
|
If you`re going to do something, do it right.
|
|
|
|
louisb
|
|
« Reply #233 on: September 19, 2010, 02:22:51 am » |
|
Started modifying the front beam today following the advice from Jeff Hibbard's book for off road buggies. I had another beam sandblasted but it turned out to have a good bit of rust in the towers so I chunked it and went with this one instead. This one is rust free and I stripped it by hand with a wire brush.  Close up of one of the shock tower braces made from 1.5x1.5 tubing:  I used a torch to burn out any grease from the tower seams then cleaned them up with a grinder to make the seams were even. After that I fully welded the them:  Adjuster mocked up in position to give 3" lift from stock:  My plan is to finish up the adjusters next weekend. I am having new Febi ball joints pressed into the trailing arms and then I will install a hook and pin stop. Some Fox class 11 shocks are also in the plans but I will have to wait on those for now. Thanks, --louis |
|
|
|
|
Logged
|
Louis Brooks
The Beatings Will Continue Until Moral Improves!
|
|
|
|
louisb
|
|
« Reply #234 on: September 20, 2010, 02:21:30 am » |
|
I managed to slip out into the garage tonight and get the adjusters welded into the beam. After comparing the angles for the torsion leaves it looks like I ended up 2 degrees raised from stock. The stock angle for the grub screws were 50 top and 55 bottom. After welding mine were 52 top and 57 bottom. Hopefully that will not be an issue.  Thanks, --louis |
|
|
|
|
Logged
|
Louis Brooks
The Beatings Will Continue Until Moral Improves!
|
|
|
|
louisb
|
|
« Reply #235 on: October 02, 2010, 00:11:21 am » |
|
Went home early today with the goal of getting the trans buttoned up and installed. This is the trans that the locash guys put together for me and it has been sitting under my work table for the last year waiting on me to install the torsion tubes. Here is a shot of all the rear suspension parts. Trans is stock geared with a 4.12 R&P, threaded super diff and welded 3rd & 4th gears. I added braces to the stock side covers and a longer clutch arm. Also shown are the adjustable spring plates, stock torsion bars, stock rubber torsion bushings, the requisite chrome torsion tube caps, rear wide 5 to Chevy adapters, bus snubbers, spring plate retainers and new factory torsion tubes with 1 piece boots.  This shot shows the difference in the two clutch arms. Should make that Kennedy stage 1 fell like a stocker.  Here is the tranny dropped into place. It was at this point I realized the Bugpack side cover braces did not clear the frame horn flange so I will have to do some clearancing. While I am at it I think I will weld up the seam on the frame horn. I am still debating that last one.  I sure hope the damn thing doesn't leak. I hate working on transmissions. I will do almost anything on a car but there are two things I will gladly pay someone else to do, wiring and transmission work. --louis |
|
|
|
|
Logged
|
Louis Brooks
The Beatings Will Continue Until Moral Improves!
|
|
|
|
Zach Gomulka
|
|
« Reply #236 on: October 04, 2010, 19:47:51 pm » |
|
I sure hope the damn thing doesn't leak. I hate working on transmissions. I will do almost anything on a car but there are two things I will gladly pay someone else to do, wiring and transmission work.
Hahaha! I feel the exact same way!  Looking good dude  |
|
|
|
|
Logged
|
Born in the '80s, stuck in the '70s.
|
|
|
|
louisb
|
|
« Reply #237 on: January 02, 2011, 21:20:02 pm » |
|
Wow, its been almost 2 months since I have posted any real progress. Stuff has been getting done but none of it very picture worthy. Today though I feel I made some real progress. Got the rear suspension wrapped up and the rear tires mounted. As soon as the front disc kit shows up from So Cal Imports I will be able to get it rolling. I hate mounting the rear trailing arms. I can never find a bolt the right length so I end up doing stuff like this:  Discs on one side, drums on the other?  This is better. I still need to run the brake cables/lines. A set of Fox shocks are on the wish list but for now the oil shocks will have to do:  Side shot. The cheap chrome torsion covers have already started to rust. Plus they seem thinner than the factory ones.  Last shot is of the trans mid mount and rear cage support Danny Gabbard made for me. I had a pic of the rear tires mounted up but it didn't come out and I am too tired to go take another so you will just have to wait.  Thanks, --louis |
|
|
|
|
Logged
|
Louis Brooks
The Beatings Will Continue Until Moral Improves!
|
|
|
|
louisb
|
|
« Reply #238 on: January 29, 2011, 00:53:46 am » |
|
I have not updated in a while, mostly because I am not sure if this is really of interest to you guys. I have sort of moved out of the Cal-look scene for a while. Really gotten heavy in to the buggy scene. Here is a shot of the buggy as a roller and a home built tubing bender I made based on plans from Got Trikes: Vroom, Vroom! Still missing a few pieces but man what a difference from the start.  The single hoop is an original Meyers Manx hoop I picked up cheap. I am trying to figure out how to work it into the full cage but I may just end up using it for a template. I need to figure out how close the gap between the bottom to the tubes and the 1/4 x 1.5 flat stock that I will use as the base of the cage. I am toying with the idea of using some 2x2x.125 tubing I have left from the bender build but I have to think about it some more. Speaking of the home brew bender:  My very first 92 deg bend Still working on figuring out the spring back. That is a piece of 1.75 x .125 DOM tubing.  A rather blurry pick of the other side. Like the HF Orange paint I chose?  Look! Its Kid N Play!  Actually just my 40 IDFs waiting to get rebuilt here soon. Some more realistic 3" elements are already on order. I just sent my Bosch 010 to Dizzymeister Glenn Ring today for rebuilding (I hope) and once that gets back I should have everything to start assembling the engine. --louis |
|
|
|
|
Logged
|
Louis Brooks
The Beatings Will Continue Until Moral Improves!
|
|
|
|
Nico86
|
|
« Reply #239 on: January 29, 2011, 01:55:59 am » |
|
I have not updated in a while, mostly because I am not sure if this is really of interest to you guys. I have sort of moved out of the Cal-look scene for a while. Really gotten heavy in to the buggy scene.
Keep the updates coming it's a cool car  |
|
|
|
|
Logged
|
|
|
|
|
 The Cal-look Lounge


 Author