Gwar72
Jr. Member

Posts: 50
|
 |
« on: March 21, 2016, 15:04:18 pm » |
|
|
|
|
|
|
 Logged
|
|
|
|
|
vwhelmot
|
|
« Reply #1 on: March 21, 2016, 16:41:39 pm » |
|
Keep going. What's the overall look going to be? Big or small motor?
|
|
|
|
|
Logged
|
|
|
|
Gwar72
Jr. Member
Posts: 50
|
|
« Reply #2 on: March 21, 2016, 17:25:42 pm » |
|
Original motor tidied up and back in but looking to build a bigger motor along they way, all depends on time scale, money of build..!!??  This is the Beauty Unit that has inspired me.   |
|
|
|
« Last Edit: March 21, 2016, 17:33:24 pm by Gwar72 »
|
Logged
|
|
|
|
AngelzDD
Newbie
Posts: 47
|
|
« Reply #3 on: March 21, 2016, 20:04:34 pm » |
|
I hope you return to the original 1970 style !
|
|
|
|
|
Logged
|
|
|
|
|
Neil Davies
|
|
« Reply #4 on: March 21, 2016, 21:44:42 pm » |
|
Good choice on inspiration! As you've probably noticed, we're not embarrassed by late models here, in fact quite the opposite! I'd go back to late panels but 1200-spec ones, just to be a little closer to Stoo's car. Use the same colour, the Lucas L488 indicators and the same lack of un-necessary chrome, just on a later car. Wheels are where it gets tricky - you need something a bit obscure but cool. Rivieras? Cosmics? Keep it 4 bolt!
|
|
|
|
|
Logged
|
2007cc, 48IDFs, street car. 14.45@93 on pump fuel, treads, muffler and fanbelt. October 2017!
|
|
|
Gwar72
Jr. Member
Posts: 50
|
|
« Reply #5 on: March 21, 2016, 22:16:54 pm » |
|
I hope you return to the original 1970 style !
Still undecided yet as need to replace front clip Good choice on inspiration! As you've probably noticed, we're not embarrassed by late models here, in fact quite the opposite! I'd go back to late panels but 1200-spec ones, just to be a little closer to Stoo's car. Use the same colour, the Lucas L488 indicators and the same lack of un-necessary chrome, just on a later car. Wheels are where it gets tricky - you need something a bit obscure but cool. Rivieras? Cosmics? Keep it 4 bolt!
Cheers  Yeah Stoo's car is ace but inspiration only not colour. My bug looks like it's Chinchilla grey on the dash so thinking of going along that colour route  |
|
|
|
|
Logged
|
|
|
|
Gwar72
Jr. Member
Posts: 50
|
|
« Reply #6 on: March 21, 2016, 22:26:50 pm » |
|
|
|
|
|
|
Logged
|
|
|
|
Gwar72
Jr. Member
Posts: 50
|
|
« Reply #7 on: March 22, 2016, 14:56:11 pm » |
|
|
|
|
|
« Last Edit: March 22, 2016, 17:30:33 pm by Gwar72 »
|
Logged
|
|
|
|
56BLITZ
DKK
Sr. Member
Posts: 274
|
|
« Reply #8 on: March 22, 2016, 23:49:09 pm » |
|
That front cross-member looked unfamiliar to me . . . until I went out to look at my '70 . . . it's the same! FWIW . . . I'm with the other guys . . . go with '70 wings/panels! All the best on yer project! |
|
|
|
|
Logged
|
Jesucristo es mi Señor y Salvador!
|
|
|
Gwar72
Jr. Member
Posts: 50
|
|
« Reply #9 on: March 26, 2016, 21:45:18 pm » |
|
Engine off....... 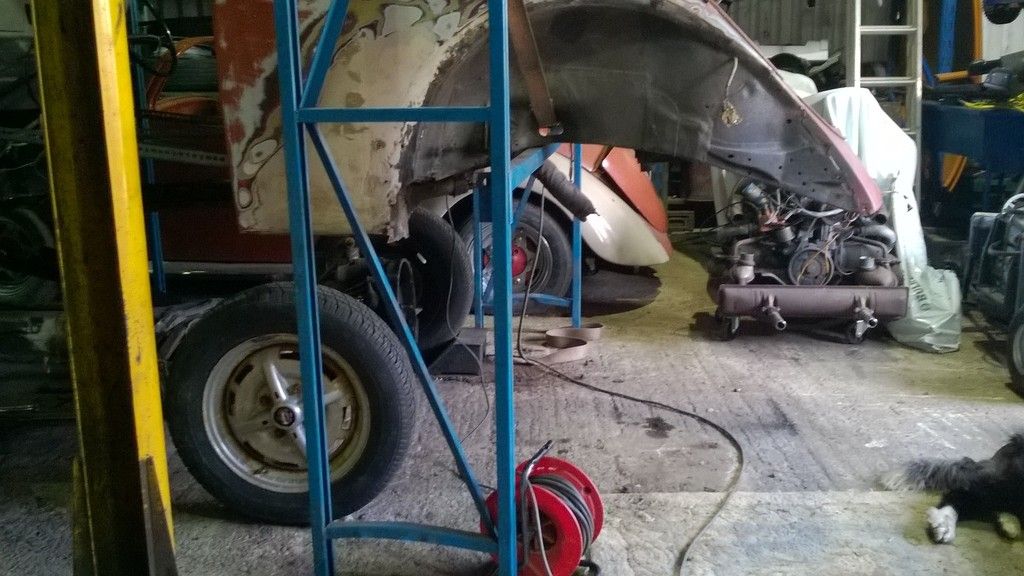 And little bit of investigation on the rear crossmember today..... 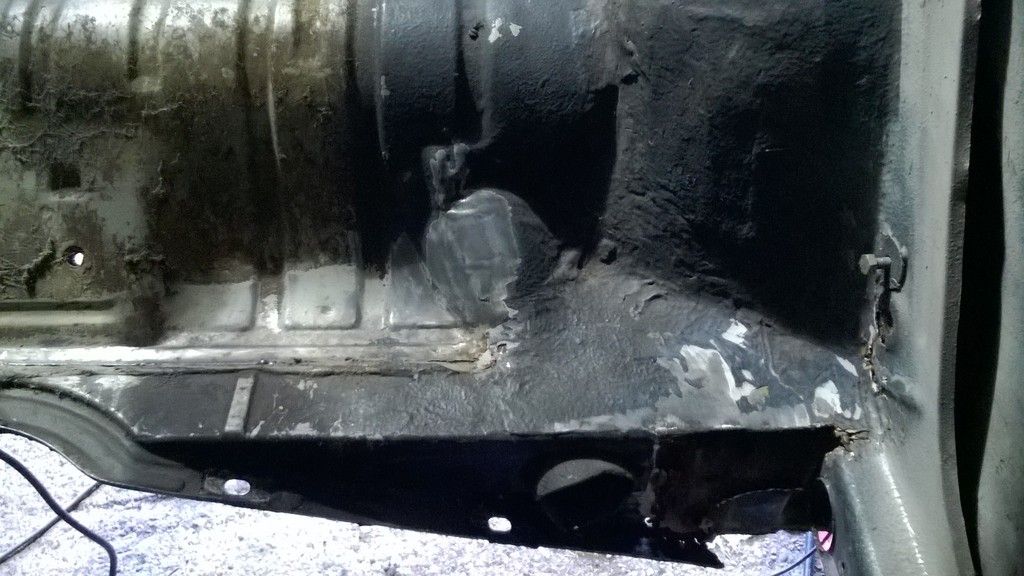 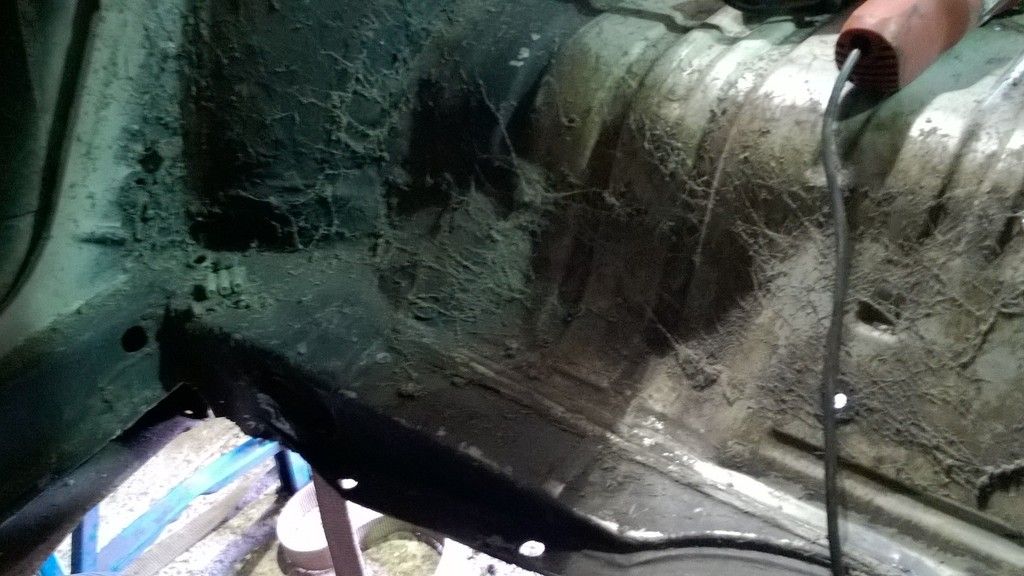 Lets see whats under patch number 1.... 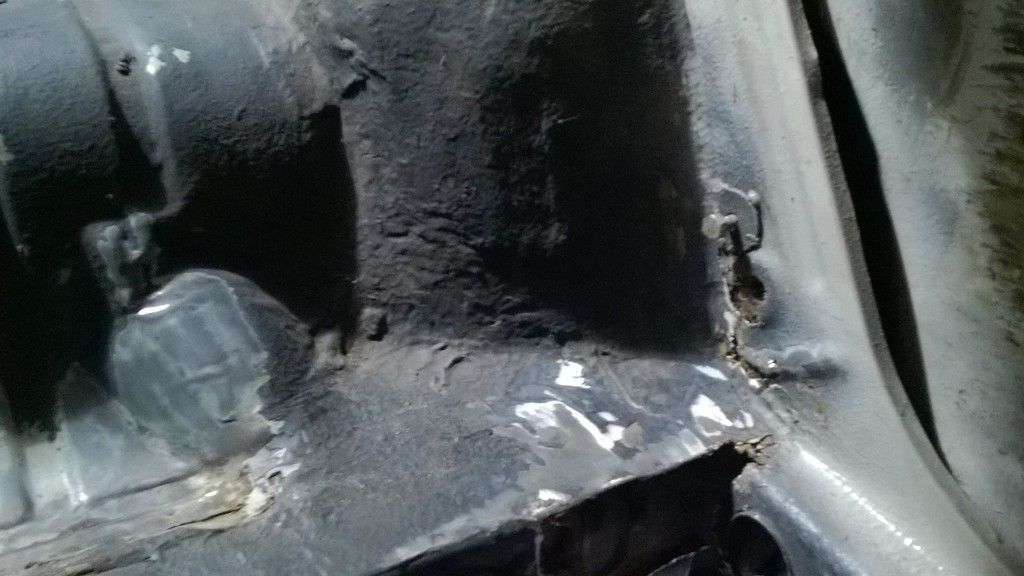 It's like picking at a scab..!!?? You know you shouldn't but you can't help to..!! LoL  Nothing found under there then..!!  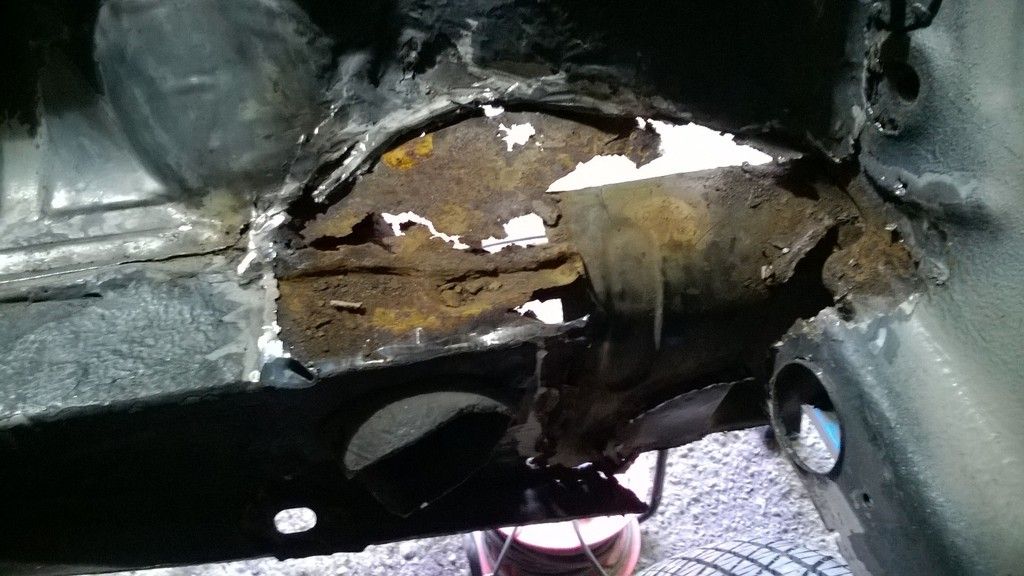 Lets see what i can find tomorrow.... |
|
|
|
|
Logged
|
|
|
|
|
vwhelmot
|
|
« Reply #10 on: March 27, 2016, 11:09:45 am » |
|
Lots of work there. |
|
|
|
|
Logged
|
|
|
|
Gwar72
Jr. Member
Posts: 50
|
|
« Reply #11 on: March 29, 2016, 14:08:17 pm » |
|
Lots of work there. YEP..!! |
|
|
|
« Last Edit: March 29, 2016, 14:16:03 pm by Gwar72 »
|
Logged
|
|
|
|
Gwar72
Jr. Member
Posts: 50
|
|
« Reply #12 on: March 29, 2016, 14:11:56 pm » |
|
That front cross-member looked unfamiliar to me . . . until I went out to look at my '70 . . . it's the same! FWIW . . . I'm with the other guys . . . go with '70 wings/panels! All the best on yer project! Cheers Full bulkhead Panel sorted from VW Heritage |
|
|
|
|
Logged
|
|
|
|
Gwar72
Jr. Member
Posts: 50
|
|
« Reply #13 on: March 29, 2016, 14:40:21 pm » |
|
|
|
|
|
« Last Edit: March 30, 2016, 11:28:29 am by Gwar72 »
|
Logged
|
|
|
|
Gwar72
Jr. Member
Posts: 50
|
|
« Reply #14 on: March 29, 2016, 14:43:30 pm » |
|
|
|
|
|
« Last Edit: March 29, 2016, 14:47:03 pm by Gwar72 »
|
Logged
|
|
|
|
|
Nico86
|
|
« Reply #15 on: March 30, 2016, 19:29:07 pm » |
|
Great work! Can't wait to see more (:
|
|
|
|
|
Logged
|
|
|
|
Gwar72
Jr. Member
Posts: 50
|
|
« Reply #16 on: March 31, 2016, 16:12:11 pm » |
|
|
|
|
|
|
Logged
|
|
|
|
56BLITZ
DKK
Sr. Member
Posts: 274
|
|
« Reply #17 on: March 31, 2016, 18:31:41 pm » |
|
WOW . . . looks O.E.M.! Was it made in Mexico? |
|
|
|
|
Logged
|
Jesucristo es mi Señor y Salvador!
|
|
|
Gwar72
Jr. Member
Posts: 50
|
|
« Reply #18 on: April 05, 2016, 09:39:43 am » |
|
WOW . . . looks O.E.M.! Was it made in Mexico? It's a genuine part but not sure where it was made?? Very good quality, heavy and solid..!! |
|
|
|
|
Logged
|
|
|
|
|
Neil Davies
|
|
« Reply #19 on: April 05, 2016, 10:14:37 am » |
|
Looks like the VW Mexico part that I fitted to my car many years ago. Not strictly correct for a 60s beetle but fits so much better than the repro. The threaded studs are for a push fit clip that holds wiring in place - quite common on New cars. Whip them off with the grinder!
|
|
|
|
|
Logged
|
2007cc, 48IDFs, street car. 14.45@93 on pump fuel, treads, muffler and fanbelt. October 2017!
|
|
|
Gwar72
Jr. Member
Posts: 50
|
|
« Reply #20 on: April 05, 2016, 12:29:31 pm » |
|
Looks like the VW Mexico part that I fitted to my car many years ago. Not strictly correct for a 60s beetle but fits so much better than the repro. The threaded studs are for a push fit clip that holds wiring in place - quite common on New cars. Whip them off with the grinder!
Cheers |
|
|
|
|
Logged
|
|
|
|
Gwar72
Jr. Member
Posts: 50
|
|
« Reply #21 on: April 11, 2016, 13:56:42 pm » |
|
|
|
|
|
|
Logged
|
|
|
|
|
jamiep_jamiep
|
|
« Reply #22 on: April 13, 2016, 10:00:59 am » |
|
You have your work cut out for you there... excellent progress though, keep the pictures coming.
|
|
|
|
|
Logged
|
|
|
|
Gwar72
Jr. Member
Posts: 50
|
|
« Reply #23 on: April 13, 2016, 13:57:54 pm » |
|
You have your work cut out for you there... excellent progress though, keep the pictures coming.
Cheers "cut out" is quite true..!! Blasted pedal assembly and etch primed... 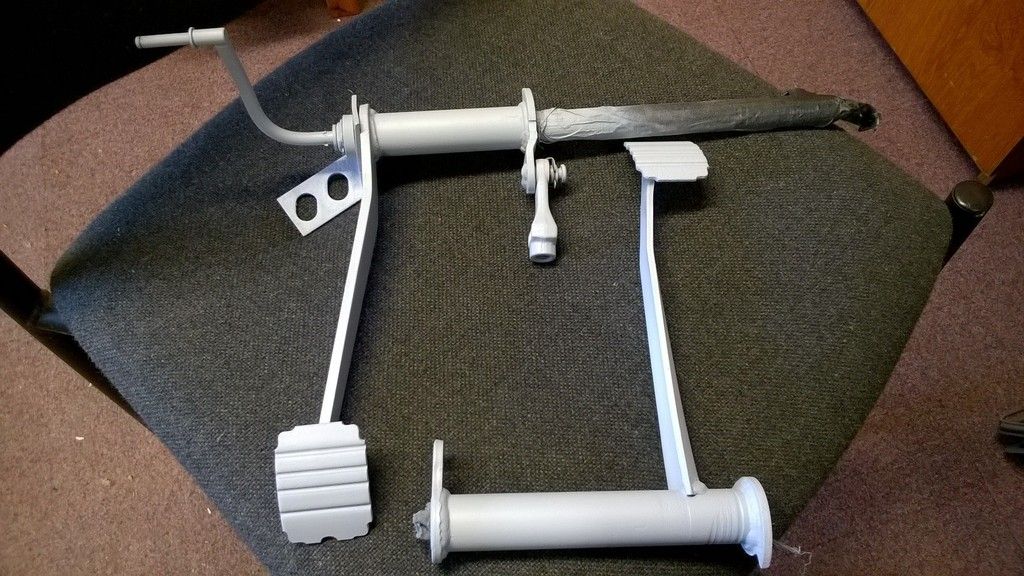 |
|
|
|
|
Logged
|
|
|
|
|
mr horsepower
|
|
« Reply #24 on: April 13, 2016, 18:31:34 pm » |
|
Wow man memory lane for me
There is a lot of work to do
Reminds me my car that was total crispy
I was lucky to find an other verry good body
With almost no welding needed
But that was 20 years ago
You don t find them so easy annymore these days
Good luck with the build.
Gr
|
|
|
|
|
Logged
|
|
|
|
Gwar72
Jr. Member
Posts: 50
|
|
« Reply #25 on: November 16, 2016, 15:02:55 pm » |
|
Finally managed some time up the unit since April..!! Scraped off the wax oil off the outer front wheel arches to see how it looked underneath. Not to bad so a little vertical patching strip where the bulkhead spot welds to on both arches and then start to look at some local media cleaning and priming before bulkhead goes in. 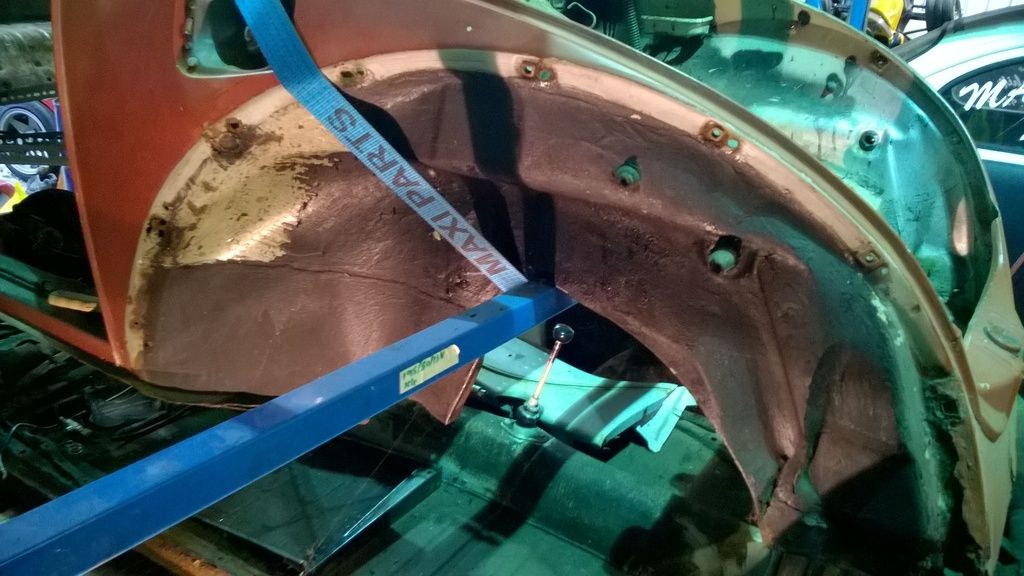 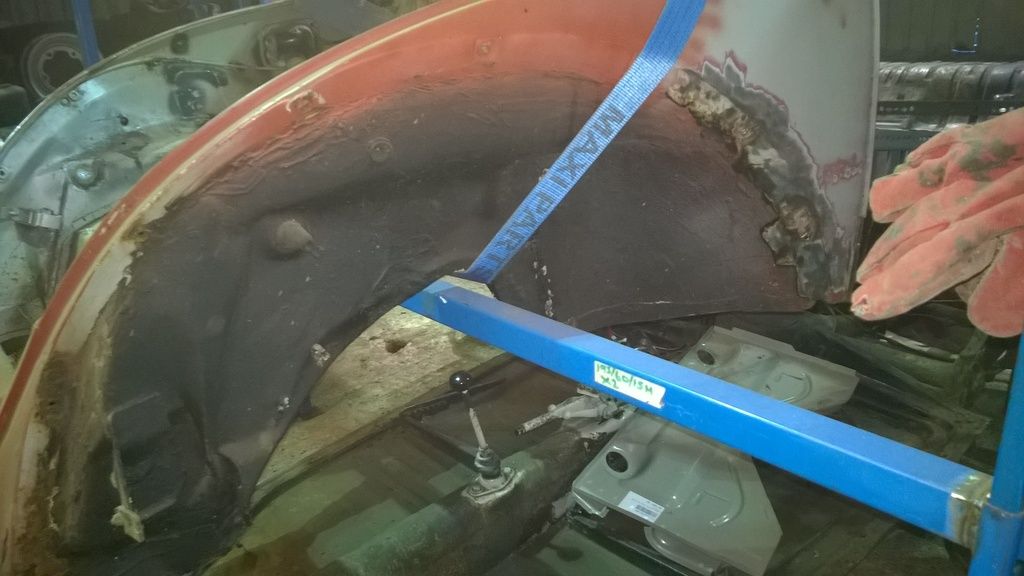 Going to be replacing front clip to 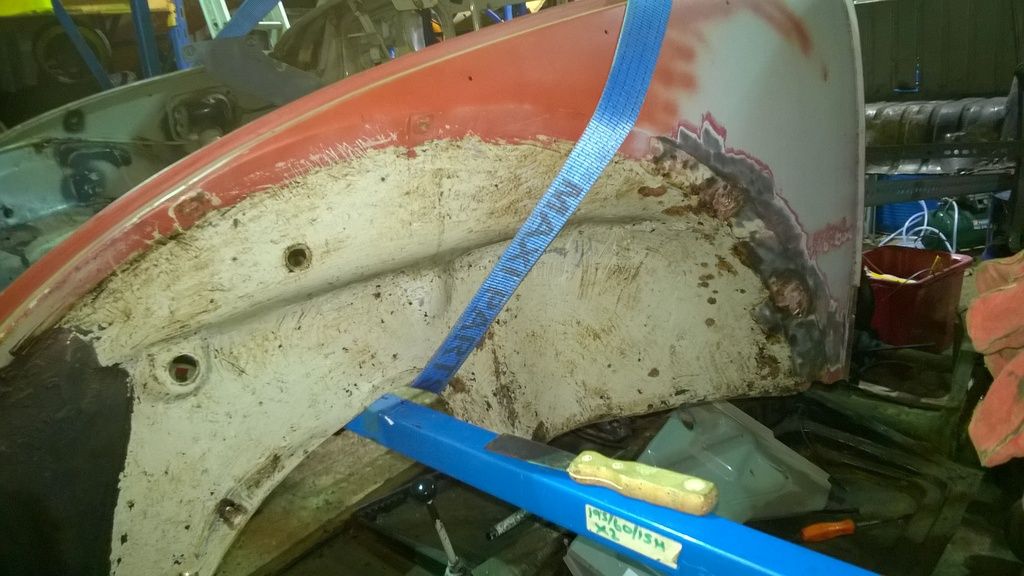 Going to be cutting out previous lower repair panel. 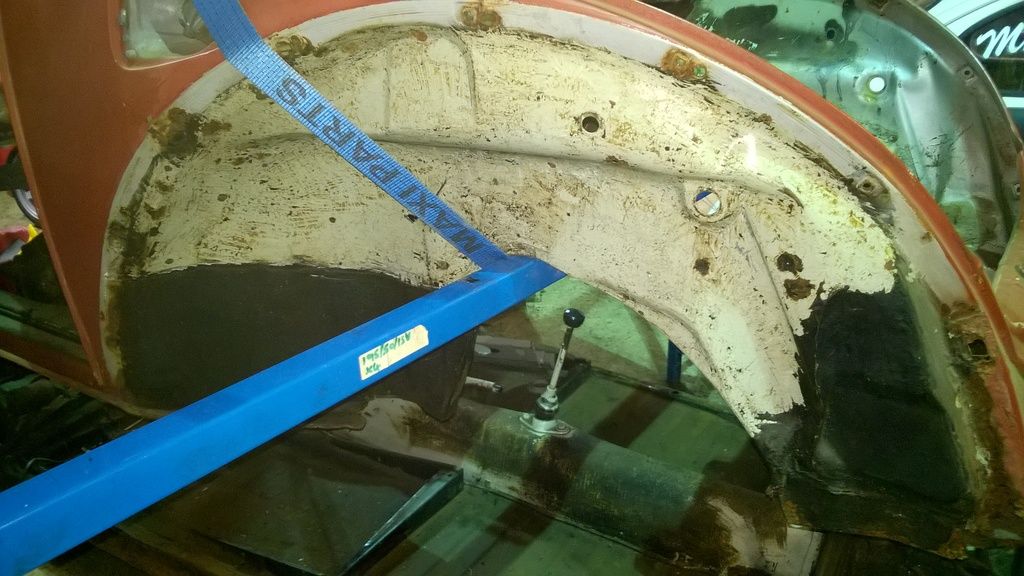 |
|
|
|
|
Logged
|
|
|
|
Gwar72
Jr. Member
Posts: 50
|
|
« Reply #26 on: December 07, 2016, 12:59:06 pm » |
|
|
|
|
|
|
Logged
|
|
|
|
Gwar72
Jr. Member
Posts: 50
|
|
« Reply #27 on: January 28, 2017, 20:32:26 pm » |
|
|
|
|
|
|
Logged
|
|
|
|
|
Neil Davies
|
|
« Reply #28 on: January 28, 2017, 22:49:30 pm » |
|
Sensible move - if they need more than the bumper mount and lower repair its not worth fixing them. Get the genuine quarters tho - the repro ones aren't worth bothering with.
|
|
|
|
|
Logged
|
2007cc, 48IDFs, street car. 14.45@93 on pump fuel, treads, muffler and fanbelt. October 2017!
|
|
|
Gwar72
Jr. Member
Posts: 50
|
|
« Reply #29 on: January 28, 2017, 23:52:20 pm » |
|
Sensible move - if they need more than the bumper mount and lower repair its not worth fixing them. Get the genuine quarters tho - the repro ones aren't worth bothering with.
Funds may not stretch to genuine?? |
|
|
|
|
Logged
|
|
|
|
|
 The Cal-look Lounge


 Author